
If you’ve ever experienced your Dyson vacuum continuing to run after releasing the trigger, you’re not alone. This common issue affects many Dyson cordless vacuum owners and can be incredibly frustrating. The vacuum might continue running after you’ve released the trigger, turn itself back on unexpectedly, or even cut out repeatedly while you’re using it.
Affiliate disclosure: As an Amazon associate, We'll earn a commission for every successful order through our affiliate links in the article. However, you won’t be charged anything for this.
The good news is that this problem typically stems from a few specific causes related to the battery connection, trigger assembly, or internal components. In this comprehensive guide, we’ll explore why your Dyson vacuum won’t turn off and provide detailed solutions ranging from quick temporary fixes to permanent repairs. Whether you’re technically inclined or prefer simpler solutions, you’ll find options that work for your situation.
Common Causes of Dyson Vacuum Trigger Failures
The issue of a Dyson vacuum continuing to run after releasing the trigger can be traced to several potential causes. Identifying the specific problem is the first step toward finding an effective solution.
Battery Connection Issues
One of the most common culprits is a loose battery connection. When the battery doesn’t sit properly in its housing, it can put constant pressure on the trigger mechanism. This pressure tricks the vacuum into thinking the trigger is still being pressed, causing it to continue running even after you’ve released it.
The microswitch inside the battery assembly can also become misaligned or stuck in the “on” position. This small but crucial component is responsible for detecting when the trigger is pressed or released, and any issues with it can lead to operational problems.
Mechanical Trigger Problems
The trigger mechanism itself might be the source of the problem. A loose screw that holds the trigger assembly in place can affect the alignment of the microswitch, preventing it from properly detecting when you’ve released the trigger.
Inside the handle, there’s a plastic tab that the battery screw attaches to. If this tab breaks, it can allow the battery to move around, preventing the trigger from properly engaging with the on/off button built into the vacuum.
Wall Mounting Stress
Interestingly, how you store your Dyson vacuum can contribute to the problem. Many users mount their Dyson vacuums on the wall using the manufacturer-provided wall mount. While convenient, this mounting method can put additional stress on the handle and battery compartment.
When mounted, gravity pulls on the vacuum, which can cause the battery to slip slightly out of position. This subtle movement can be enough to create constant pressure on the trigger mechanism, leading to the vacuum running continuously.
Internal Component Failures
In upright Dyson models, a loose switch wire can cause the on/off switch to malfunction. Additionally, the metal tabs above the lever of the bin should make electrical contact with the wires running around the bin and down the wand to the motorhead. If these tabs aren’t properly aligned, it can cause electrical issues that affect the vacuum’s operation.
Blockages in the System
Sometimes, the problem isn’t with the trigger or battery at all, but rather with blockages in the vacuum system. The flap that separates the intake to the debris chamber can get stuck or have debris wedged behind it. Additionally, dust and debris can clog the cyclone, causing the vacuum to pulsate and turn on and off repeatedly.
Troubleshooting Your Dyson Vacuum: Step-by-Step Solutions
When your Dyson vacuum won’t turn off, you have several options for resolving the issue. Here are detailed solutions ranging from quick temporary fixes to more permanent repairs.
Quick Temporary Fixes
Adjusting the Battery Position
If you need a quick fix to get through your cleaning session, try gently pushing the battery further into the handle. This can temporarily relieve any pressure on the trigger mechanism and allow it to release properly. While not a permanent solution, it can help you finish your cleaning task before implementing a more lasting fix.
Reducing Wall Mount Stress
If you use a wall mount for your Dyson vacuum, try placing a small box or spacer between the wand/head end and the wall. This simple adjustment can reduce the stress on the handle and prevent the battery from slipping out of position, which often contributes to the trigger problem.
Permanent DIY Solutions
Filing Down the Black Plunger
This solution requires some precision but can be very effective:
- Remove the battery from your Dyson vacuum
- Locate the black plastic plunger on top of the battery pack
- Using a fine file, carefully remove about 1/32 inch of material from the plunger
- Ensure you don’t damage any surrounding components
- Be particularly careful not to short-circuit the two wires during this process
- Reassemble the vacuum and test the trigger
This modification reduces the pressure the plunger exerts on the trigger mechanism, allowing it to release properly when you let go.
Fixing the Trigger Assembly
For this repair, you’ll need a Torx T8 screwdriver:
- Remove the battery from your vacuum
- Disassemble the trigger assembly (YouTube tutorials can be helpful here)
- Inspect the top rubber seal for any pinches or deformities
- If necessary, carefully trim the rubber seal
- Reinstall the trigger assembly
- Test the vacuum to ensure the trigger now releases properly
Tightening the Handle Screw
A loose handle screw can contribute to trigger issues:
- Remove the battery from your vacuum
- Access the internal handle screw (you’ll need a long Torx T8 screwdriver)
- Securely tighten the screw
- For added security, consider adding a thin layer of rubber or similar material between the battery and the handle
- Reassemble the vacuum and test
Replacing the Trigger Mechanism
If the trigger mechanism itself is damaged, replacing it might be necessary.
If the trigger mechanism is damaged, then it needs to be replaced with a new one.
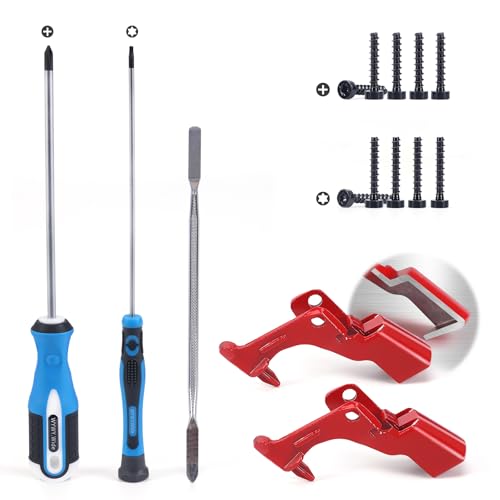
Durable metal trigger with comprehensive repair tools
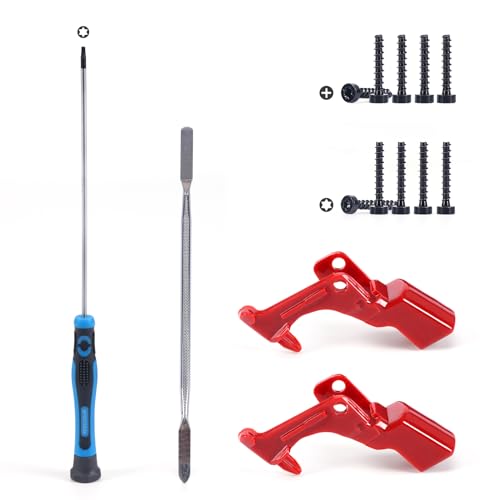
Sturdy metal with custom tools for precise repair

Affordable metal with step-by-step video guide
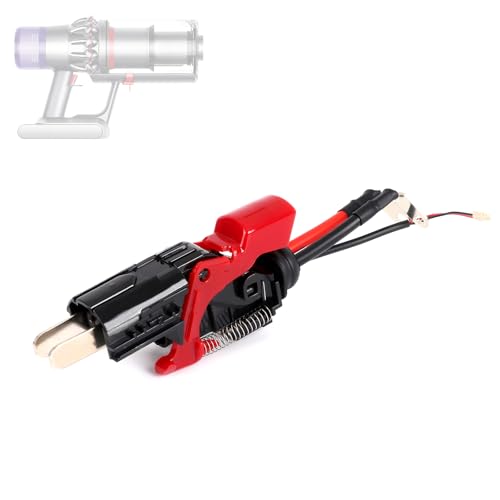
High-end assembly with reinforced pressure points
- Purchase a replacement trigger mechanism (available on platforms like Etsy or eBay)
- Follow online guides for proper installation
- This solution typically costs between £10-£20, much less than Dyson’s replacement cost
Addressing a Broken Plastic Tab
If the plastic tab inside the handle is broken:
- Identify the broken tab that normally secures the battery
- As a workaround, add a zip-tie around the battery to keep it in place
- This prevents the battery from moving and allows the trigger to function correctly
Clearing Blockages
If blockages are causing your vacuum to malfunction:
- Empty the bin and leave the bin base open
- Inspect the entire air path for any blockages
- Brush away dust around the shroud of the cyclone
- Press and hold the trigger for 10 seconds
- Remove the pre-filter
- Cover the hole with your palm while pressing and holding the trigger for 10 seconds (use Max Power)
- Be cautious of fine dust being blown out of the machine
Battery and Charger Maintenance
Sometimes, the issue is with the battery connections:
- Remove the battery from your vacuum
- Wipe the connections with a dry cloth to remove any dust or debris
- If your vacuum is within the 2-year warranty period, contact Dyson as you may be eligible for a free battery replacement
If the battery is not working properly and is not holding charge, then replace it with a new one.

Official genuine replacement for V7 models with extended runtime

Upgraded high-capacity V8 replacement with non-slip design

Budget-friendly V8 replacement with fast charging

Premium V8 option with maximum runtime and safety certifications
Performing a Battery Reset
If battery-related issues persist, try resetting the battery:
- Ensure the vacuum is powered off and disconnected from any power source
- For models with removable batteries, detach the battery
- Discharge residual power by pressing and holding the power button for 10-20 seconds
- Reinstall the battery and charge it fully
- Turn on the vacuum to confirm it operates correctly
If the charger is not working properly, then it needs to be replaced with a new one.
Budget-friendly replacement with extended compatibility and durable build
High-capacity replacement with extensive model compatibility and safety certifications
Affordable replacement for newer models with global voltage compatibility

Enhanced durability with premium safety features and extended support
Professional Solutions and Warranty Options
Contacting Dyson Support
If DIY solutions aren’t working or you’re not comfortable attempting them:
- Contact Dyson customer support
- Explain the issue in detail
- If your vacuum is under warranty, Dyson may offer a replacement or repair at no cost
- Even outside the warranty period, Dyson sometimes offers solutions at reduced costs
Visiting a Dyson Repair Shop
Authorized Dyson repair shops have the expertise and parts to fix your vacuum:
- Locate a Dyson service center near you
- Bring your vacuum for professional diagnosis
- Get a quote for the repair before proceeding
Knowing Your Consumer Rights
If you’ve had multiple replacements or repairs:
- Under consumer protection laws (like the Consumer Guarantees Act), you may be entitled to a refund or upgrade
- If you’ve received replacement parts that haven’t resolved the issue, consider requesting an upgrade or refund
- Document all interactions with customer service for reference
Frequently Asked Questions (FAQ)
Why does my Dyson vacuum turn itself back on after I’ve turned it off?
This typically happens because of pressure on the trigger mechanism, often caused by a loose battery connection or a misaligned microswitch. The vacuum perceives this pressure as you pressing the trigger, causing it to turn back on. Try adjusting the battery position or implementing one of the permanent fixes described in this article.
Can wall mounting really cause my Dyson vacuum’s trigger to malfunction?
Yes, wall mounting can contribute to trigger problems. When the vacuum is mounted vertically, gravity pulls on it, which can cause the battery to slip slightly out of position. This movement can create pressure on the trigger mechanism. Using a spacer between the wand and the wall can help reduce this stress.
Is it worth fixing my Dyson vacuum myself, or should I contact Dyson support?
If your vacuum is still under warranty (typically 2 years), contact Dyson support first as they may provide a free replacement or repair. For out-of-warranty vacuums, DIY solutions can be cost-effective, with parts often available for £10-£20 compared to Dyson’s higher replacement costs. However, if you’re not comfortable with technical repairs, professional service is recommended.
How can I prevent this issue from happening again after fixing it?
To prevent recurrence, consider storing your vacuum horizontally rather than wall-mounted, regularly check and tighten the handle screw, keep the battery connections clean, and avoid overfilling the dust bin. Regular maintenance of your Dyson vacuum can help prevent many common issues, including trigger problems.
Can blockages in my Dyson vacuum cause it to turn on and off by itself?
Yes, blockages in the air pathway or cyclone can cause operational issues, including the vacuum turning on and off unexpectedly. Regular cleaning of filters and checking for blockages can prevent these problems. If your vacuum is pulsating or cutting out during use, a thorough cleaning of the entire air pathway may resolve the issue.
Conclusion
A Dyson vacuum that won’t turn off when the trigger is released can be frustrating, but the problem is usually fixable. Whether it’s a simple battery adjustment, a trigger assembly repair, or addressing wall mounting stress, there are multiple solutions available to get your vacuum working properly again.
For those comfortable with DIY repairs, options like filing down the plunger or replacing the trigger mechanism can provide cost-effective fixes. If you prefer professional assistance, Dyson support or authorized repair centers can help, especially if your vacuum is still under warranty.
Remember that regular maintenance and proper storage can help prevent these issues from occurring in the first place. By understanding the common causes and solutions for Dyson vacuum trigger problems, you can keep your vacuum running efficiently for years to come.


