
The Dyson V8 is a powerful cordless vacuum, but even the best machines can encounter performance issues. If your Dyson V8 isn’t picking up debris as effectively as it once did, don’t worry – most suction problems have straightforward solutions. This guide will walk you through comprehensive troubleshooting steps to restore your vacuum’s performance and extend its lifespan.
Affiliate disclosure: As an Amazon associate, We'll earn a commission for every successful order through our affiliate links in the article. However, you won’t be charged anything for this.
When your Dyson V8 starts showing signs of reduced suction power, it’s typically due to blockages, filter issues, or component wear. The good news is that many of these problems can be resolved at home without professional help. By following the systematic approach outlined in this article, you’ll be able to diagnose and fix the most common Dyson V8 suction problems quickly and effectively.
Common Dyson V8 Suction Problems
The Dyson V8’s suction power can be compromised by several factors. The most frequent issues include clogged filters, blockages in the airway, debris in the brush bar, or a full dust bin. You might notice your vacuum making a pulsing or irregular sound, feeling unusually hot near the motor area, or simply not picking up dirt as efficiently as before.
These symptoms typically indicate that something is preventing proper airflow through the vacuum. The good news is that most of these issues can be resolved through regular maintenance and simple troubleshooting steps. By identifying the specific problem affecting your Dyson V8, you can apply the appropriate solution to restore its optimal performance.
Step-by-Step Troubleshooting Guide
Checking and Emptying the Dust Bin
- Press the red release button to detach the dust bin from the main unit
- Hold the bin over a trash can and press the bin release button to empty contents
- Check for debris stuck to the cyclone assembly inside the bin
- Inspect the bin seals for damage or wear that might affect suction
- Ensure the bin clicks securely back into place when reattached
Remember that Dyson recommends emptying the bin after each use, as an overfilled bin can significantly reduce suction power. Never allow debris to accumulate past the “MAX” line marked on the bin.
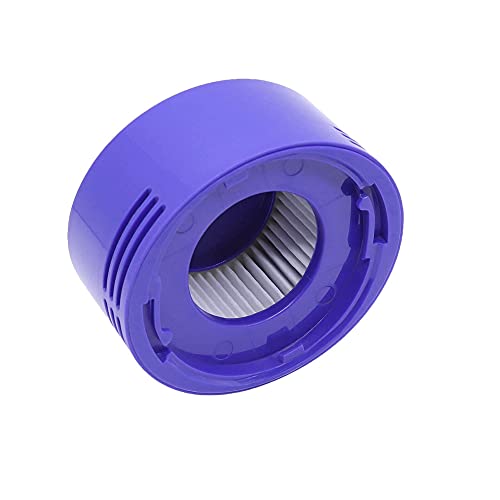
Cleaning the Filters
Pre-Motor Filter Cleaning:
- Locate the purple filter at the top of the vacuum unit
- Twist counterclockwise to remove it from the vacuum
- Tap gently to remove loose dust and debris
- Rinse thoroughly under cold water (no soap or detergents)
- Continue rinsing until water runs clear
- Squeeze excess water out gently
- Allow to dry completely for 24-48 hours before reinstalling
Post-Motor HEPA Filter Cleaning:
- Find the post-motor filter on the side of the vacuum (typically behind a cover)
- Remove by pulling it straight out
- Tap to remove loose debris
- Rinse under cold running water
- Allow to dry completely for 24-48 hours
- Reinstall only when completely dry
A damaged or excessively dirty HEPA filter can restrict airflow and reduce suction. Replacing it ensures proper filtration of fine particles and allergens.

High-efficiency HEPA filters with 0.3 micron capture
Budget-friendly single HEPA post filter option
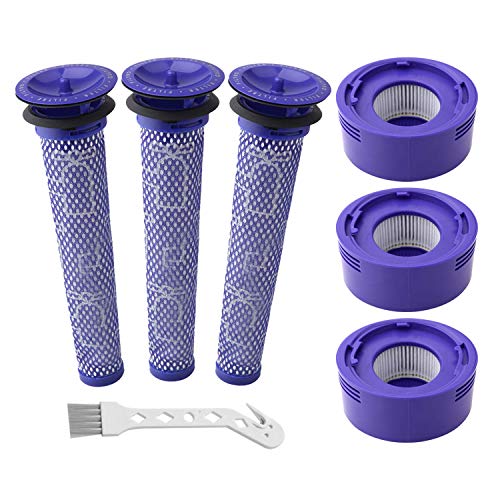
Cost-effective bulk replacement solution

Balanced value with included cleaning brush
Dirty filters are among the most common causes of reduced suction in Dyson V8 vacuums. Dyson recommends washing filters at least once a month for regular household use.
Inspecting for Blockages
Checking the Main Wand:
- Disconnect the wand from both the cleaner head and the main unit
- Look through the wand to check for visible blockages
- Use a broom handle or similar long object to push out any obstructions
- Inspect both ends of the wand for debris buildup
If the wand is cracked or damaged, it can leak air, reducing suction power. Replacing it ensures an airtight connection and optimal performance.
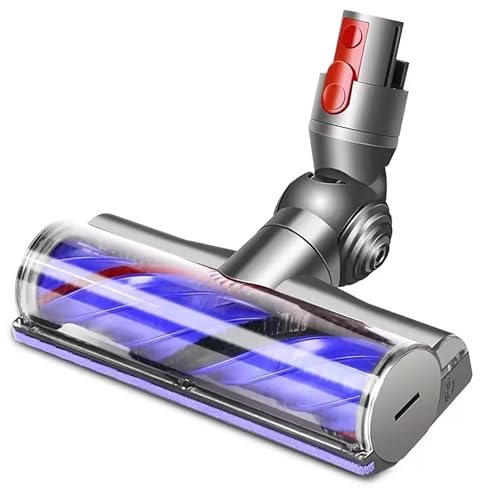
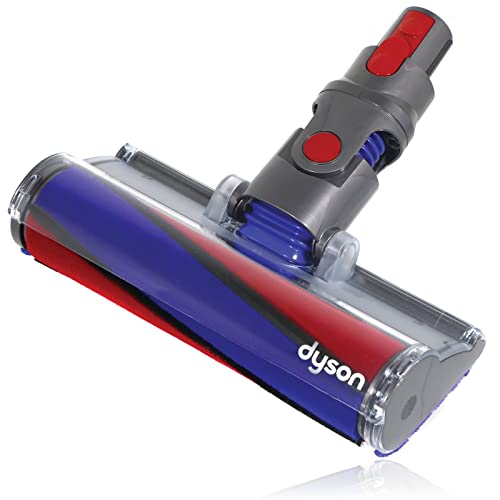
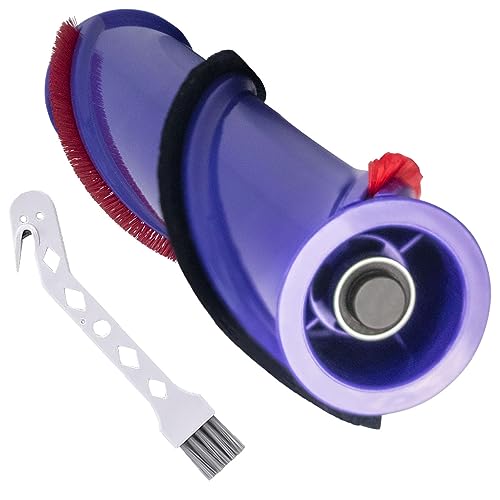
Examining the Cleaner Head:
- Disconnect the cleaner head from the wand
- Turn the cleaner head upside down
- Use a coin to unlock the end cap (marked with a padlock symbol)
- Remove the brush bar completely
- Clear any hair or string wrapped around the brush
- Check the air channels inside the cleaner head for blockages
- Reassemble the brush bar and secure the end cap
If the cleaner head is severely damaged or worn, it may not create a proper seal with the floor, leading to reduced suction. A replacement ensures optimal cleaning performance.
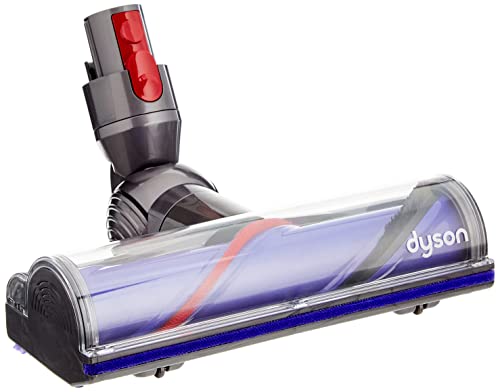
Official replacement with quick-release for V8 vacuum

Genuine soft roller for efficient hard floor cleaning
Premium third-party with hair-cutting technology
Official hard floor tool with direct-drive motor
Inspecting the Bin Inlet:
- Remove the dust bin from the vacuum
- Check the inlet at the back of the bin for obstructions
- Look inside the cyclone assembly for visible blockages
- Clear any debris that might be restricting airflow
Blockages can occur anywhere in the vacuum’s airpath and significantly impact suction power. A systematic check of all components ensures you don’t miss any potential obstructions.
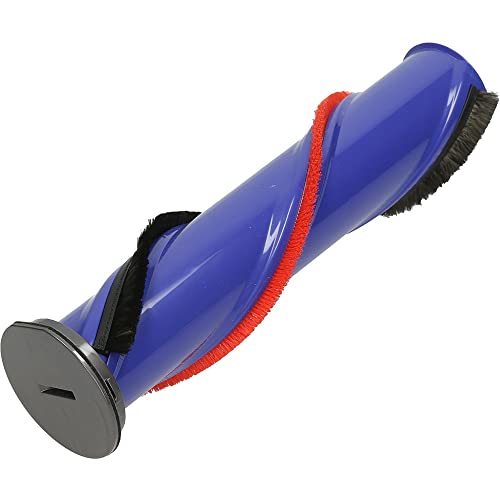
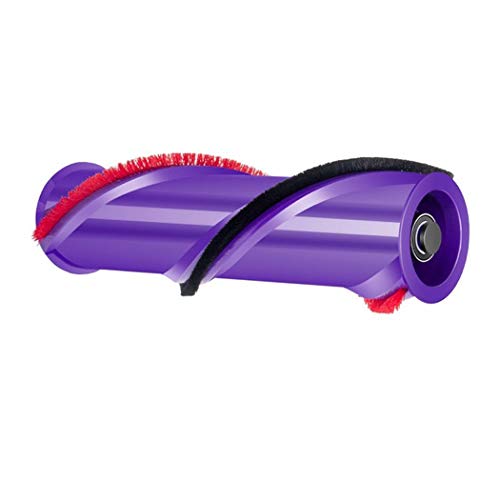
Addressing Brush Bar Issues
- Disconnect the cleaner head from the wand
- Turn the cleaner head upside down
- Use a coin to turn the end cap counterclockwise
- Slide out the brush bar completely
- Cut away any hair or threads wrapped around the bar using scissors
- Check the brush bristles for wear and damage
- Examine the brush bar bearings for smooth rotation
- Reinstall the brush bar, ensuring it clicks into place
- Secure the end cap by turning clockwise
If your brush bar’s bristles are worn down or damaged, it won’t effectively agitate and lift dirt from carpets. Replacing it restores cleaning performance.
Official replacement for optimal performance and compatibility
Budget-friendly direct-fit replacement for V8 models
Enhanced cleaning efficiency with dual-bristle technology

Complete replacement with maintenance tool included
A brush bar that doesn’t rotate properly won’t pick up debris effectively, especially on carpets. Regular cleaning prevents hair and thread buildup that can restrict movement.
Resolving Pulsing Power Issues
If your Dyson V8 is pulsing or cutting in and out, try these solutions:
- Clear Airway Blockages: Remove the wand, cleaner head, and bin to check for debris in all pathways
- Replace Old Filters: If you’ve had your vacuum for over a year without replacing filters, consider installing new ones
- Check Battery Charge: Ensure the battery is fully charged (3.5 hours charging time)
- Inspect Motor Vents: Make sure the cooling vents on the main unit aren’t blocked by dust
- Cool Down Period: If the vacuum has been running for an extended period, allow it to cool for 30 minutes
Pulsing typically indicates the vacuum’s protection system has activated due to a blockage, overheating, or power issue.
Fixing Low Suction Problems
- Clean All Filters: Remove and wash both filters according to the instructions above
- Check All Attachment Points: Ensure all connections between components are secure with no gaps
- Inspect Seals: Check the rubber seals around the bin and filter housing for damage
- Test Different Power Modes: Try both standard and MAX power settings to compare suction
- Remove Attachments: Test suction directly from the main unit without wand or tools
- Examine Cleaner Head: Make sure the cleaner head’s air channels aren’t clogged with debris
Systematically eliminating each potential cause will help identify the specific issue affecting your vacuum’s suction power.
Addressing Motor Issues
Overheating Solutions
- Turn off the vacuum immediately if it feels unusually hot
- Allow the unit to cool down for at least 30-60 minutes
- Check and clear any blockages in the air intake vents
- Ensure filters are clean and properly installed
- Use the vacuum in shorter sessions if the problem persists
- Avoid using MAX power mode for extended periods
Dyson vacuums have thermal protection that causes shutdown if overheating occurs. This feature prevents damage to the motor but requires addressing the underlying cause.
Dealing With Battery Problems
- Ensure the battery is properly connected to the main unit
- Charge the vacuum fully (3.5 hours minimum)
- Check the charger connection for damage or debris
- Try a different power outlet for charging
- Look for flashing LED indicators that might signal battery issues
- Consider battery replacement if your unit is several years old
If your Dyson V8 is no longer charging or holding charge as expected, replacing the charger can solve your problem.
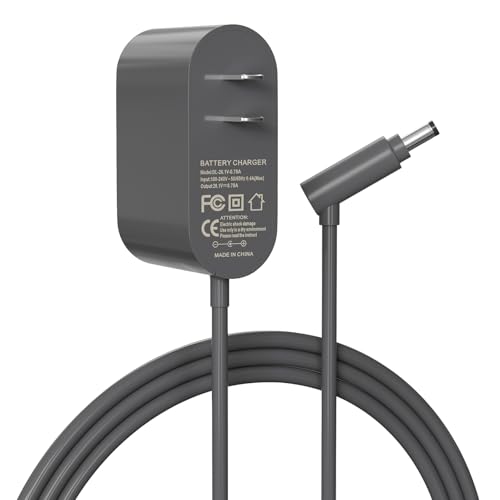
Budget-friendly third-party replacement with global voltage support
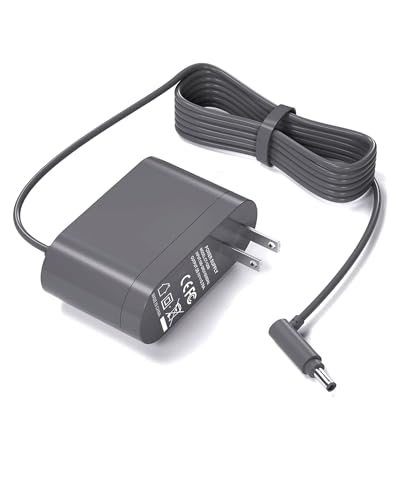
Extended cable option with universal voltage compatibility
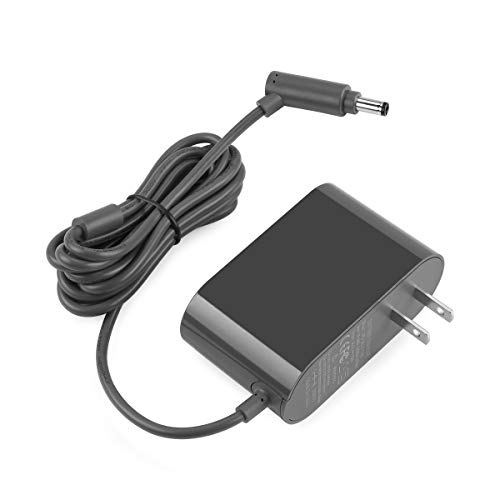
Certified safety with 15-month warranty and overvoltage protection

Premium option with comprehensive 12-month manufacturer warranty
The Dyson V8’s lithium-ion battery naturally degrades over time. After 2-3 years of regular use, reduced runtime and power may indicate the need for a replacement battery.

Official genuine replacement with 1-year warranty

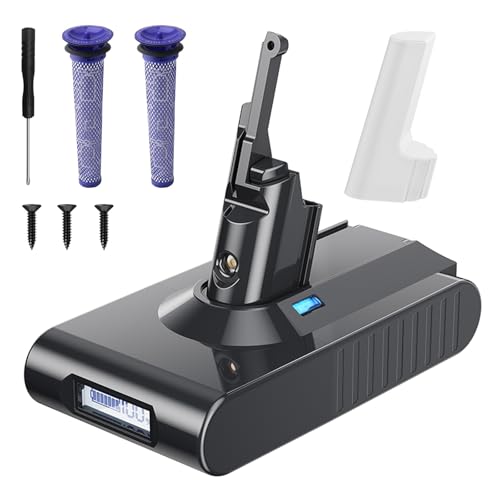
8000mAh capacity with 2-year warranty and 3 filters

7000mAh with included filters and screws
7000mAh with LCD display and built-in protection
Preventive Maintenance Tips

Regular Cleaning Schedule
- Empty the dust bin after each use
- Wash both filters monthly
- Clean the brush bar every 1-2 weeks
- Inspect for blockages monthly
- Wipe down the exterior and attachments regularly
- Check seals and gaskets quarterly for wear
Consistent maintenance prevents many common suction problems before they develop into more serious issues.
Proper Storage Practices
- Store your Dyson V8 in a cool, dry place
- Use the wall-mounting dock for proper upright storage
- Keep attachments organized and clean
- Remove the battery during long periods of non-use
- Ensure the vacuum is stored with a partially charged battery
- Keep away from direct sunlight and heat sources
Proper storage extends the lifespan of both the vacuum and its battery while maintaining optimal performance.
Frequently Asked Questions (FAQ)
Why does my Dyson V8 keep cutting out during use?
Your Dyson V8 may cut out during use due to several reasons: a blockage in the airway system, overheated motor, clogged filters, or a failing battery. First, check for and clear any blockages in the wand, cleaner head, and bin inlet. Then ensure your filters are clean and completely dry. If the problem persists, allow the vacuum to cool down for 30 minutes before trying again. For recurring issues, the battery might need replacement.
How often should I clean the Dyson V8 filters?
Dyson recommends washing both the pre-motor and HEPA filters at least once a month for normal household use. However, if you vacuum frequently or have pets, you may need to clean them more often—perhaps every 2-3 weeks. Always allow filters to dry completely (24-48 hours) before reinstalling them. Never use detergents or washing machines to clean filters, as this can damage them.
Why is my Dyson V8 brush bar not spinning?
If your Dyson V8 brush bar isn’t spinning, first check for hair, string, or debris wrapped around it. Remove the brush bar completely using a coin to unlock the end cap, then clear any obstructions. Make sure the brush bar is properly reinstalled with the end cap securely fastened. Also verify that the cleaner head is correctly attached to the wand. If these steps don’t resolve the issue, the brush bar motor might need replacement.
Can I use my Dyson V8 without filters?
No, you should never use your Dyson V8 without its filters. The filters are essential for protecting the motor from dust and debris, as well as ensuring the vacuum releases clean air. Operating the vacuum without filters can cause serious damage to the motor and void your warranty. If your filters are being washed, wait until they’re completely dry before using the vacuum, or purchase spare filters to use in rotation.
When should I replace my Dyson V8 battery?
Most Dyson V8 batteries last approximately 2-3 years with regular use before showing significant capacity reduction. Consider replacing your battery when: runtime decreases noticeably from the original 40 minutes, the vacuum doesn’t maintain consistent power throughout operation, or the battery fails to hold a charge. Genuine Dyson replacement batteries are recommended for optimal performance and safety.
Conclusion
Maintaining your Dyson V8’s suction power is primarily a matter of regular maintenance and prompt attention to developing issues. Most suction problems stem from blockages, dirty filters, or worn components—all of which can be addressed through the troubleshooting steps outlined in this guide.
By incorporating regular cleaning of filters, emptying the dust bin after each use, and periodically checking for blockages, you can prevent many common problems before they affect your vacuum’s performance. For persistent issues that don’t respond to these solutions, Dyson’s customer support can provide additional assistance, especially if your device is still under warranty.
Remember that your Dyson V8 is designed to deliver years of powerful cleaning performance when properly maintained. With the right care and attention, you can keep it operating at peak efficiency throughout its lifespan.


