
The Dyson V8 Absolute is a powerful cordless vacuum, but like any battery-powered device, it can develop charging issues over time. When your premium cleaning tool refuses to charge, it can be frustrating—especially when the problem isn’t covered in the official manual. This comprehensive guide will walk you through diagnosing and resolving charging problems with your Dyson V8 Absolute, from simple fixes to more complex solutions.
Affiliate disclosure: As an Amazon associate, We'll earn a commission for every successful order through our affiliate links in the article. However, you won’t be charged anything for this.
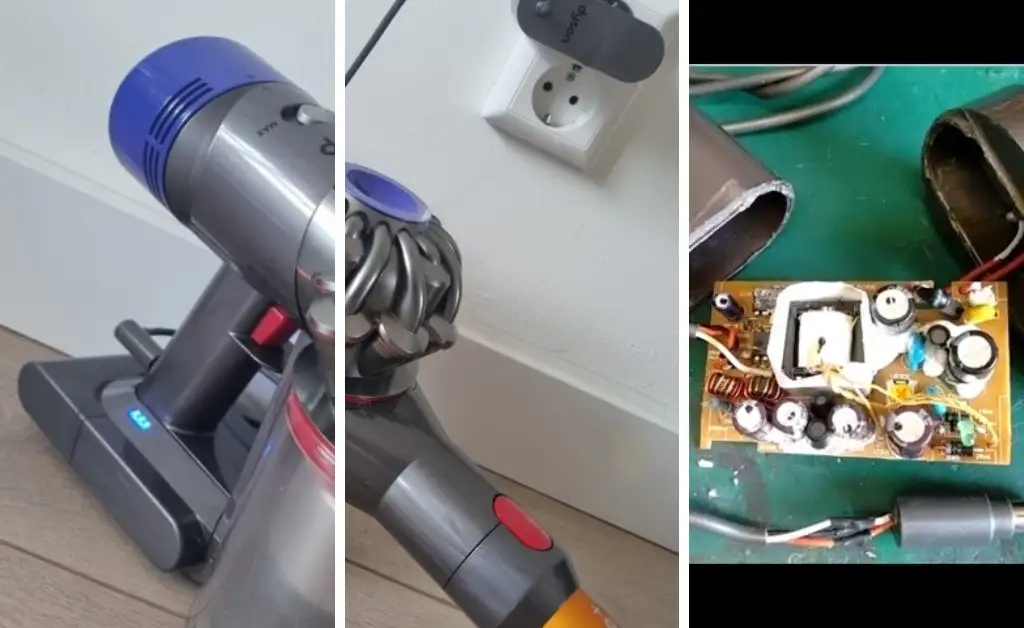
If you’ve noticed your Dyson V8 displaying unusual light patterns when placed on the charger or failing to charge altogether, you’re not alone. Many users report a specific pattern of red light blinks followed by a blue light blink when holding the trigger—a symptom not documented in Dyson’s troubleshooting materials. We’ll address this issue along with other common charging problems, providing both quick fixes and detailed repair options to get your vacuum back to full power.
Identifying Dyson V8 Charging Issues
When your Dyson V8 Absolute refuses to charge, several telltale signs can help identify the problem. The most common symptoms include:
- Battery indicator showing one blue bar remaining but not increasing when placed on the charger
- No blue bars lighting up when connected to the charging dock
- A specific light sequence when the trigger is held: a red light blink, another red light blink, followed by a single blue light blink
- Flashing blue lights that indicate potential battery malfunction
- Significantly reduced runtime, especially in “Max” mode (shutting off after only 5-6 seconds)
- Frequent need for recharging despite limited use
These symptoms often point to issues with the battery itself, the charging contacts, or the internal circuitry of your vacuum. By carefully observing how your device behaves when you attempt to charge it, you can narrow down the potential causes and apply the appropriate solution.
Quick Fixes for Charging Problems
Before diving into more complex repairs, try these simple troubleshooting steps that often resolve charging issues:
Check Your Power Source and Connections
- Ensure the charger is properly plugged into a working electrical outlet
- Try a different wall outlet to rule out power supply problems
- Check that the vacuum is securely attached to the charging station
- Examine the charging cable for any visible damage or fraying
If you suspect the charging cable or adapter is faulty, replacing it with a new one is a good first step.
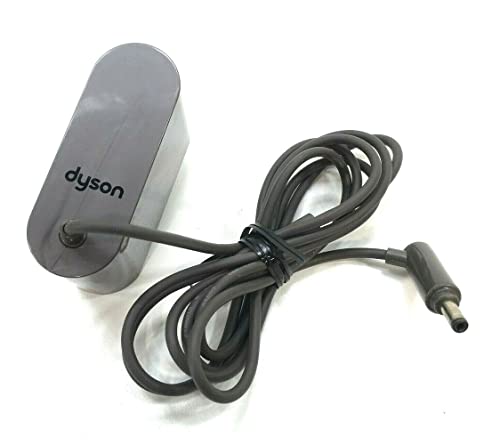
Official Dyson OEM charger with direct compatibility
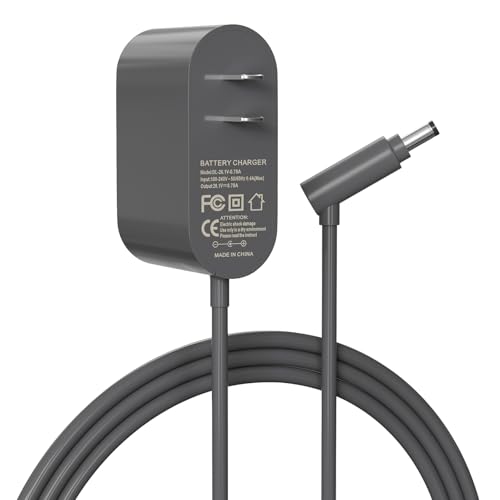
Budget-friendly universal replacement with global voltage
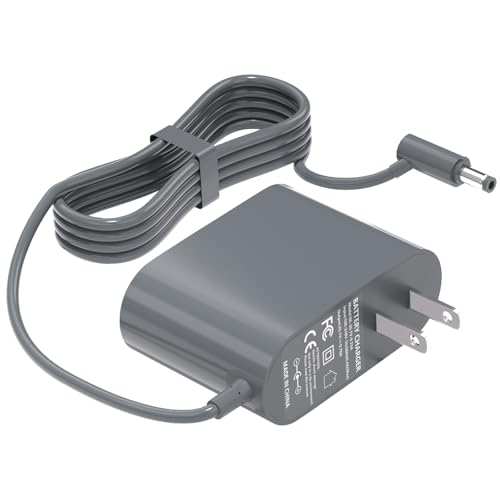
Certified safety with comprehensive compatibility
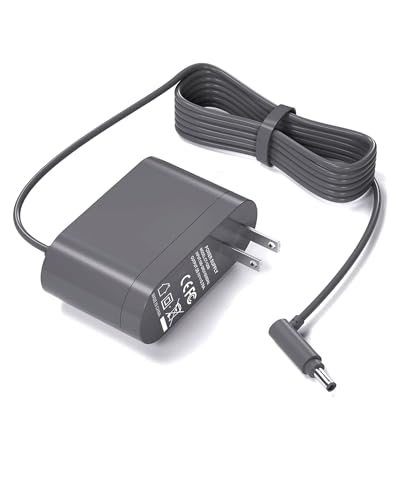
High-end option with extended protection
Clean the Charging Contacts
Dust and debris can prevent proper electrical connection between your Dyson and its charger:
- Locate the metal charging contacts on both the vacuum and the charging dock
- Use a soft, dry cloth or cotton swab to gently clean these contacts
- For stubborn buildup, lightly dampen the cloth with isopropyl alcohol and clean the contacts
- Allow contacts to dry completely before attempting to charge
Reset the Battery System
A simple reset can often resolve electronic glitches in the battery management system:
- Disconnect the vacuum from the charger
- Press and hold the power button for 20 seconds to discharge residual electricity
- Release the button and reconnect to the charger
- Wait to see if the charging indicator begins functioning normally
The “Quick Charge Hack”
Some users report success with this unconventional but simple method:
- Place the vacuum on the charging station for approximately 30 seconds
- Remove it from the charger
- Place it back on the charger
- Many users find this somehow triggers the proper charging cycle
Advanced Troubleshooting for Persistent Issues
If basic troubleshooting doesn’t resolve the charging problem, it’s time to investigate more complex issues that might require parts replacement or repair.
Battery Diagnostics
To determine if your battery is the culprit:
Check for physical signs of battery damage:
– Swelling or bulging of the battery compartment
– Unusual heat when charging or operating
– Leakage or corrosion around battery contactsTest battery performance:
– If the vacuum runs for only a few minutes after “full” charging
– If it works normally in standard mode but dies quickly in “Max” mode
– If it shows charging completion very quickly (under 30 minutes)
These symptoms typically indicate a failing battery that needs replacement.
If your battery shows these signs, it’s time to consider a replacement.

Extended runtime with safety protections and included installation tools

Maximum runtime with advanced safety and filtration system

Balanced performance with safety features and filters
Charging Port Inspection
Problems with the charging port can prevent proper connection:
- Examine the port for visible damage or misalignment
- Check for debris or foreign objects blocking the connection
- Look for bent or broken pins in the charging port
- Test the alignment between the battery and charging dock
With new replacement batteries, misalignment can be a common issue. The charging plug might hit the bottom of the handle hole, preventing proper connection.
Internal Circuit Testing
For those comfortable with electronics:
- Use a multimeter to test the voltage output of the charger (should match specifications on the charger label)
- Check continuity across the charging contacts
- Test the resistance of the charging port
- Look for any burned components or loose connections if you open the device
DIY Battery Replacement Process
If diagnostics point to a battery failure, replacement is often the most effective solution. Here’s how to replace your Dyson V8 battery:
Tools Required:
- Small Phillips screwdriver
- Replacement battery compatible with Dyson V8 Absolute
- Clean, flat workspace
Step-by-Step Replacement:
Prepare the vacuum:
– Ensure the vacuum is powered off and disconnected from the charger
– Discharge any remaining power by pressing and holding the power button for 10-20 secondsAccess the battery compartment:
– Locate the screw near the handle
– Remove the screw on the back of the device using the Phillips screwdriver
– Carefully disassemble the unit to access the battery trayRemove the old battery:
– Disconnect any connectors attaching the battery to the main unit
– Carefully lift out the old battery, noting its orientationInstall the new battery:
– Place the new battery in the same orientation as the old one
– Reconnect any connectors, ensuring they’re secure
– Slide the battery tray back into positionReassemble the vacuum:
– Carefully reattach all components in reverse order of disassembly
– Secure all screws, making sure not to overtighten themTest the new battery:
– Place the vacuum on the charger
– Verify that charging indicators show proper charging activity
– Allow the battery to charge fully before first use
Selecting the Right Replacement Battery

When purchasing a replacement battery for your Dyson V8 Absolute, consider these factors:
Official vs. Third-Party Options
- Official Dyson batteries: More expensive but guaranteed compatibility and quality
- Third-party batteries: Less expensive but varying quality; read reviews carefully
Where to Purchase
- Dyson’s official website or authorized retailers
- Online marketplaces like Amazon or eBay (check seller ratings)
- Specialty vacuum parts suppliers
What to Avoid
- Extremely cheap batteries (under $30) often fail within weeks
- Batteries without proper certification or warranty
- Sellers with poor reviews or return policies
Price Range Expectations
A quality replacement battery for the Dyson V8 typically costs between $50-$100, depending on the source and whether it’s an official Dyson part or third-party alternative.
Preventing Future Charging Issues
To maximize the lifespan of your new battery or prevent problems with your existing one:
Proper charging habits:
– Don’t leave the vacuum constantly on the charger when fully charged
– Allow the battery to cool down before charging after extended use
– Charge fully before storing for long periodsRegular maintenance:
– Clean filters regularly to prevent motor strain
– Keep charging contacts clean
– Store in a cool, dry locationUsage best practices:
– Use “Max” mode sparingly to reduce battery strain
– Empty the dust bin after each use to maintain suction efficiency
– Allow the vacuum to cool down during extended cleaning sessions
When to Seek Professional Help
Despite your best DIY efforts, some issues require professional attention:
Contact Dyson Support When:
- Your vacuum is still under warranty
- You’ve tried all troubleshooting steps without success
- You notice unusual smells, sounds, or heat from the device
To reach Dyson support, email askdysonUS@dyson.com with your serial number, problem description, and contact information.
Consider Repair Services If:
- You’re uncomfortable performing battery replacement yourself
- The issue appears to be with the motor or electronic components
- Multiple components need replacement or repair
Professional repair typically costs between $75-$150 depending on the problem and parts needed.
Frequently Asked Questions (FAQ)
How long should a Dyson V8 battery last before needing replacement?
With proper care, a Dyson V8 battery typically lasts 2-4 years before capacity noticeably decreases. Users report varying lifespans depending on usage frequency, with those who use their vacuum multiple times weekly seeing shorter battery life than occasional users.
Why does my Dyson V8 run for only a few seconds in Max mode?
This is a classic symptom of battery failure. The battery management system detects uneven cell drainage and shuts down to prevent damage. When cells can’t maintain equal discharge rates, the vacuum automatically powers off to protect the battery, especially under the high-drain conditions of Max mode.
Can I use third-party batteries in my Dyson V8 Absolute?
Yes, third-party batteries are available and can work well, but quality varies significantly. Choose batteries from reputable manufacturers with good reviews and warranties. Avoid the cheapest options as they typically fail prematurely and may potentially damage your vacuum.
What does it mean when my Dyson shows alternating red and blue lights?
This light pattern often indicates a communication issue between the battery management system and the main control board. Try a full reset by holding the power button for 20 seconds while disconnected from power. If the pattern persists, the battery or control board may need replacement.
Is it normal for a Dyson V8 to get warm while charging?
Some warmth during charging is normal, but the vacuum should never become hot to the touch. Excessive heat during charging indicates a potential problem with the battery or charging system. Disconnect immediately if the device becomes unusually hot and contact Dyson support.
Conclusion
Charging issues with the Dyson V8 Absolute can be frustrating but are often fixable with the right approach. From simple fixes like cleaning contacts and performing resets to more involved solutions like battery replacement, this guide provides multiple pathways to resolve your charging problems.
Remember that battery issues are the most common cause of charging failures in the Dyson V8, and a replacement battery often provides the most straightforward solution. By following proper maintenance practices and charging habits, you can extend the life of your new battery and keep your Dyson V8 Absolute running efficiently for years to come.
If troubleshooting steps don’t resolve your issue, don’t hesitate to contact Dyson support or seek professional repair services. With proper care and timely maintenance, your Dyson V8 can continue to deliver the powerful cleaning performance it’s known for.


