
Hair on your floors but your Dyson vacuum isn’t picking it up? This frustrating issue is more common than you might think. When your trusted Dyson fails to collect hair effectively, it doesn’t necessarily mean your vacuum is broken beyond repair. In most cases, the problem stems from maintenance issues that you can resolve at home.
Affiliate disclosure: As an Amazon associate, We'll earn a commission for every successful order through our affiliate links in the article. However, you won’t be charged anything for this.
In this comprehensive guide, we’ll explore the most common reasons why your Dyson vacuum isn’t picking up hair and provide step-by-step solutions to restore its performance. From simple maintenance tasks to identifying when parts need replacement, you’ll learn exactly what to check and how to fix it, potentially saving you from an unnecessary repair bill or premature replacement.
Common Causes of Poor Hair Pickup
Full Dirt Container
One of the most frequent and easily fixable causes of poor suction is a full dust bin. When the container reaches its capacity, airflow becomes restricted, significantly reducing the vacuum’s ability to pick up hair and other debris.
Solution:
1. Remove the dirt container by pressing the release button
2. Empty all contents into a trash bag
3. Tap the container gently to remove residual dust
4. Wipe the interior with a dry cloth if necessary
5. Securely reattach the container until you hear a click
For optimal performance, consider emptying the bin after each use, especially if you’re dealing with significant amounts of pet or human hair.
Clogged Filters
Dirty filters are a major culprit behind suction problems. When filters become clogged with dust and hair, they restrict airflow and force the motor to work harder with diminished results.
Solution:
1. Locate all filters (typically there’s a pre-motor and post-motor filter)
2. Remove each filter carefully
3. Tap filters against a trash can to remove loose debris
4. Wash filters under cold water, gently scrubbing stubborn dirt
5. Allow filters to dry completely (up to 24 hours) before reinserting
6. Ensure filters are properly seated when reinstalling
If your filters are damaged or worn out, you may need to replace them to restore your Dyson’s suction power.

Official OEM filter for V11/V15 with H13 efficiency

3-pack H13 filters for V11/V15, lasting 3-6 months
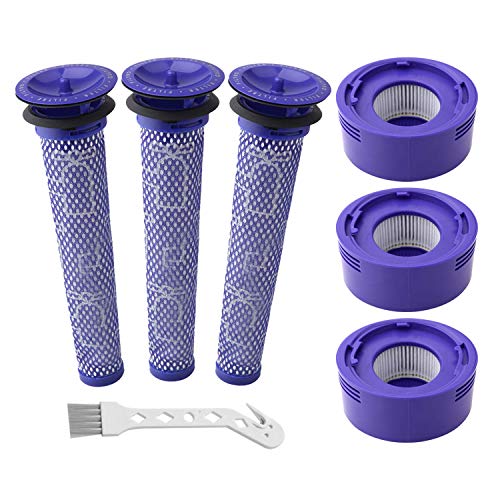
6-pack pre/post filters for V7/V8, lasting 2-3 months
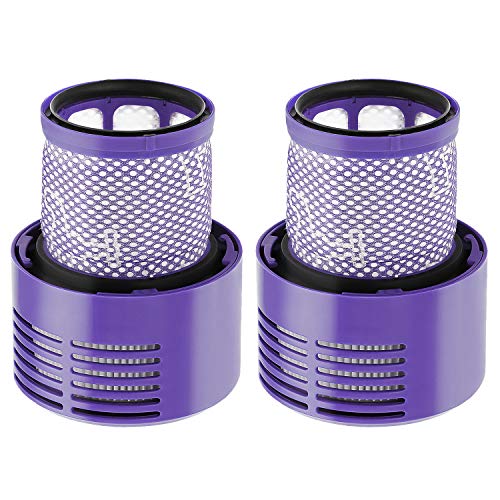
2-pack H12 filters for V10, lasting 3-6 months
Maintenance Tip: Clean your filters at least once every three months. If you vacuum daily or have pets, increase the frequency to monthly cleaning.
Troubleshooting Hair Pickup Issues: A Comprehensive Guide
Examining the Cleaner Head
The cleaner head is particularly susceptible to hair blockages, especially if you or your pets have long hair.
Step-by-Step Inspection:
1. Disconnect the cleaner head from the vacuum
2. Turn it upside down to examine the brush roll
3. Cut away any hair wrapped around the brush using scissors
4. Remove the brush roll completely (if your model allows) for thorough cleaning
5. Check for debris lodged in the air channels and suction path
6. Ensure the brush roll spins freely after cleaning
7. Reattach the cleaner head securely
Testing Tip: After cleaning the head, test suction directly from the hole where the cleaner head normally attaches. If suction is strong there but weak through the head, you may have missed a blockage.
Addressing Brush Roll Problems
A worn or damaged brush roll can significantly impact your vacuum’s ability to pick up hair.
Inspection Process:
1. Access the brush roll according to your model’s instructions
2. Look for signs of wear such as flattened bristles or bare spots
3. Check for cracks or breaks in the brush roll structure
4. Clear any hair and debris wrapped around the ends
5. Test the brush roll’s ability to rotate freely
6. Replace the brush roll if severely worn (Dyson replacement parts available online)
If your brush roll is damaged, then replacing it is the best way to restore your vacuum cleaner.

Genuine Dyson replacement for DC65/DC66 models
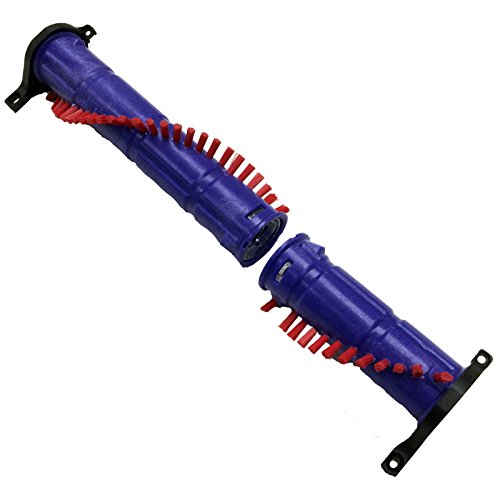
Premium third-party replacement for DC65/DC66 models

Affordable replacement for Dyson V6 cordless vacuums

Enhanced cleaning performance for V8 models
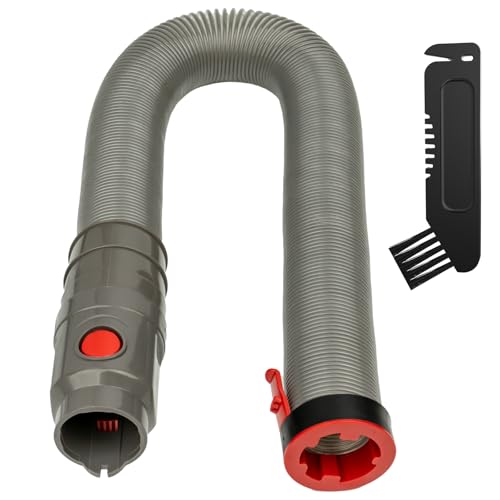
Clearing Blocked Suction Hoses
Blockages in the suction hose are common but often overlooked problems.
Detection and Clearing Process:
1. Detach the hose from both ends
2. Visually inspect for obvious blockages
3. Check for cracks or damage along the hose
4. Use a thin, flexible tool (like a straightened wire hanger) to gently dislodge any obstructions
5. Flush the hose with water if necessary and allow to dry completely
6. Replace the hose if you find cracks that can’t be repaired
7. Ensure both ends are securely reconnected
If your hose is beyond repair, a replacement will be necessary to restore proper suction.

Official replacement for DC14 models with durable construction

Multi-model compatibility with upgraded durability
Cost-effective solution for extended cleaning reach

Optimized for DC07 models with exceptional reach
Fixing Malfunctioning Changeover Valves
The changeover valve directs suction between the cleaner head and hose. When it malfunctions, hair pickup suffers dramatically.
Repair Steps:
1. Locate the valve (typically near where the hose connects to the main unit)
2. Remove the ball cover and filter to access the valve
3. Inspect for obstructions like small objects or debris
4. Use needle-nose pliers to carefully remove any foreign objects
5. Check that the valve moves freely between positions
6. Reassemble all components carefully
Interesting Finding: Many users have discovered unusual objects like golf tees, pens, or small toys causing valve blockages!
Cleaning the Cyclone Assembly
Hair and fine debris can accumulate in the cyclone assembly, affecting overall performance.
Thorough Cleaning Process:
1. Turn off and unplug the vacuum
2. Remove the dirt container
3. Wash the bin if your model allows (check the manual)
4. Use compressed air or a small brush to clear hair from cyclone holes
5. Pay special attention to the entrance area between the dust bin and filter housing
6. Ensure everything is completely dry before reassembling
7. Check that all components fit together properly
Specialized Solutions for Persistent Problems
Upgrading to Pet-Friendly Models
If you consistently struggle with hair pickup despite maintenance, your current model may not be designed for heavy hair loads.
Pet-Friendly Dyson Options:
– Dyson V11 Cordless Stick Vacuum
– V8 Animal Cordless Stick Vacuum
– Cinetic Big Ball Animal Canister Vacuum
– Cinetic Big Ball Animal Upright Canister Vacuum
These models feature specialized tools and enhanced suction specifically designed for hair pickup. Alternatively, you can purchase pet-friendly attachments like the Hair Screw Tool for your existing Dyson.
Addressing Static Electricity Issues
Static charge can cause hair to stick to the bin walls rather than collecting properly.
Simple Solution:
Apply a light mist of anti-static spray to the interior of the bin. This reduces static cling and improves hair collection.
Checking for Motor Problems
If you’ve tried all other solutions and your vacuum still struggles with hair, the motor may be the issue.
Diagnostic Steps:
1. Listen for unusual sounds during operation
2. Check if the vacuum feels unusually hot
3. Test if suction varies or cuts out intermittently
4. Contact Dyson customer support if you suspect motor issues
Inspecting Power Cord and Seals
For corded models, damaged power cords can affect performance. Similarly, worn seals can cause suction leaks.
Inspection Points:
1. Check the entire length of the power cord for cuts, frays, or damage
2. Inspect all connection points for secure fitting
3. Examine seals at hose and main unit connection points
4. Replace any damaged components
If the power cord is damaged, it needs to be replaced to ensure safe and effective operation.

Official Dyson OEM replacement for DC65/DC66/UP20 models with 10.7m length
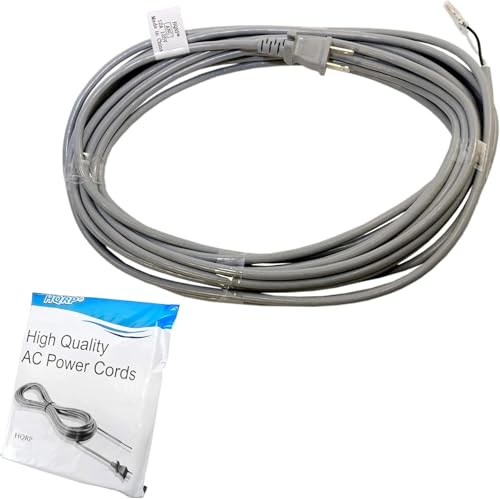
36ft durable replacement cord for Dyson DC14 models with 17AWG wiring
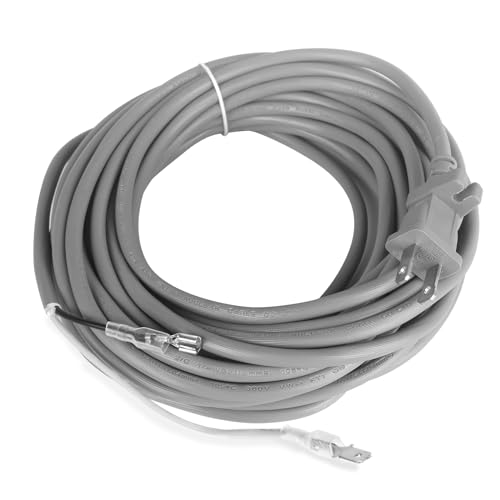
Universal 36ft replacement for DC33/DC41/DC65 with polarized plug

UL-listed 36ft replacement cord for Dyson DC33/DC41/DC65 models
Advanced Maintenance Techniques
Accessing Internal Components
For thorough maintenance, you may need to access internal components.
Safe Access Method:
1. Flip the device over on a clean, flat surface
2. Locate and disengage the red clip
3. Flip off the two additional clips and click them forward
4. Carefully remove covers to access internal components
5. Take photos before disassembly to help with reassembly
Diagnosing and Fixing Hose Clogs
Hose clogs can be particularly challenging to diagnose and clear.
Detailed Process:
1. Remove the canister by pressing the red button on the side
2. Wiggle the hose sideways to disconnect it
3. Examine the hose interior, particularly near the nozzle end
4. Use fingers, a wire hanger, or appropriate tools to remove blockages
5. Pay special attention to the front section (approximately six inches from the nozzle to the first curve)
6. When reassembling, ensure the red tab on the hose is fully depressed
7. Secure the canister back onto the vacuum
Using the Correct Cleaning Mode
Using the wrong power setting can affect hair pickup efficiency.
Optimal Settings:
– For heavy pet hair, use Medium or Eco mode instead of Boost mode
– Boost mode can cause rapid clogging when dealing with large amounts of hair
– Adjust settings based on floor type and hair volume
Frequently Asked Questions (FAQ)
Why does my Dyson pick up everything except hair?
Hair presents unique challenges because it can wrap around brush rolls and clog narrow passages. If your Dyson picks up dust and debris but struggles with hair, check the brush roll for tangling and ensure you’re using a model or attachment designed for hair pickup. The Hair Screw Tool or Tangle-free Turbine tool are specifically designed to address this issue.
How often should I clean my Dyson to maintain optimal hair pickup?
For homes with pets or people with long hair, empty the bin after each use and check the brush roll weekly for hair wrapping. Clean filters monthly, and perform a thorough inspection of hoses and cyclones every three months. This regular maintenance schedule will prevent most hair pickup problems.
Is it normal for hair to stick to the sides of the dust bin?
Yes, this is common due to static electricity. A light mist of anti-static spray inside the bin can help. Also, ensure you’re emptying the bin before it reaches the MAX line, as overfilling increases the likelihood of hair sticking to the sides.
Why does my Dyson suddenly stop picking up hair after working fine?
Sudden performance drops usually indicate a blockage somewhere in the system. Check for clogs in the hose, cleaner head, and cyclone assembly. Also inspect the changeover valve, as small objects can become lodged there without warning, causing immediate performance issues.
Can I wash all parts of my Dyson vacuum?
No. While some components (like filters and some dirt containers) are washable, never submerge electronic parts or the main body in water. Always consult your specific model’s manual for washing instructions and ensure parts are completely dry before reassembly.
Conclusion
Most Dyson vacuum hair pickup problems can be resolved through proper maintenance and targeted troubleshooting. Regular cleaning of filters, emptying the dirt container, and checking for blockages will prevent most issues. For persistent problems, inspect less obvious areas like the changeover valve and cyclone assembly.
Remember that prevention is the best approach—establish a regular maintenance routine based on your household’s hair volume. If you have pets or long-haired family members, consider upgrading to a pet-specific model or attachment designed to handle hair more effectively.
By following the comprehensive steps outlined in this guide, you can restore your Dyson’s hair pickup performance and extend its useful life, saving money and frustration in the long run.


