
Why Your Dyson DC44 Won’t Charge
When your Dyson DC44 vacuum cleaner refuses to charge, it can quickly turn a routine cleaning task into a frustrating experience. This powerful cordless vacuum relies entirely on its battery system, making charging issues particularly problematic. Typically, you might notice the battery indicator light failing to illuminate, flickering inconsistently, or your vacuum running for mere minutes before dying completely.
Affiliate disclosure: As an Amazon associate, We'll earn a commission for every successful order through our affiliate links in the article. However, you won’t be charged anything for this.
These symptoms point to several potential underlying causes, from simple fixes like dirty charging contacts to more complex issues involving internal components. The good news is that many Dyson DC44 charging problems can be resolved without professional help. In this comprehensive guide, we’ll walk through the common causes, diagnostic approaches, and step-by-step solutions to get your vacuum charging properly again. Whether you’re dealing with a worn-out battery, faulty charging base, or connection issues, you’ll find practical troubleshooting methods to restore your Dyson’s functionality.
Common Causes of Charging Failures
The Dyson DC44 may fail to charge for several key reasons. Identifying the specific cause is crucial for implementing the correct solution:
Battery Issues
The most common culprit is a failing battery. After years of use, the lithium-ion battery in your Dyson DC44 naturally degrades, holding less charge and eventually failing completely. Signs of battery failure include significantly reduced runtime, the vacuum shutting off unexpectedly during use, or the battery becoming warm during charging attempts.
Charging Base Problems
The charging dock itself may be malfunctioning. Damaged internal components, worn-out contacts, or electrical failures within the base can prevent proper charging. If the charging indicator doesn’t light up when the vacuum is docked, the base might be the problem.
Power Supply Complications
Sometimes the issue lies with the power supply. A damaged power cord, loose connection at the wall outlet, or problems with the electrical outlet itself can interrupt the charging process. Always check the simplest solution first by testing the outlet with another device.
Contact Contamination
Dust and debris can accumulate on the charging contacts of both the vacuum and the charging base, creating a barrier that prevents proper electrical connection. This issue is particularly common in households with pets or high dust levels.
Internal Connection Problems
Over time, internal connections between the battery and the motor or between the charging socket and the battery can loosen or corrode. These connection issues often result in intermittent charging or the vacuum failing to power on despite charging attempts.
Diagnosing Your DC44 Charging Issue
Before attempting repairs, it’s essential to accurately diagnose the problem:
Power Source Verification
First, ensure your charging issue isn’t simply due to a faulty power outlet:
– Plug another device into the same outlet to confirm it’s working
– Try connecting your Dyson charger to a different outlet
– Check if the house circuit breaker has tripped
Battery Assessment
Examine your battery for signs of failure:
– Look for physical damage like bulging, leakage, or discoloration
– If possible, test the battery voltage using a multimeter—a healthy Dyson DC44 battery should read approximately 14-18 volts when partially charged, and around 21.5 volts when fully charged
– Note how long the vacuum runs when fully charged—significantly reduced runtime indicates battery degradation
Charging Dock Examination
Inspect the charging base thoroughly:
– Check for visible damage to the dock housing
– Examine the contacts for corrosion or dirt buildup
– Verify that all connections between the dock and power cord are secure
– If available, test the charging dock with a multimeter to confirm it’s outputting the correct voltage
Vacuum Inspection
Check the vacuum itself for issues:
– Examine the charging socket for damage or debris
– Look for loose connections where the battery connects to the vacuum
– Ensure the dust bin and filters are clean, as excessive blockage can cause performance issues that might be mistaken for charging problems
Step-by-Step Troubleshooting Solutions
Quick Reset Procedure
Often, a simple reset can resolve charging issues:
1. Unplug the vacuum from the charging base and power source
2. Press and hold the trigger button for approximately 30 seconds to discharge any residual power
3. Reconnect to the charging base
4. Allow at least 3-4 hours for a complete charging cycle
Cleaning Charging Contacts
Dirty contacts often prevent proper charging:
1. Ensure the vacuum is powered off
2. Locate the charging contacts on both the vacuum and charging base
3. Gently clean the contacts using a soft, lint-free cloth
4. For stubborn corrosion, lightly dampen a cotton swab with rubbing alcohol
5. Allow contacts to dry completely before attempting to charge
6. Reconnect and test charging functionality
Power Cord Inspection and Repair
A damaged power cord can interrupt charging:
1. Visually examine the entire length of the power cord for cuts, frays, or kinks
2. Pay special attention to the areas where the cord connects to the charging base and wall plug
3. If you find a severed wire (particularly the red wire in the charging cable), you can:
– Trim the damaged section
– Reconnect the wires ensuring proper polarity
– Secure with electrical insulation tape
4. Replace the entire cord if damage is extensive
If the power cord is damaged, it’s safer and more reliable to replace it rather than attempting a repair.

High-quality universal charger for Dyson DC44 with global voltage compatibility
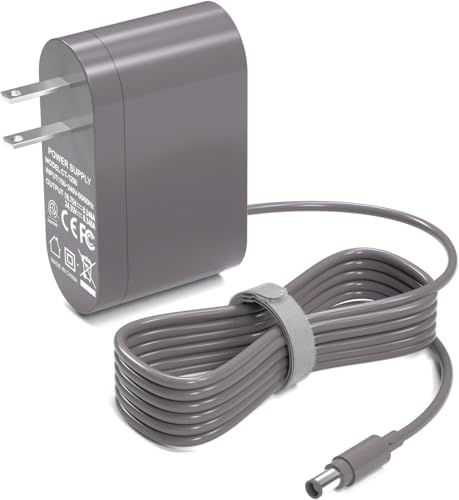
Extended cable length with safety certifications for Dyson DC44

Extended warranty charger with safety certifications for Dyson DC44
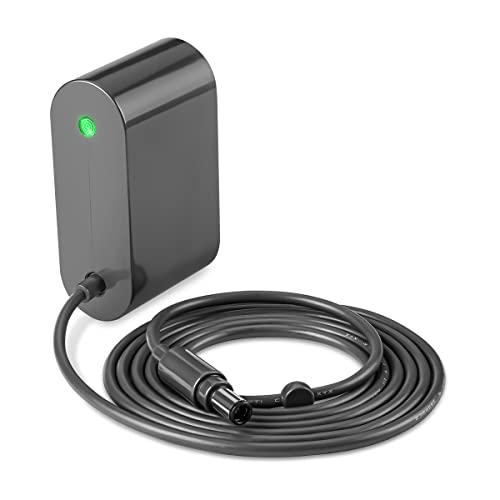
Safety-certified charger with fireproof housing for Dyson DC44
Charging Socket Repair
A loose charging socket can cause intermittent charging:
1. Identify if your DC44 uses a three-pin connection type (central pin, outer metal ring, and earth)
2. Disassemble the socket carefully using appropriate screwdrivers
3. Examine the copper contacts for looseness
4. Gently bend the copper contacts outward to improve connection
5. Lightly scratch the outer surface of contacts to remove oxidation
6. Reassemble the socket and test charging
Battery Replacement Procedure
If your battery is failing, replacement is often necessary:
Identifying Your Battery Type
Dyson DC44 vacuums use two main battery types:
– Type A: No tab on top, more common in pre-2013 models
– Type B: Tab on top, longer arm on the pack, typically found in post-2013 models
Replacement Steps
-
Access the Battery Compartment:
– Open the top lever to disassemble the vacuum
– Remove the air filter (this is also a good time to clean it) -
Remove the Old Battery:
– Locate and remove two screws (one at the front, one at the back)
– Carefully extract the battery, noting whether it’s Type A or Type B -
Install the New Battery:
– Insert the replacement battery through the bottom of the housing
– Ensure proper alignment with the connection points
– Reinstall screws: use the longer screw in the back and the shorter in the front
– Use needle-nose pliers if needed to align the screw holes -
Reassemble and Test:
– Replace the air filter, ensuring the tab aligns properly
– Secure the housing
– Connect to the charging base and allow for a full charge
– Test the vacuum’s operation
If your Dyson DC44 battery is no longer holding a charge or has significantly reduced runtime, it’s time for a replacement. Be sure to choose the correct type (A or B) for your model.

Upgraded high-capacity battery with safety protections and extended runtime

Certified replacement with extended runtime and safety protections
Factory Reset Method
For electronic issues, try this more thorough reset:
1. Disconnect the vacuum from all power sources
2. If possible, remove the battery
3. Press and hold the main power button for approximately 60 seconds
4. Reinstall the battery
5. Connect to the charging base and allow for a complete charging cycle
Preventive Maintenance Tips
Regular Cleaning Routine
Prevent future charging issues with these maintenance practices:
– Wipe charging contacts weekly with a clean, dry cloth
– Empty the dust bin after each use to prevent blockages
– Clean or replace filters monthly—use an air compressor or blower for thorough cleaning
– Allow filters to dry completely (at least 24 hours) before reinstallation
Proper Storage Practices
How you store your Dyson affects its longevity:
– Store the vacuum upright on its charging dock when not in use
– Keep in a cool, dry location away from direct sunlight and extreme temperatures
– Avoid storing with a completely depleted battery—maintain at least some charge
– Keep away from moisture to prevent internal corrosion
Battery Optimization
Maximize your battery’s lifespan:
– Allow the battery to discharge completely once every 1-2 months
– Avoid leaving the vacuum on the charger for extended periods after full charge
– If storing long-term, charge to about 50% capacity first
– Use the vacuum regularly to keep the battery active
Addressing Filter and Canister Blockages
Blockages can affect charging and performance:
Filter Maintenance
- Remove the filter by pressing the release button
- Tap gently to remove loose debris
- For thorough cleaning, use an air compressor or blower
- Alternatively, rinse with cold water (no soap)
- Allow to dry completely for 24 hours before reinstalling
Canister Cleaning
- Empty the canister by pressing the release button
- Check for debris around the cyclone unit
- Clear any blockages from small holes at the base of the canister
- Inspect and clear the rear of the barrel where debris can accumulate
- Reassemble and test vacuum operation
Frequently Asked Questions (FAQ)
How long should my Dyson DC44 battery last?
A new Dyson DC44 battery typically provides 15-20 minutes of continuous use on standard mode. Over time, this will naturally decrease. After 2-3 years of regular use, you might notice a significant reduction in runtime, indicating it’s time to consider replacement.
Can I use generic replacement batteries?
Yes, generic batteries can work well for the Dyson DC44 if you verify compatibility with your specific model (Type A or Type B). These typically cost $30-$40, compared to higher-priced official Dyson replacements. Ensure the voltage specifications match the original (22V nominal).
Why does my Dyson DC44 run for only a few seconds?
If your vacuum runs briefly before shutting down, this typically indicates a severely depleted battery, a failing battery that can’t hold charge, or a blockage in the filter system causing the motor to overheat. Clean all filters thoroughly and ensure a full charge cycle before testing again.
Is it worth repairing the charging socket myself?
Repairing the charging socket yourself can save money if the battery replacement isn’t actually needed.
How do I know if my charger is working properly?
A functioning Dyson DC44 charger should show a light indicator when connected to power. If you have access to a multimeter, you can test the output voltage at the charging contacts—it should match the specifications listed on the charger (typically around 26-27V). Alternatively, try charging for several hours and then test if the vacuum runs longer than before.
Conclusion
Most Dyson DC44 charging issues can be resolved through systematic troubleshooting and maintenance. From simple solutions like cleaning charging contacts and performing resets to more involved repairs like fixing charging sockets or replacing batteries, this guide provides comprehensive approaches to restore your vacuum’s functionality.
Remember that preventive maintenance is key to avoiding future charging problems. Regular cleaning of contacts, filters, and the canister will help maintain optimal performance. When replacing parts, verify compatibility with your specific model, particularly when selecting battery types.
For persistent issues that resist DIY solutions, Dyson’s customer support or certified repair centers remain viable options. However, armed with the knowledge from this guide, you can address many common charging problems and extend the life of your Dyson DC44 vacuum without professional intervention.


