
The Dyson DC41 is a powerful upright vacuum cleaner that many homeowners rely on for effective cleaning. However, a frequently reported issue is the wand not turning on or functioning properly, which can significantly impact your cleaning routine.
Affiliate disclosure: As an Amazon associate, We'll earn a commission for every successful order through our affiliate links in the article. However, you won’t be charged anything for this.
When your Dyson DC41 wand fails to turn on, it can be frustrating, especially when you’re in the middle of cleaning. This comprehensive guide will walk you through the most common causes of this problem and provide step-by-step solutions to get your vacuum working again. From simple blockages to more complex internal issues, we’ll cover everything you need to know to troubleshoot and fix your Dyson DC41 wand.
The Dyson DC41 Wand System: How It Works
The wand system on the Dyson DC41 is designed to provide versatile cleaning capabilities. It consists of several key components that work together:
- The extendable solid tube (wand) that sits inside a stretchy hose
- A latching mechanism that secures the wand to the main unit
- A change valve that switches suction between the floor head and the wand
- Various connection points that must remain clear for proper airflow
When functioning correctly, the system allows you to switch seamlessly between floor cleaning and using attachments for above-floor cleaning. The wand should activate automatically when properly positioned and latched.
Primary Wand Issues and Their Solutions
No Suction in the Wand
Many users report having no suction in the wand despite the main vacuum working properly. This is one of the most common complaints with the DC41.
Step-by-Step Solution:
Check for hidden clogs:
- Even when the hose appears clear, internal blockages can exist
- Detach the wand completely from the vacuum
- Run warm water through the wand to dislodge potential clogs
- Gently tap the wand against a sink to help loosen stubborn debris
- Allow to dry completely before reattaching
Inspect the change valve:
- Remove the secondary filter on the left side of the vacuum
- Locate the change valve near where the hose connects to the canister
- Check for debris such as pet hair or fine particles blocking the valve
- Ensure the valve moves freely to switch suction modes
Clean thoroughly with a cloth or small brush
Clear the hose connection points:
- Disconnect the hose from both the wand and the main unit
- Check both ends for blockages
- Use a long, thin object (like a broom handle) to gently push through any clogs
- Inspect for tears or damage that might cause suction loss
Wand Failing to Latch Properly
Another common issue is the wand not latching correctly into place, which prevents it from activating.
Step-by-Step Solution:
Align the extension tube properly:
- Fully extend the wand
- Check the bottom of the hose for obstructions
- Retract the wand
- Attempt to latch it back into place with proper alignment
Address an overstretched hose:
- An overstretched hose can sit too high on the back of the main body
- Inspect the hose position
- If the hose appears permanently stretched, it may need replacement
- Dyson Genuine Replacement Hose Assembly (Part #920596-07) is recommended
If the hose is overstretched or damaged, replacing it is often the best solution to restore proper functionality.

Official Dyson replacement for DC41 models

Enhanced flexibility for multi-floor cleaning

All-in-one hose and washable filter solution
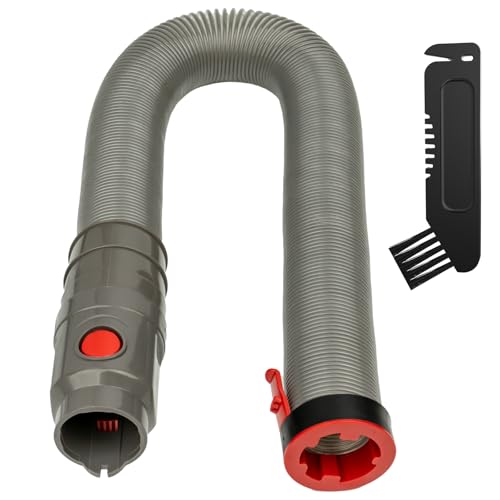
Durable third-party alternative with tools
- Use gentle force if necessary:
- If the wand seems physically damaged or worn
- Gently tap the wand with a rubber mallet to help it seat properly
- Never force components together as this can cause further damage
Hose Cinching or Accordion Effect
Some users report the hose cinching up like an accordion when using the wand, which restricts airflow and prevents proper function.
Step-by-Step Solution:
Untwist the hose:
- Detach the hose completely
- Lay it out straight and check for twists
- Gently rotate to remove any twisting
- Reattach to the vacuum
Check for internal damage:
- Inspect the interior lining of the hose
- Look for tears or separation that might cause the accordion effect
- If damaged, replace the hose assembly
- If the hose is internally damaged, it will likely need replacing to prevent airflow restriction.
- Verify proper hose installation:
- Ensure the hose is seated correctly at both connection points
- Listen for a clicking sound that indicates proper attachment
- Test functionality after reattachment
Advanced Troubleshooting for Persistent Issues
If the basic troubleshooting steps don’t resolve the wand issues, more advanced measures may be necessary.
Accessing and Cleaning the Main Unit Chamber
For persistent clogs that affect wand performance:
Access the main chamber:
- Locate the gold prongs on the vacuum’s base
- Use the red clip on the base to detach the unit
- Gently remove the chamber by unhooking the top latch
Perform deep cleaning:
- Use gloves for protection
- Remove debris such as paper, hair, and dust
- For stubborn buildup, use disinfectant wipes to clean the interior
- Pay special attention to the pathways that connect to the wand system
Reassembly:
- Ensure all components are completely dry
- Reattach the chamber securely
- Verify the red clip is properly engaged
Addressing Deep Hose Clogs
For clogs located deep within the hose system:
Access the hose inlet:
- Remove the canister
- Locate the hose inlet near the base
- Lift the flip-up panel to expose the hose’s interior
Extract deep clogs:
- Use needle-nose pliers carefully to avoid damaging the hose liner
- Remove debris from deep within the system
- Check for complete clearance by shining a light through the hose
Thorough cleaning:
- Use compressed air to blow out any remaining debris
- Wipe down accessible areas with a microfiber cloth
- Reassemble all components
Maintenance Tips to Prevent Wand Issues
Regular maintenance can help prevent wand problems from occurring in the first place.
Weekly Maintenance Tasks
Empty the dust container:
- Turn off and unplug the vacuum
- Press the release button to detach the dust container
- Empty contents into a trash bin
- Wipe the container with a damp cloth
Check for visible blockages:
- Inspect the wand and hose for obvious obstructions
- Look for debris caught at connection points
- Clear any visible blockages immediately
Test wand functionality:
- Detach and reattach the wand weekly
- Verify proper suction through the wand
- Address minor issues before they become major problems
Monthly Maintenance Tasks
Clean the filters thoroughly:
- Locate the filter inside the motor housing
- Remove carefully and rinse under cold water
- Allow to dry completely (24 hours minimum) before reinserting
- Replace HEPA filters according to manufacturer recommendations
If your vacuum’s performance is still suffering after cleaning, it might be time to replace the filters.
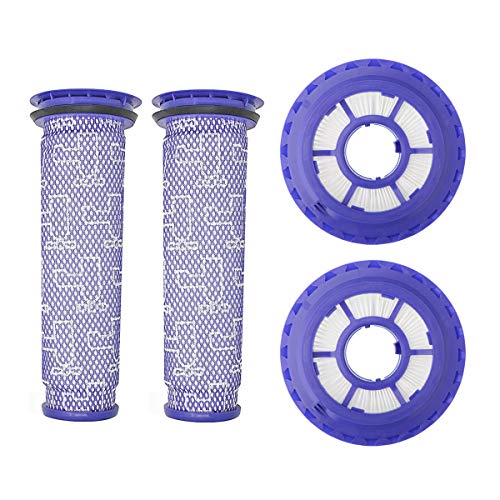
Premium HEPA filters with H12 efficiency for enhanced filtration and long-term use

Cost-effective 6-pack with cleaning brush for comprehensive filter replacement
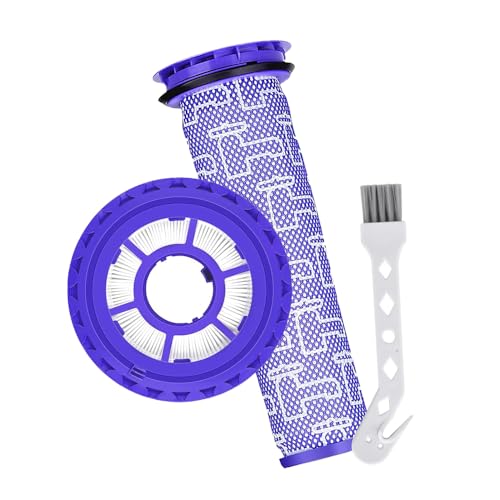
Affordable single-set filters with high-efficiency HEPA filtration

Complete replacement set with HEPA H12 filters and cleaning brush included
Deep clean the wand and hose:
- Detach all components
- Flush with warm water to remove built-up debris
- Allow to dry completely before reassembly
- Check for damage that might require part replacement
Inspect the change valve:
- Access the valve mechanism
- Clean thoroughly to prevent buildup
- Ensure smooth operation when switching between floor and wand modes
Annual Maintenance Tasks
Deep clean the brush roll:
- Remove the brush roll following the user manual
- Soak in mild soapy water for 10 minutes
- Scrub with an old toothbrush to remove stubborn dirt
- Rinse and dry completely before reinstalling
Check for worn parts:
- Inspect wheels, casters, and axles for wear
- Examine the hose for cracks or tears
- Test all accessories for proper function
- Replace any worn components
Verify electrical connections:
- Check the power cord for damage
- Test all switches for proper operation
- Ensure the motor is functioning correctly
Frequently Asked Questions (FAQ)
Why does my Dyson DC41 wand have no suction even though the vacuum works fine?
This is typically caused by a blockage in the hose or wand that isn’t immediately visible. The most common culprits are internal clogs of hair, dust, and debris that accumulate over time. The change valve that switches suction between the floor head and wand may also be stuck or clogged. Follow the troubleshooting steps above to locate and clear these hidden blockages.
How do I know if my Dyson DC41 hose needs replacement?
Signs that your hose needs replacement include visible cracks or tears, persistent accordion-like cinching when in use, and continued suction loss despite clearing all blockages. If your hose appears permanently stretched or damaged, it’s best to replace it with a genuine Dyson part (Hose Assembly #920596-07) to ensure proper fit and function.
What causes the Dyson DC41 wand to not latch properly?
Several factors can prevent proper latching, including misalignment of the extension tube, an overstretched hose that positions components incorrectly, physical damage to the latching mechanism, or debris caught in the connection points. Regular cleaning and proper alignment of components will help prevent latching issues.
How often should I clean my Dyson DC41 filters?
Dyson recommends washing the main filter monthly with cold water and allowing it to dry completely (at least 24 hours) before reinserting. The HEPA filter should be replaced according to the manufacturer’s guidelines, typically every 6-12 months depending on usage. Regular filter maintenance is crucial for maintaining proper suction and preventing strain on the motor.
Can I use my Dyson DC41 without the wand functioning?
Yes, you can still use your DC41 for floor cleaning even if the wand isn’t functioning properly. The main floor head should continue to work as long as the motor and brush roll are operational. However, you’ll lose the ability to use attachments for above-floor cleaning until the wand issue is resolved.
Conclusion
The Dyson DC41’s wand not turning on is a common but fixable problem. In most cases, the issue stems from blockages in the airflow system, improper alignment of components, or worn parts that need replacement. By following the troubleshooting steps outlined in this guide, you can identify and resolve the specific cause of your wand malfunction.
Regular maintenance is key to preventing these issues from recurring. Implementing weekly, monthly, and annual maintenance routines will keep your Dyson DC41 operating at peak performance and extend its lifespan. If you’ve tried all the suggested solutions and still experience problems, contacting Dyson customer support or a certified repair technician may be necessary.
Remember that genuine Dyson replacement parts are recommended for any repairs to ensure proper fit and function. With proper care and timely troubleshooting, your Dyson DC41 can continue to provide powerful cleaning performance for years to come.


