
The Dyson DC41 is a powerful vacuum cleaner known for its reliable performance, but like any electronic device, it can experience issues. One of the most frustrating problems is when your Dyson DC41 simply refuses to turn on. This leaves you with a non-functional appliance and potentially dirty floors.
Affiliate disclosure: As an Amazon associate, We'll earn a commission for every successful order through our affiliate links in the article. However, you won’t be charged anything for this.
In this comprehensive guide, we’ll explore the common reasons why your Dyson DC41 might not be powering up and provide detailed troubleshooting steps to get it working again. From simple power supply issues to more complex motor problems, we’ll cover everything you need to know to diagnose and fix your vacuum. By following these steps, you can potentially save money on repairs and extend the life of your Dyson DC41.
Power Supply Troubleshooting
When your Dyson DC41 won’t turn on, the first place to look is the power supply. Power issues are often the simplest to fix and require no technical expertise.
Checking the Electrical Connection
Start by ensuring your vacuum is properly connected to a working power source:
- Verify the vacuum is plugged firmly into the wall outlet
- Test the outlet with another device (like a lamp) to confirm it’s providing power
- Try plugging the vacuum into a different outlet to rule out issues with the original socket
- If you’re using an extension cord or power strip, try connecting directly to a wall outlet
Inspecting the Power Cord
Power cord damage is a common culprit when vacuums won’t turn on:
- Examine the entire length of the power cord for visible damage such as cuts, frays, or exposed wires
- Pay special attention to the areas near the plug and where the cord enters the vacuum
- Check for any bends or kinks that might be disrupting the electrical flow
- If you find damage, the cord will need to be replaced to restore functionality
If you’ve found damage to the power cord, replacing it is essential for safety and functionality.
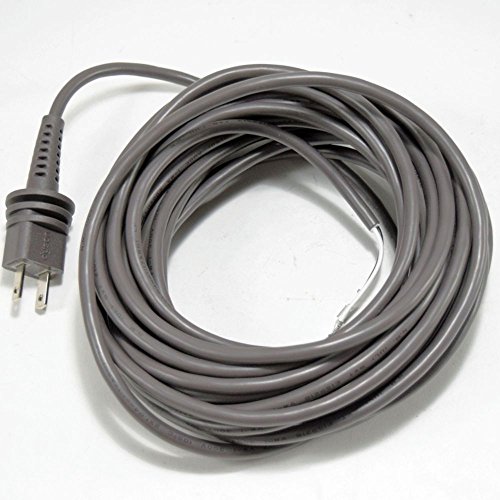
Official replacement power cord for Dyson DC33 Upright vacuum

UL-listed replacement cord with 200-day warranty
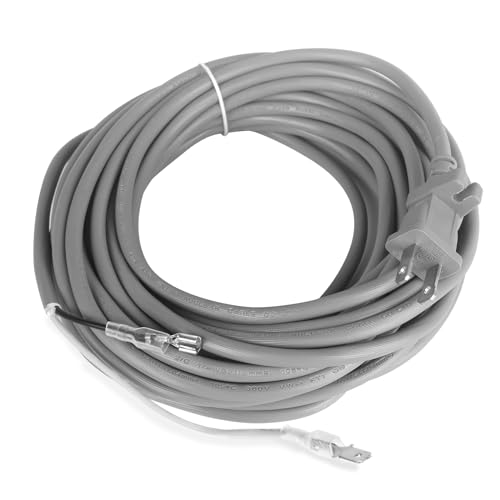
Flexible 36ft cord with waterproof protection
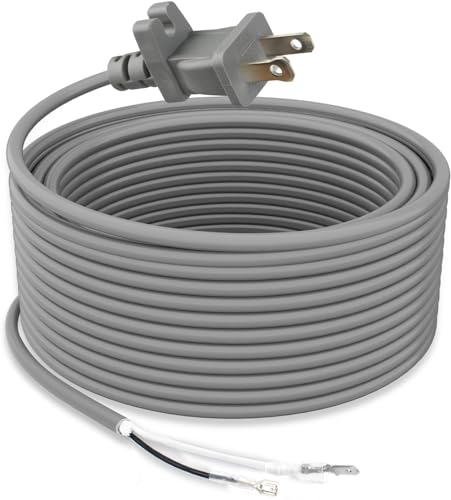
Durable replacement with extended reach
Testing the Wall Socket
If you suspect your outlet might be the problem:
- Use a socket tester or multimeter to verify the outlet is providing the correct voltage
- Check your home’s circuit breaker to ensure it hasn’t tripped
- If the outlet is not functioning properly, consult an electrician for repairs
Overheating Protection and Reset Procedures
The Dyson DC41 includes built-in safety features that can temporarily disable the vacuum under certain conditions.
Resetting After Overheating
When your Dyson DC41 overheats, it automatically shuts down to prevent damage:
- Unplug the vacuum from the power source immediately
- Allow the vacuum to cool down completely for at least 30-60 minutes
- While waiting, check for and clear any blockages that might have caused overheating
- After the cooling period, plug the vacuum back in and attempt to turn it on
- If the vacuum operates normally, the overheating protection was likely the issue
Addressing Electrical Short Circuits
Internal short circuits can prevent your vacuum from powering on:
- Unplug the vacuum and inspect for any obvious signs of electrical damage
- Check for burning smells or discoloration on the vacuum’s body
- If you suspect a short circuit, do not attempt to operate the vacuum
- Consult a professional technician as internal electrical repairs require expertise
Motor and Fan System Diagnosis
The motor is the heart of your Dyson DC41, and problems with this component can prevent the vacuum from turning on.
Diagnosing Motor Failure
If you suspect motor issues, perform these diagnostic steps:
- First, verify power is reaching the vacuum using the previous troubleshooting steps
- Listen for any unusual sounds when attempting to start the vacuum
- Check if the power head operates but produces no suction, indicating a main motor problem
- For advanced troubleshooting, use a voltmeter to measure AC voltage at the motor terminals:
- A reading of 120V AC confirms power is reaching the motor
- If power is present but the motor doesn’t run, the motor likely needs replacement
If the motor is receiving power but not running, it likely needs to be replaced.
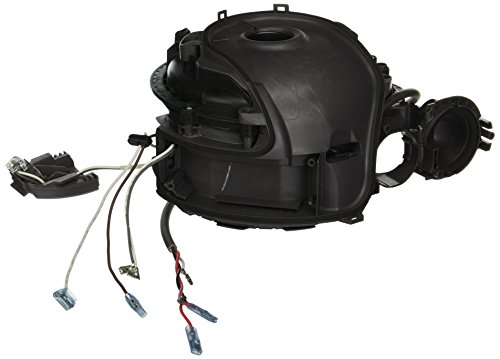
Official Dyson motor replacement for DC41 vacuums
Removing Blockages Affecting the Motor
Blockages can strain the motor and prevent proper operation:
- Turn the vacuum upside down and inspect the brush roll for tangled hair or debris
- Remove the brush roll if necessary to clear obstructions
- Check the air pathway between the brush head and the dust container
- Ensure the cyclone assembly is free from blockages
- Inspect the pre-motor and post-motor filters for excessive dirt buildup
Brush Head Maintenance
A malfunctioning brush head can affect overall vacuum performance:
- Rotate the adjustment dial (accessed by turning the vacuum sideways) until no resistance is felt
- Twist the brush head 90° and lift it off for thorough inspection
- Use a razor blade to carefully cut through any hair or string tangled around the brush
- Remove the brush head with the red hook tool and check for hidden obstructions
- Clean the brush thoroughly before reinstalling
If the brush head is damaged or worn out, replacing it can restore optimal cleaning performance.

Official replacement brushbar for Dyson DC41 Animal vacuums

Affordable compatible brushbar with precise fit
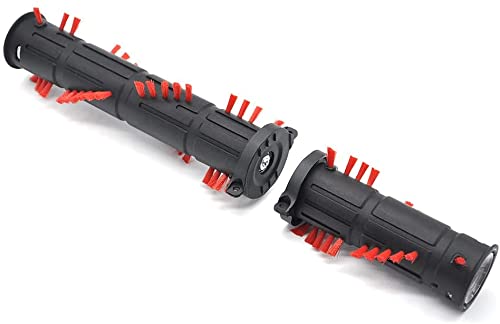
Budget-friendly replacement for DC41 Animal models

Durable third-party replacement with precise fit
Filter and Dust Collection System Maintenance
Proper maintenance of the filtration system is crucial for your Dyson DC41’s performance.
Cleaning the Filters
Clogged filters can cause the vacuum to shut down:
- Locate the washable filter at the top of the dust bin
- Remove the filter and rinse thoroughly with cold water only (no detergents)
- Allow the filter to dry completely for at least 24 hours before reinstalling
- Find the second filter located behind the bin and repeat the cleaning process
- For optimal performance, clean both filters every 3 months
If your filters are damaged or excessively worn, consider replacing them to maintain optimal suction and air quality.

Direct replacement with original part numbers for DC41 models
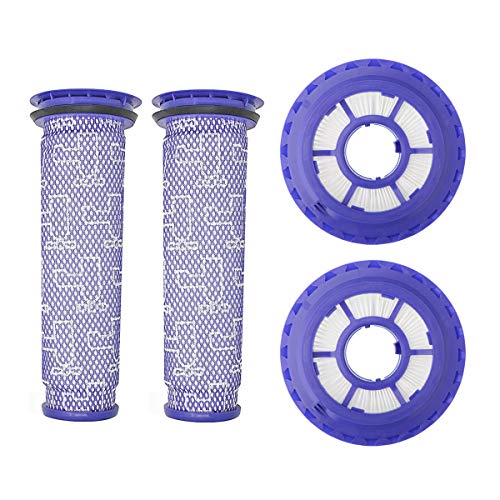
Premium HEPA filters with extended 2-pack value
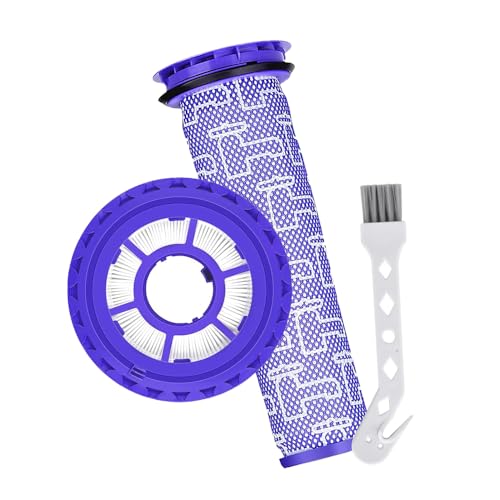
Budget-friendly HEPA replacement with cleaning brush

Premium filtration with included cleaning brush
Checking the Dust Container
An improperly seated or overfilled dust container can prevent proper operation:
- Empty the dust container if it’s approaching the MAX line
- Clean the container thoroughly, paying attention to the cyclone assembly
- Inspect the seals around the dust container for dirt or debris
- Ensure the container clicks firmly into place when reattached to the vacuum
- Verify the cyclone assembly is properly aligned and secured
Inspecting the Hose and Wand System
Blockages in the hose or wand can affect overall vacuum performance and potentially trigger safety shutoffs.
Checking for Clogs
To thoroughly inspect for blockages:
- Detach the hose by pressing the red button on the bin’s back panel
- Visually inspect the entire length of the hose for obstructions
- Drop a small coin through the hose to verify it’s completely clear
- Remove the wand and check for blockages at both ends
- Inspect the connection points where the hose meets the vacuum and wand
If the hose is damaged or has persistent blockages, replacing it can restore proper suction.

Official Dyson replacement with OEM certification

Enhanced durability for multi-model compatibility

Direct replacement for internal vacuum hose
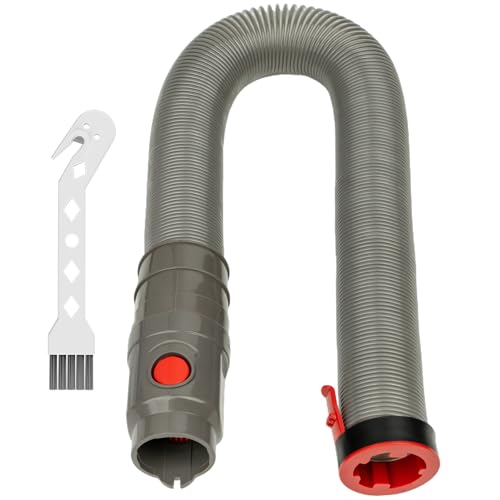
Flexible hose with 9.5ft maximum extension
Testing Suction Points
To isolate where suction might be failing:
- Detach the hose from the wand and test suction directly at the hose
- If suction is strong at the hose but weak at the wand, the wand is likely blocked
- Test suction at the main vacuum inlet with attachments removed
- If suction varies at different points, systematically check each component
User Interface and Control Panel Issues
Sometimes the problem lies with the controls rather than the vacuum’s mechanical components.
Inspecting Control Buttons
Faulty buttons can prevent proper operation:
- Check all buttons on the control panel for proper movement
- Clean around the buttons to remove any dirt or debris that might be causing them to stick
- Press each button multiple times to see if they respond inconsistently
- Look for any visible damage to the control panel
Checking Indicator Lights
Indicator lights can provide valuable diagnostic information:
- Observe any lights that illuminate when attempting to power on the vacuum
- Refer to your user manual to interpret what different light patterns indicate
- Flashing lights often signal specific issues like blocked filters or overheating
- No lights at all typically indicate a power supply issue
Frequently Asked Questions (FAQ)
Why does my Dyson DC41 turn on but then immediately shut off?
This typically indicates an overheating issue or a blockage. First, check all filters and clean them thoroughly. Next, inspect the entire airflow path for blockages, including the hose, wand, and brush head. If the problem persists after clearing all blockages and cleaning filters, the thermal cut-out switch may be malfunctioning or the motor could be failing.
How often should I clean the filters on my Dyson DC41?
Dyson recommends cleaning both filters every 3 months for optimal performance. However, if you vacuum frequently or have pets, you might need to clean them more often. Always allow filters to dry completely (at least 24 hours) before reinstalling them in the vacuum.
Can a clogged brush bar prevent my Dyson DC41 from turning on?
Yes. A severely clogged brush bar can create excessive resistance that triggers the vacuum’s safety features, preventing it from turning on. Regularly inspect the brush bar for hair, string, and debris. Use scissors or a razor blade to carefully cut away entanglements, and remove the brush bar completely for thorough cleaning if necessary.
Is it worth repairing my Dyson DC41 if the motor has failed?
This depends on several factors. If your vacuum is still under warranty, contact Dyson for a potential free repair or replacement. If it’s out of warranty, compare the cost of a motor replacement (typically $100-150 plus labor) against the price of a new vacuum. Sometimes, investing in a newer model with updated features makes more economic sense than repairing an older unit.
What’s the difference between a motor problem and a power supply problem?
A power supply problem means electricity isn’t reaching the vacuum properly. This could be due to a faulty outlet, damaged cord, or internal wiring issue. You can diagnose this by checking if the vacuum shows any signs of receiving power (lights, sounds). A motor problem occurs when power is reaching the vacuum, but the motor itself isn’t functioning. This is often indicated by unusual noises, burning smells, or the vacuum receiving power but not creating suction.
Conclusion
A non-functioning Dyson DC41 can be frustrating, but many issues can be resolved through systematic troubleshooting. Start with the simplest potential causes like power supply problems before moving on to more complex issues like motor failure. Regular maintenance—including emptying the dust container, cleaning filters, and checking for blockages—can prevent many common problems.
If you’ve tried all the troubleshooting steps in this guide without success, it may be time to consult a professional repair service or contact Dyson customer support directly. Remember that some repairs might not be economically viable compared to purchasing a new vacuum, especially for older models.
By following the detailed steps in this guide, you can diagnose and potentially fix your Dyson DC41 issues, saving both time and money while extending the life of your vacuum cleaner.


