
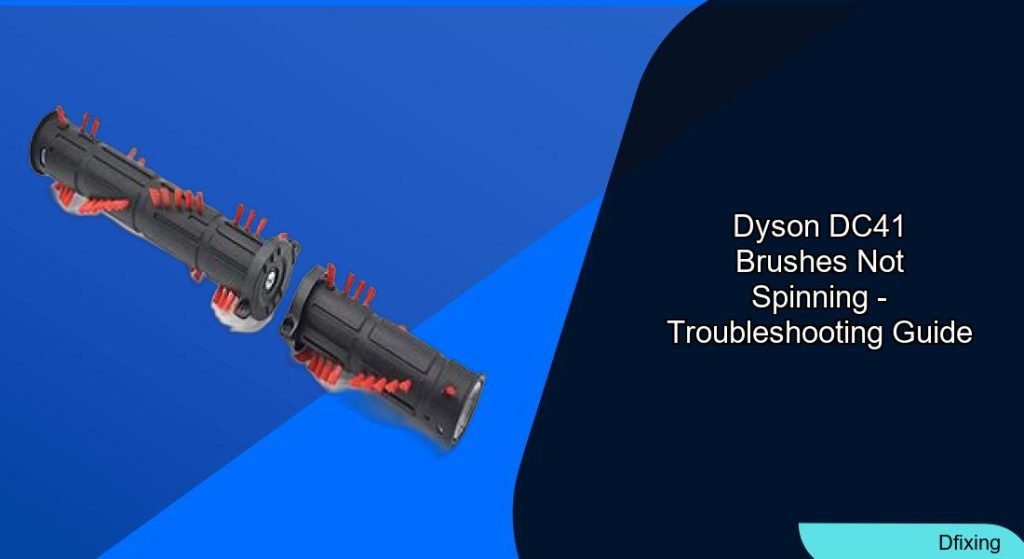
A Dyson DC41 with a non-spinning brushroll can frustrate users with poor cleaning performance, reduced suction, and unusual noises. This issue often stems from mechanical or electrical failures in components like the motor, brushroll, or drive belt. By systematically inspecting these parts, homeowners can identify and resolve the problem without professional assistance. This guide walks you through diagnostics, repairs, and preventive measures to restore your vacuum’s functionality.
Affiliate disclosure: As an Amazon associate, We'll earn a commission for every successful order through our affiliate links in the article. However, you won’t be charged anything for this.
The article covers essential tools for troubleshooting, step-by-step fixes for common issues, and maintenance tips to avoid future problems. Whether the culprit is a jammed brushroll, a worn drive belt, or a faulty microswitch, this guide equips you with actionable solutions. For advanced cases involving circuit boards or complex electrical systems, we also highlight when to seek expert help or consider replacement options.
Diagnosing the Core Issue
Brushroll Motor Malfunction
A defective motor is a primary cause of brushroll failure. Begin by unplugging the vacuum and removing the bottom plate of the vacuum head. Inspect the motor for visible damage, such as overheating or burnt wiring. Use a multimeter to test electrical connections: if no power reaches the motor, check for loose or damaged wires. A voltage check revealing over 300 DC volts at the connector (with a non-functional motor) confirms the motor needs replacement.
If the motor is indeed the issue, replacing it with a compatible component is necessary to restore the brushroll’s function.

Genuine OEM cleanerhead with rotating beater bar for Dyson DC41-2013
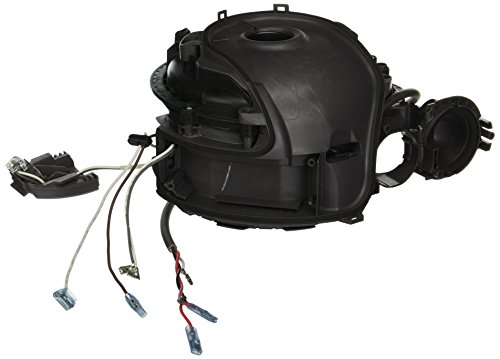
OEM motor assembly for Dyson DC41/DC65/DC66 vacuum models
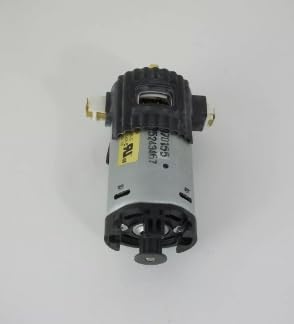
Third-party compatible brushroll motor for Dyson DC41
Obstructed Brushroll
Hair, string, or debris缠绕 can jam the brushroll. Remove the brushroll by unscrewing its fasteners and examine the shaft for blockages. Carefully cut away tangled materials with scissors or a knife. If the brushroll is clear but still immobile, apply a small amount of lubricant to the bearings. For DC40 models, use a wire brush to clean hair from the caster wheels and bearings, ensuring smooth movement.
If cleaning and lubricating doesn’t solve the problem, the brushroll itself might be damaged or worn out, requiring a replacement.
Search term for Amazon: Dyson DC41 Brushroll Replacement
Worn or Broken Drive Belt
A frayed or loose drive belt prevents the brush roll from spinning. After accessing the brush roll, inspect the belt for wear. Replace it with a genuine Dyson belt, ensuring proper tension around the motor pulley and brush roll. Reassembly requires aligning the belt correctly to avoid misalignment, which can cause noise or further damage.
Troubleshooting Electrical and Mechanical Components
Microswitch Failure in the Hinge
The micros witch disables the brush roll when the vacuum is upright. If this switch fails, the brush roll remains inactive. Replace the microswitch by accessing the hinge mechanism, ensuring the new component restores functionality when the vacuum tilts forward.
Faulty Electrical Connections
Loose or frayed wires inside the brush head can disrupt power flow. Inspect all connections for damage and secure them with electrical parts cleaner to remove debris. A continuity test with a multimeter helps identify breaks in the circuit.
Battery and Power Delivery Problems
A depleted or malfunctioning battery may fail to supply adequate power. Test battery health with a charger or multimeter. If the battery functions but the brushroll remains idle, check for internal power delivery issues, such as a damaged electrical loom that passes voltage but insufficient current.
If the battery is not holding a charge or providing enough power, a replacement is necessary.
Circuit Board Issues (Part 21029)
In DC41 models, a faulty circuit board in the motor compartment (part number 21029) can halt the brush roll despite functional motor and power supply. Confirm no clogs exist, then test continuity in motor leads. If power doesn’t reach the brush roll’s takeoff point, replace the circuit board. Note that part scarcity may necessitate replacing the entire vacuum, as seen in user cases opting for models like the “Sibo X7 Premium Pet.”
Step-by-Step Solutions
Brush Switch Replacement
- Preparation: Remove the vacuum hose and four back-panel screws.
- Access the Switch: Detach the front panel by pressing inward on tabs, noting spring placement to avoid loss.
- Replace the Switch: Disconnect the faulty switch (distinct from the power switch) and install the new one. Align black and red wires to the right side of the back panel.
- Reassembly: Reattach the front panel and screws. Test the brush by switching the vacuum out of the upright position.
Beater Brush Reset Technique
For temporary fixes, extend the beater bar fully and toggle the on/off button five times while extended. This resets the mechanism in some cases.
Maintenance and Preventive Measures
Regular Cleaning and Inspection
- Empty the Dust Bin: After each use to maintain suction.
- Clean the Filter: Monthly cleaning prevents clogs and motor strain.
- Inspect the Brushroll: Bi-weekly checks for debris or wear.
Preventive Practices
- Avoid Large Debris: Vacuum large objects manually to prevent tangling.
- Adjust Settings: Use appropriate floor-type settings to reduce brushroll stress.
Airflow and Design Considerations
Over time, aged plastic components in Dyson models like the DC41 can degrade, causing suction loss due to gasket leaks. Regularly check airflow pathways for cracks or gaps. Additionally, the microswitch activator’s complex spring mechanism is prone to dislodging during repairs—handle with care.
Frequently Asked Questions (FAQ)
How often should I clean the brushroll?
Inspect and clean the brushroll every 1-2 weeks, especially if you vacuum pet hair or long fibers regularly.
Can I use third-party replacement parts?
Dyson recommends manufacturer-approved parts for reliability. Used or generic components may compromise performance.
Why does the brushroll stop only when upright?
This is typically due to a faulty microswitch, which disables the brushroll in the upright position to protect floors during hose use.
What tools are essential for repairs?
A screwdriver set, multimeter, wire brush, and lubricant are critical. A Torx T15 screwdriver is also needed for specific fasteners.
Is DIY repair viable for circuit board issues?
If the circuit board (part 21029) fails and replacements are unavailable, consider upgrading to a newer model. DIY repairs for complex electronics carry risks of further damage.
Conclusion
A Dyson DC41 with non-spinning brushes can often be revived through methodical troubleshooting. By addressing motor malfunctions, removing obstructions, replacing worn belts, or fixing electrical components, users can restore their vacuum’s performance. Regular maintenance and preventive care extend the lifespan of critical parts, while awareness of design limitations—like the fragile microswitch—
helps avoid recurring issues. For advanced problems, such as unobtainable circuit boards, investing in a new vacuum may be more practical than repair. Always prioritize safety by unplugging the unit before inspections and seeking professional help if DIY fixes prove inadequate.


