

The Dyson DC39 is known for its powerful cleaning capabilities, but like any vacuum cleaner, it can experience suction problems over time. When your once-powerful Dyson starts struggling to pick up dirt and debris, there’s usually a fixable cause behind it.
Affiliate disclosure: As an Amazon associate, We'll earn a commission for every successful order through our affiliate links in the article. However, you won’t be charged anything for this.
This comprehensive guide will walk you through the most common reasons for suction loss in your Dyson DC39 and provide detailed troubleshooting steps to restore your vacuum’s performance. From simple maintenance tasks to more complex component checks, you’ll learn exactly what to look for and how to address each potential issue effectively.
Common Causes of Dyson DC39 Suction Loss
The first step in resolving suction problems is identifying what’s causing them. Dyson DC39 vacuum cleaners typically lose suction power due to several key factors:
- Blockages in the hose or airways
- Overfilled dust bin
- Dirty or damaged filters
- Worn-out brush rolls
- Issues with the main cleaning head
- Problems with internal components like the changeover valve
- Motor or overheating issues
Each of these problems requires a specific approach to diagnose and fix. Let’s explore each potential cause in detail.
Step-by-Step Blockage Inspection
A blockage in your Dyson’s airflow pathway is the most common cause of suction loss. Follow these comprehensive steps to check for and clear blockages:
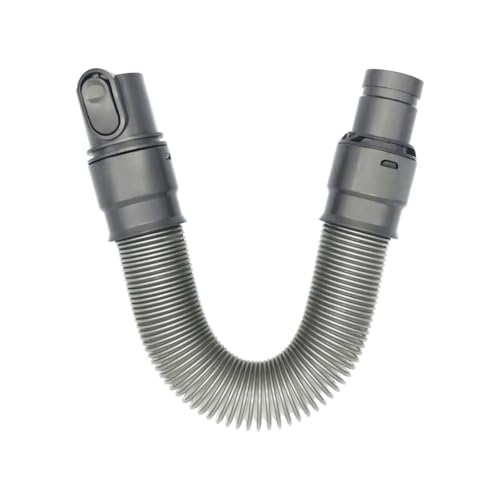
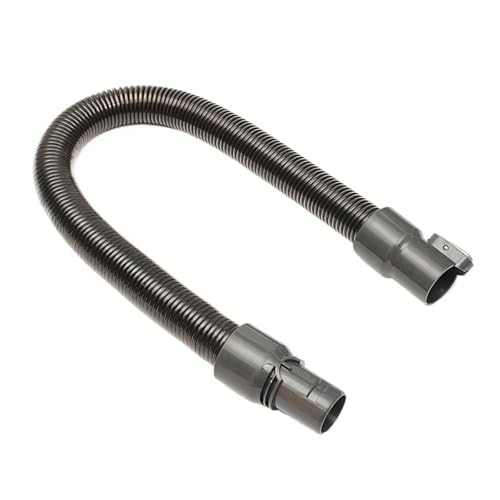
Examining the Main Hose
- Disconnect the hose from both the vacuum body and the wand
- Visual inspection: Look through the hose from end to end using a flashlight to spot any obstructions
- Physical check: Run your hand along the outside of the hose to feel for any trapped objects
- Clearing technique: Use a long, thin object like a knitting needle or straightened wire hanger to gently dislodge any blockages
- Water test: If you suspect a blockage but can’t see it, run water through the hose (ensure it’s completely dry before reattaching)
If the hose is damaged or severely clogged beyond cleaning, consider replacing it to restore optimal airflow.
Lightweight and durable with strong suction for efficient cleaning.
Telescopic design for extended reach and flexible cleaning.
Checking Internal Airways
- Remove the dust bin and inspect the cyclone inlet
- Check the bin connector where the dust bin attaches to the main unit
- Examine the valve area behind where the hose connects to the main body
- Look for foreign objects that might be lodged in corners or crevices
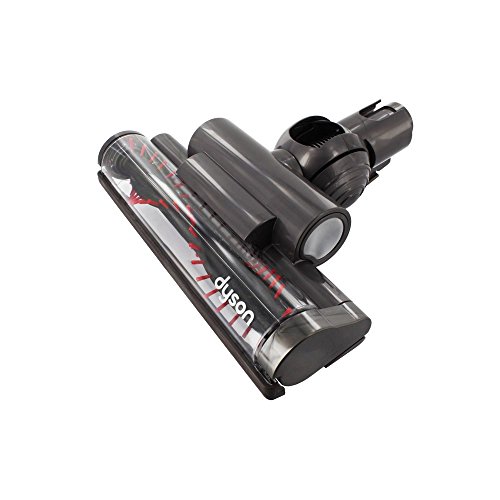
Inspecting the Cleaning Head
- Detach the cleaning head from the wand
- Turn it upside down and check the air intake channel
- Remove any tangled hair or string from the brush roll
- Clear the air passage connecting the head to the wand
Proper Dust Bin Maintenance
An overfilled or improperly sealed dust bin dramatically reduces suction power. Here’s how to properly maintain it:
Emptying Procedure
- Press the red release button on the side of the vacuum
- Hold the bin over a trash can
- Press the gray button (only visible after pressing the red button) to release the bottom trap door
- Tap gently to dislodge stubborn debris
- Clean the cyclone shroud with a dry cloth if dust has accumulated
Bin Seal Check
- Inspect the rubber seals around the bin rim
- Look for cracks or damage that might cause air leaks
- Clean any dirt or debris from the sealing surfaces
- Ensure proper alignment when reattaching the bin
Thorough Filter Cleaning and Replacement
Dirty filters restrict airflow and cause significant suction loss. The DC39 has two main filters that require regular attention:
Pre-Motor Filter Maintenance
- Locate the pre-motor filter (usually a washable foam filter)
- Remove it carefully from its housing
- Rinse thoroughly under cold running water
- Gently squeeze (don’t wring) to remove excess water
- Allow to dry completely for at least 24 hours before reinstalling
HEPA Post-Motor Filter Care
- Find the HEPA filter (typically located on the ball or body of the vacuum)
- Remove the filter housing
- Tap the filter against the inside of a trash can to remove loose dust
- Rinse with cold water if it’s a washable HEPA filter
- Let it dry completely before reinstallation
Replacement Schedule
- Pre-motor filter: Clean every month, replace annually
- HEPA filter: Clean every three months, replace every 6-12 months depending on usage
Brush Roll Inspection and Replacement
The brush roll is crucial for effective carpet cleaning. When it’s worn or damaged, suction performance suffers:
Checking Brush Condition
- Turn off and unplug the vacuum
- Flip over the cleaning head
- Inspect the bristles for wear, damage, or excessive hair wrapping
- Check the brush roll ends for smooth rotation
- Examine the drive belt for stretching or damage
Clearing Entanglements
- Use scissors to cut away hair and string (being careful not to cut the bristles)
- Pull debris free from the brush and end caps
- Clean the brush housing of any accumulated dirt
- Check for free movement after cleaning
Replacement Process
- Remove the sole plate (usually requires a coin to turn the fasteners)
- Lift out the old brush roll
- Remove and replace the drive belt if necessary
- Install the new brush roll ensuring proper alignment
- Reattach the sole plate securely
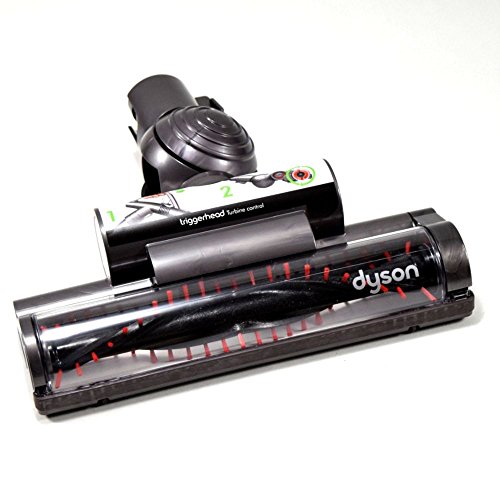
Main Cleaning Head Troubleshooting
The DC39’s main head is turbine-powered and requires special attention when diagnosing suction problems:
Basic Inspection
- Detach the cleaning head from the wand
- Check for visible blockages in the neck and air channels
- Ensure the sole plate is properly attached
- Verify that height adjustment (if applicable) is functioning correctly
Advanced Disassembly
- Remove the main head completely
- Use a coin to open the head access panel
- Locate the long black tube with bristles (brush bar)
- Remove trapped hair or debris from all moving parts
- Check the turbine and spindles for free movement
Troubleshooting Specific Issues
- Head not spinning: Check for blockages in the air channel that powers the turbine
- Intermittent spinning: Look for partial blockages or damage to the turbine
- Noise during operation: Inspect for foreign objects caught in the mechanism
- Resistance when pushing: Check height settings and wheel movement
If the cleaning head is severely damaged or beyond repair, consider replacing it with a new assembly.
Official replacement head for Dyson DC39 vacuum
Cost-effective OEM equivalent to 923181-03

Alternative OEM option with same part number
If internal components are damaged beyond repair, replacement heads are available from both Dyson and third-party manufacturers.
Diagnosing Changeover Valve Problems
The changeover valve directs suction between the cleaning head and hose. When it malfunctions, you may experience inconsistent suction:
Testing Valve Function
- Remove the cleaner head and test suction directly from the connection point
- Place the vacuum in reclined position and test suction again
- Compare the suction strength between these two tests
Locating and Inspecting the Valve
- Find the changeover valve (a small plastic mechanism inside the vacuum)
- Check if it moves freely when the vacuum is reclined
- Look for obstructions like small toys or debris
- Remove any foreign objects using needlenose pliers
- Test the valve movement manually to ensure proper operation
A small clear piece of tubing or pen lodged in the valve can cause persistent suction issues.
Addressing Motor and Overheating Issues

Sometimes suction problems stem from motor issues or overheating:
Overheating Diagnosis
- Check if the vacuum shuts off after a few minutes of operation
- Feel the exterior for excessive heat
- Listen for unusual motor sounds like whining or laboring
Thermal Protection Troubleshooting
- Identify the motor model number
- Locate the thermal protection fuse near the motor
- Consider disconnecting the thermal coupler (for testing purposes only)
- Run the vacuum for 20 minutes to see if it operates normally
Cyclone Pack Maintenance
- Thoroughly clean the cyclone pack since the exhaust HEPA filter may not be readily available
- Disassemble the cyclone components carefully
- Clean each part thoroughly
- Test the vacuum with the cyclone pack removed (temporarily) to isolate the issue
In some cases, motor issues may require professional service or replacement.
Frequently Asked Questions (FAQ)
Why does my Dyson DC39 lose suction when the dust bin isn’t full?
Even with a partially empty bin, suction loss can occur due to blocked filters, hose obstructions, or issues with the changeover valve. The cyclone technology requires clear airways throughout the system to maintain proper suction. Check all filters and airways as described in this guide.
How often should I clean the filters on my Dyson DC39?
For optimal performance, the pre-motor filter should be cleaned monthly and the HEPA filter every three months. Both filters should be completely dry before reinstallation, which typically takes 24 hours. More frequent cleaning may be necessary in homes with pets or high dust levels.
Why does my Dyson DC39 overheat and shut off?
Overheating typically occurs due to restricted airflow, which forces the motor to work harder. Common causes include blocked filters, clogged airways, or a missing exhaust filter. The thermal protection system shuts the vacuum off to prevent damage. Address airflow restrictions and ensure all filters are properly installed and clean.
Can I repair the changeover valve myself if it’s stuck?
Yes, in many cases you can fix a stuck changeover valve without professional help. Accessing the valve requires some disassembly, but once exposed, you can manually check its movement and remove any obstructions. Small objects like pen caps or toys are often the culprit when the valve fails to switch properly.
Is it worth replacing the brush roll, or should I buy a new vacuum?
Replacing the brush roll is significantly more cost-effective than purchasing a new vacuum. A new brush roll typically costs $15-30 and can restore cleaning performance on carpets. The DC39 is designed for component replacement, and many parts are readily available. Only consider a replacement vacuum if multiple major components have failed.
Conclusion
Suction loss in your Dyson DC39 vacuum is almost always fixable with proper troubleshooting and maintenance. By systematically checking for blockages, maintaining filters, and addressing specific component issues, you can restore your vacuum’s powerful performance without the expense of replacement.
Regular maintenance—including emptying the dust bin after each use, monthly filter cleaning, and annual brush roll inspection—will prevent most suction problems before they start. When problems do occur, this guide provides the detailed steps needed to diagnose and resolve them effectively.
Remember that Dyson vacuums are designed for longevity with proper care. With the right maintenance approach, your DC39 can continue delivering exceptional cleaning performance for many years to come.


