
The Dyson DC33 is known for its powerful suction capabilities, but like any vacuum cleaner, it can experience performance issues over time. If your once-mighty Dyson is struggling to pick up debris, leaving dirt behind, or simply not performing as it used to, you’re likely dealing with suction loss. This comprehensive guide will walk you through diagnosing and resolving suction problems in your Dyson DC33, helping you restore your vacuum to its full cleaning potential.
Affiliate disclosure: As an Amazon associate, We'll earn a commission for every successful order through our affiliate links in the article. However, you won’t be charged anything for this.
Suction problems are among the most common issues Dyson owners face, but the good news is that many of these problems can be resolved through proper maintenance and troubleshooting. By following the steps outlined in this article, you can often avoid costly repairs or replacements and extend the life of your vacuum cleaner.
Common Causes of Dyson DC33 Suction Loss
When your Dyson DC33 starts to lose suction power, several potential culprits could be responsible. Identifying the specific cause is the first step toward an effective solution. The most frequent causes of suction loss include:
- Full or improperly emptied dust container
- Dirty or clogged filters
- Blockages in the hose system
- Worn-out brush roll or damaged belt
- Issues with the cyclone assembly
- Problems with the motor or fan
- Improper nozzle positioning or damaged nozzle hose
Each of these issues requires a different approach to resolve, but most can be addressed through regular maintenance and simple repairs that you can perform at home without specialized tools or expertise.
Essential Dust Container Maintenance
The dust container is your first line of defense against suction loss. When it becomes full or contains compacted debris, airflow is restricted, dramatically reducing your vacuum’s performance.
To properly maintain your dust container:
Empty regularly – Don’t wait until the container is completely full. Empty it after each use or when debris reaches the MAX line.
Release the container – Press the red release button located at the back of the vacuum to unlock the container.
Proper emptying technique – Hold the container over a trash bin and press the second release button to open the bottom trap door, allowing debris to fall out.
Clean thoroughly – After emptying, wipe the inside of the container with a damp cloth to remove dust film and residue that can accumulate over time.
Check the cyclone openings – Ensure that the small holes in the cyclone assembly aren’t clogged with fine dust or debris.
Reattach securely – Make sure the container clicks firmly back into place to create a proper seal.
Regular emptying prevents debris from compacting and ensures consistent airflow through your vacuum system. This simple maintenance step can prevent many suction problems before they start.
Filter Cleaning and Maintenance
Dyson DC33 vacuums have two critical filters that need regular attention: the pre-motor filter and the post-motor (HEPA) filter. Clogged filters are a primary cause of suction loss.
Pre-Motor Filter Maintenance
Locate the filter – Find the purple button on the filter housing at the top of the cyclone assembly.
Remove the filter – Press the catch and lift the housing to access and remove the filter.
Separate components – The pre-motor filter consists of a foam sponge and a plastic casing.
Washing procedure – Rinse both parts under cold running water until the water runs clear. Do not use detergents or hot water.
Squeeze excess water – Gently squeeze the foam filter to remove excess water.
Drying time – Allow at least 24 hours for the filter to air dry completely. Never reassemble with a damp filter.
Replacement guidelines – If the filter remains discolored or dirty after washing, it’s time for a replacement.
Post-Motor HEPA Filter Cleaning
Locate the HEPA filter – This is typically found near the motor housing. Access it by flicking the catch and lifting the lid.
Removal process – Carefully take out the filter unit.
Cleaning method – Rinse under cold water and gently tap to dislodge embedded particles.
Thorough drying – Allow a full 24-48 hours for complete drying before reinstallation.
Replacement schedule – Dyson recommends replacing the HEPA filter every 6-12 months depending on usage.
To ensure optimal filtration and suction, replace the HEPA filter if cleaning doesn’t restore its original condition.
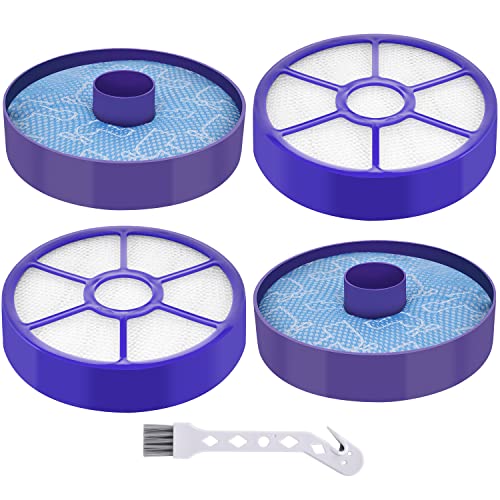
Complete set with washable pre and post filters for DC33.
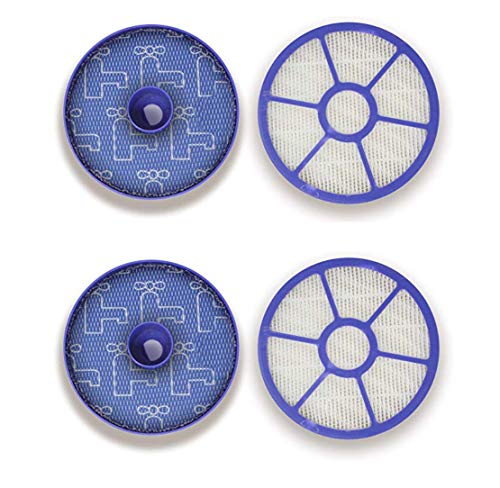
Premium HEPA set for enhanced filtration and air quality.

Budget-friendly set with washable filters for DC33.
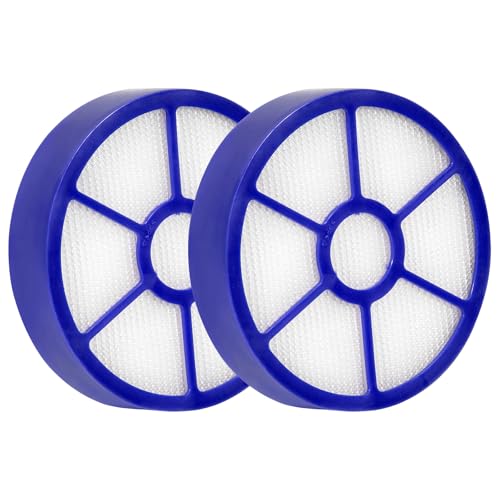
Affordable post-motor filters with high efficiency.
Both filters should be cleaned approximately every three months for optimal performance. Setting a regular cleaning schedule prevents gradual suction loss and extends the life of your vacuum.
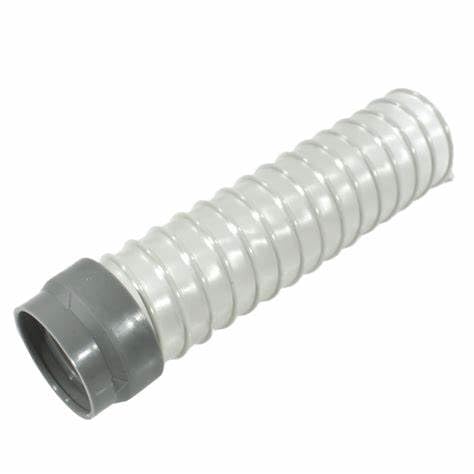
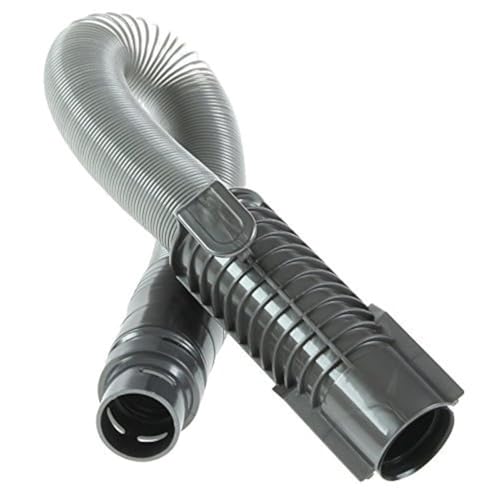
Comprehensive Hose Inspection and Clearing
Blockages in the hose system are a common cause of suction problems. The Dyson DC33 has several sections of hose that need to be checked:
Main Hose Inspection
-
Detach the hose – Press the release button or gray tabs to disconnect the hose from the vacuum body.
-
Visual inspection – Look through the hose for visible blockages using a flashlight.
-
Physical check – Run your hand along the outside of the hose to feel for any trapped objects.
-
Clearing method – Use a long, thin object like a broom handle or straightened coat hanger to gently push out any blockages. Never use sharp objects that could puncture the hose.
-
Water rinse option – For stubborn blockages, rinse the hose with water and allow it to dry completely before reattaching.
Internal Ducting Examination
-
Access the internal hose – Tilt the vacuum forward to access internal hose components.
-
U-bend inspection – Check the U-bend section where debris commonly gets trapped.
-
Ducting check – Manually inspect all internal ducting for obstructions.
-
Clearing technique – Use long-handled tools to carefully remove any debris.
-
Damage assessment – Look for cracks, splits, or tears in the hose that could cause air leaks.
If the hose is damaged beyond repair, replacing it is crucial for restoring proper suction.
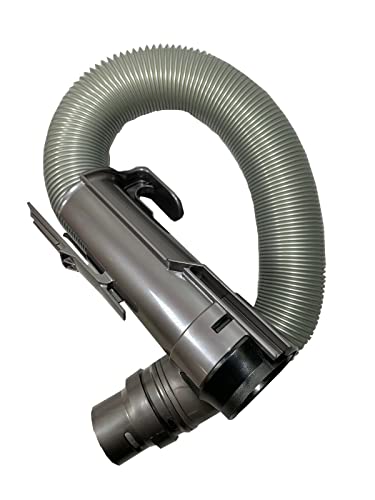
Authentic Dyson replacement hose for DC33 models
Budget-friendly durable replacement with OEM compatibility
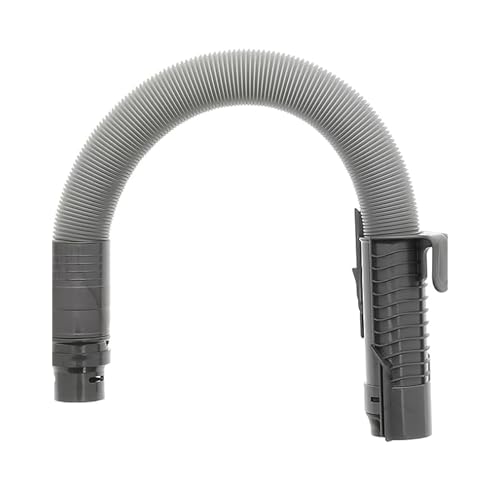
Flexible hose with optimized suction performance
Extended reach hose with included hose cuffs
If you find any damage to the hose system, replacement parts are available from Dyson or authorized dealers. A damaged hose cannot be repaired effectively and should be replaced to restore proper suction.
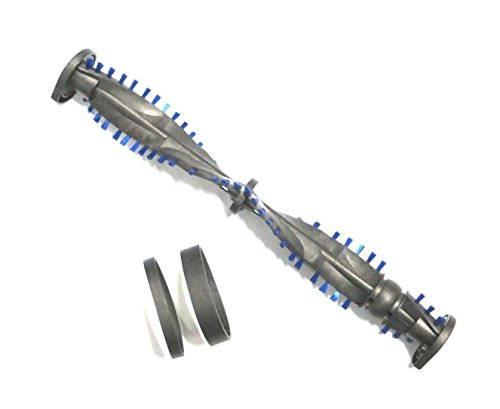
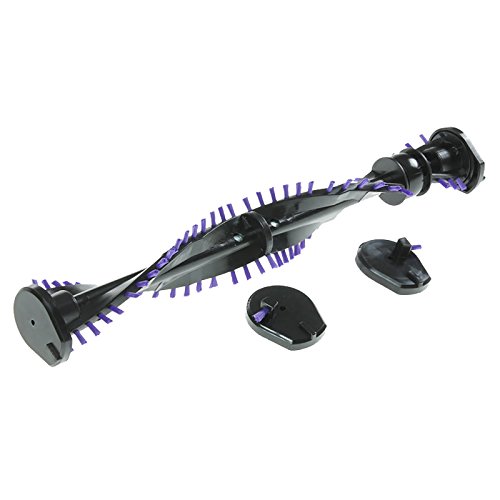
Brush Roll Troubleshooting and Maintenance
The brush roll (or beater bar) is crucial for effective carpet cleaning. When it’s not functioning properly, dirt remains trapped in carpet fibers, creating the impression of suction loss.
Brush Roll Inspection
-
Access the brush roll – Turn the vacuum upside down and remove the soleplate by unscrewing the appropriate fasteners.
-
Check for obstructions – Remove any hair, string, or debris wrapped around the brush.
-
Bearing examination – Ensure the end bearings allow the brush to rotate freely.
-
Belt inspection – Check if the drive belt is intact, properly tensioned, and not stretched or damaged.
-
Bristle condition – Examine the bristles for wear, fraying, or flattening.
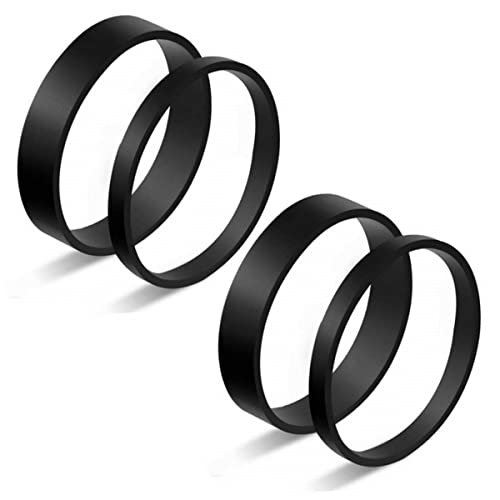
Brush Roll Repair or Replacement
If the belt is broken or stretched, replace it with a new Dyson DC33 belt.
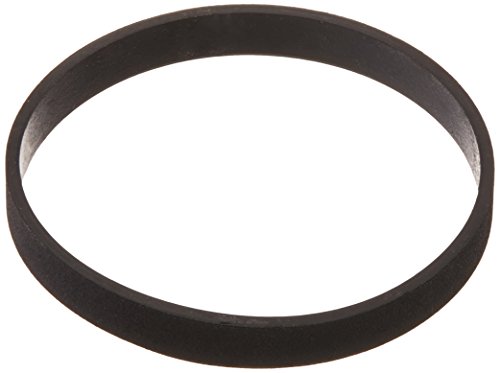
Official replacement belt for DC33 with Dyson warranty
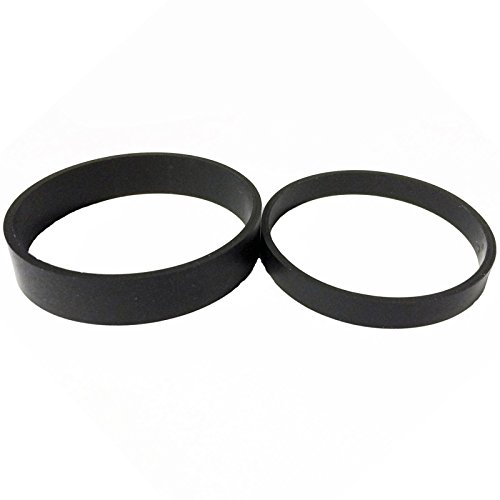
Budget-friendly 2-set replacement for DC33
Durable 2-pack for DC33 with easy installation

Value pack with extended longevity for DC33
If the bristles are severely worn or the roller is damaged, install a new brush roll.
Includes end caps and belts for DC33 compatibility

Precise fit with part number compatibility
Ensures deeper carpet cleaning with easy install
Installation procedure – Slide the new brush roll into place, ensuring the belt is properly positioned on both the motor drive and the brush roll pulley.
Testing – After reassembly, test the brush roll to ensure it spins freely when the vacuum is running.
A properly functioning brush roll will significantly improve your vacuum’s cleaning performance on carpeted surfaces, even if the actual suction power remains the same.
Motor and Fan Assembly Diagnosis
If basic maintenance doesn’t resolve the suction issue, the problem might lie with the motor or fan assembly. These components are the heart of your vacuum’s suction system.
Signs of Motor or Fan Problems
- Unusual or loud noises during operation
- Burning smell when the vacuum is running
- Vacuum fails to start or cuts out during use
- Significant reduction in power even after all other components are cleaned
Troubleshooting the Fan Assembly
Access the fan – This typically requires removing the top cover of the vacuum.
Visual inspection – Look for any visible damage, cracks, or obstructions in the fan blades.
Rotation check – Ensure the fan rotates freely when turned by hand (with the vacuum unplugged).
Debris removal – Carefully clean any debris that might be caught in the fan assembly.
Damage assessment – If the fan blades are damaged or broken, the assembly will need replacement.
Motor Considerations
Performance evaluation – If the motor is making unusual noises or overheating, it may be failing.
Replacement options – A replacement motor costs approximately $50 and can be ordered from Dyson or authorized parts dealers.
DIY vs. professional repair – Motor replacement is more complex than other maintenance tasks. Consider your comfort level with electronics before attempting this repair.
Warranty check – If your Dyson is still under warranty, contact Dyson support before attempting motor repairs.
For motor or fan issues, you may need to consult with a professional repair service if you’re not comfortable with more advanced repairs.
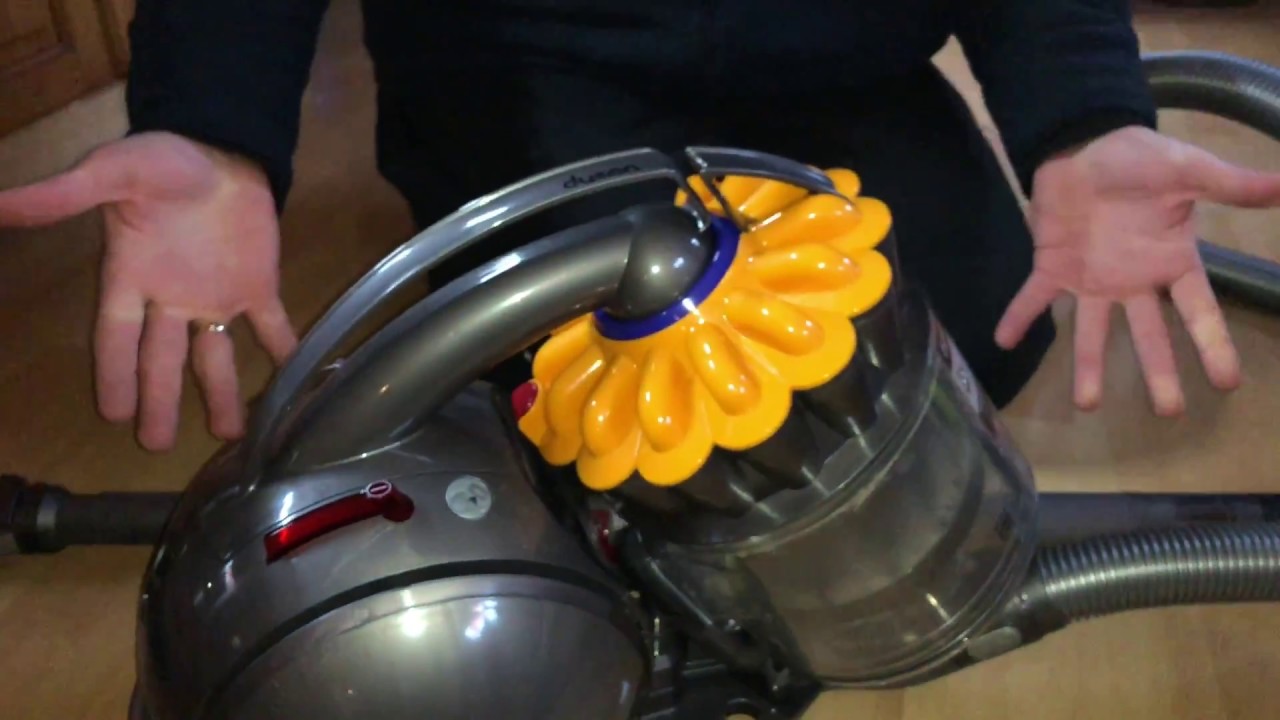
Cyclone Assembly Maintenance
The cyclone assembly is what separates Dyson from conventional vacuums. When this system becomes clogged with fine dust, suction performance suffers.
Quick Cyclone Cleaning
Compressed air method – Use compressed air to blow through the cyclone assembly, dislodging fine dust particles.
Tap cleaning – Gently tap the sides of the cyclone to loosen stuck debris.
Deep Cyclone Cleaning
Disassembly process – Remove the screws that secure the cyclone assembly to access all components.
Washing procedure – Carefully wash each component with cold water. Avoid using detergents that might damage the plastic.
Thorough drying – Allow all parts to dry completely for at least 48 hours to prevent mold growth and ensure optimal performance.
Reassembly tips – Make sure all seals and gaskets are properly positioned during reassembly.
Testing – After reassembly, test the vacuum to ensure suction has been restored.
The cyclone assembly rarely needs deep cleaning, but when it does, this thorough approach can resolve persistent suction issues.
Nozzle and Floor Head Troubleshooting

The vacuum’s nozzle and floor head design are critical for proper suction at the point of contact with your floors.
Nozzle Position Issues
Proper positioning – When the vacuum handle is reclined into the operating position, the nozzle should lie flat against the floor.
Angle check – If the nozzle is tipped at an angle, it won’t create a proper seal with the floor, reducing effective suction.
Height adjustment – Ensure the height adjustment setting is appropriate for your floor type.
Nozzle Hose Inspection
Flexibility test – Check if the nozzle hose is flexible and not stiff or brittle.
Damage assessment – Look for cracks or splits in the nozzle hose that could cause air leaks.
Replacement consideration – If the nozzle hose is stiff or damaged, replace it with a new, more flexible one.
Seal inspection – Ensure all connection points create proper seals to prevent air leaks.
Proper nozzle positioning and a well-maintained floor head are essential for transferring the vacuum’s suction power effectively to your floors.
Frequently Asked Questions (FAQ)
Why does my Dyson DC33 lose suction after a few minutes of use?
This is typically caused by a thermal cut-out feature activating due to overheating. The most common reasons include a blockage somewhere in the system, full dust container, or dirty filters. Empty the container, clean the filters, and check for blockages in the hose and brush roll. Allow the vacuum to cool completely before restarting.
How often should I clean the filters on my Dyson DC33?
Dyson recommends washing both the pre-motor and post-motor filters every three months under normal household use. However, if you have pets or vacuum frequently, you may need to clean them more often. Always allow 24 hours for complete drying before reinstalling.
My Dyson DC33 makes a high-pitched noise and has reduced suction. What’s wrong?
A high-pitched noise often indicates a partial blockage somewhere in the system. First, check for blockages in the hose, wand, and brush roll. Also inspect the connection points between these components. If the noise persists after clearing blockages, the motor might be struggling due to dirty filters or may be beginning to fail.
Is it worth repairing my Dyson DC33 or should I replace it?
Most suction issues can be resolved through proper maintenance and minor repairs that cost significantly less than a new vacuum. If your DC33 is less than 5-7 years old, repairs are usually worthwhile. However, if you’re facing motor issues in an older machine, or if multiple components need replacement, it might be more economical to consider an upgrade.
Can I use my Dyson DC33 without filters while they’re drying?
No, you should never operate your Dyson without both filters properly installed. Running the vacuum without filters can damage the motor and void your warranty. It’s recommended to have a spare set of filters so you can use your vacuum while the freshly washed set is drying.
Conclusion
Restoring suction to your Dyson DC33 is often simpler than it might seem. By systematically working through the potential causes—from the dust container and filters to the hose system, brush roll, and motor components—you can identify and resolve most suction problems without professional help.
Regular maintenance is the key to preventing suction loss in the first place. Establish a routine of emptying the dust container after each use, cleaning the filters every three months, and checking for blockages periodically. These simple habits will keep your Dyson DC33 performing at its best for years to come.
If you’ve tried all the troubleshooting steps in this guide and still experience suction problems, it may be time to contact Dyson support or a vacuum repair specialist. With proper care and occasional maintenance, your Dyson DC33 should continue to deliver the powerful suction performance that made it a popular choice among vacuum cleaners.


