
When your Dyson DC25 vacuum cleaner refuses to turn on, it can be frustrating – but don’t rush to replace it just yet. Most power issues can be resolved with some basic troubleshooting and repairs that you can handle yourself. This guide will walk you through the common causes of power failure in your Dyson DC25 and provide step-by-step solutions to get your vacuum running again.
Affiliate disclosure: As an Amazon associate, We'll earn a commission for every successful order through our affiliate links in the article. However, you won’t be charged anything for this.
Dyson vacuums are designed to be serviceable, and repairing your DC25 is often much more cost-effective than replacing it. With the right approach, you can diagnose and fix the problem, extending the life of your vacuum and saving money in the process.
Common Reasons Why Your Dyson DC25 Won’t Turn On
When your Dyson DC25 fails to power up, several components could be at fault. The most common culprits include:
- Power supply issues – damaged cords or faulty outlets
- Malfunctioning power switch – worn-out or broken switches
- Tripped thermal reset switch – safety feature that cuts power when overheating occurs
- Clogged filters and airways – restricting airflow and causing overheating
- Electrical component failures – internal wiring problems or motor issues
Each of these problems requires a different approach to diagnose and fix. Let’s explore these issues in detail and provide solutions for each.
Essential Troubleshooting Steps Before Disassembly
Before taking your Dyson apart, perform these basic checks to potentially save time and effort:
Check the Power Source
- Ensure the vacuum is properly plugged into a working outlet
- Try a different outlet to rule out electrical supply problems
- Inspect the entire length of the power cord for damage, cuts, or fraying
- Check the plug for bent prongs or other visible damage
If the power cord is damaged, it’s crucial to replace it to ensure safe and reliable operation.
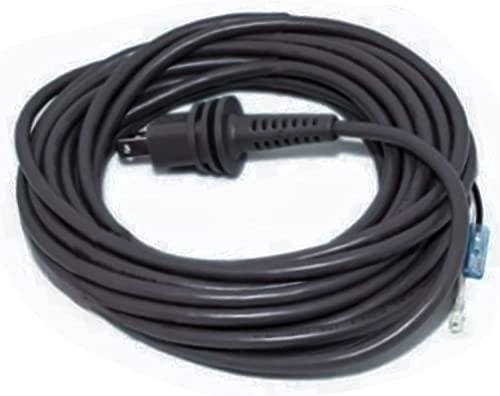
Official compatible replacement for Dyson DC25
Examine for Blockages
Blockages can cause overheating, triggering the thermal cutout switch:
- Empty the dust bin and check for clogs around the cyclone assembly
- Remove and inspect the filters – wash if dirty and allow to dry completely
- Check the brush roll for tangled hair or string
- Inspect all hoses and airways for obstructions
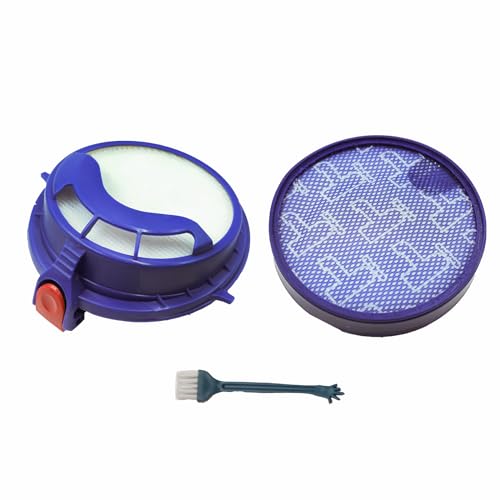
Clogged or damaged filters can significantly reduce suction and cause the vacuum to overheat. Replacing them can restore performance.
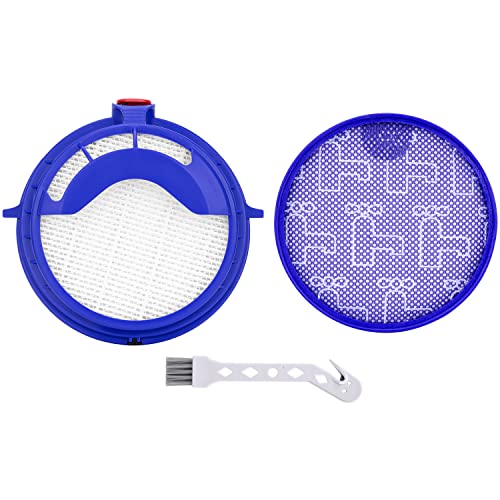
Premium filter kit with HEPA and pre-motor filters for DC25 vacuums
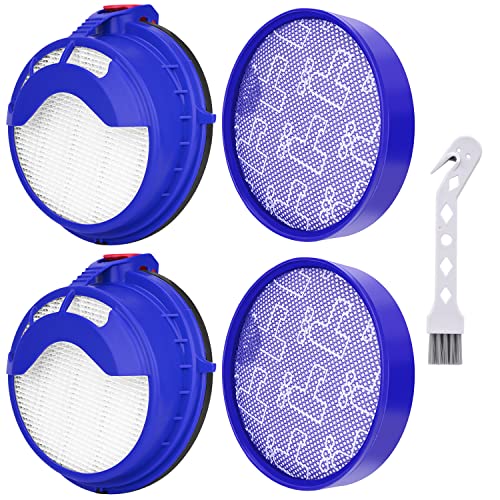
Value pack with cleaning brush for enhanced suction and longevity
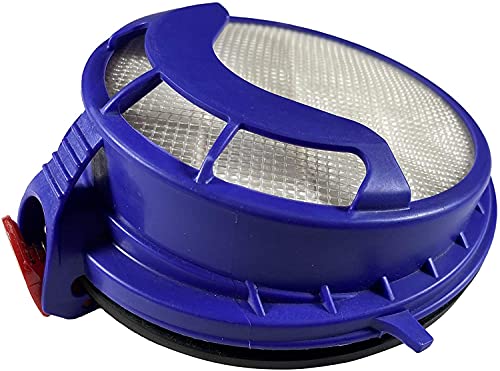
Cost-effective washable filters with noise reduction benefits
Affordable HEPA replacement with 30-day money-back guarantee
Reset the Thermal Cutout Switch
If your Dyson has overheated, the thermal cutout switch may have tripped:
- Unplug the vacuum and let it cool for at least 30 minutes
- Locate the small red reset button (typically near the motor housing)
- Press the button firmly until you hear a click
- Plug the vacuum back in and test
If these basic steps don’t resolve the issue, it’s time to look at more specific problems and solutions.
Diagnosing and Fixing Power Switch Issues
A faulty power switch is one of the most common reasons why a Dyson DC25 won’t turn on. Here’s how to diagnose and replace it:
Tools Required:
- Phillips head screwdriver
- Torx T15 screwdriver
- Flathead screwdriver
- Multimeter
- Small container for screws
- Replacement power switch (if needed)
Testing the Power Switch
- Unplug the vacuum for safety
- Set your multimeter to continuity or resistance (ohms) mode
- Remove the necessary covers to access the power switch
- Touch the multimeter probes to the switch terminals
- Press the switch – a working switch will show continuity (beep) when pressed
If the switch doesn’t show continuity when pressed, it needs replacement.
Replacing the Power Switch
If the power switch is faulty, replacing it is essential for restoring power to your Dyson.
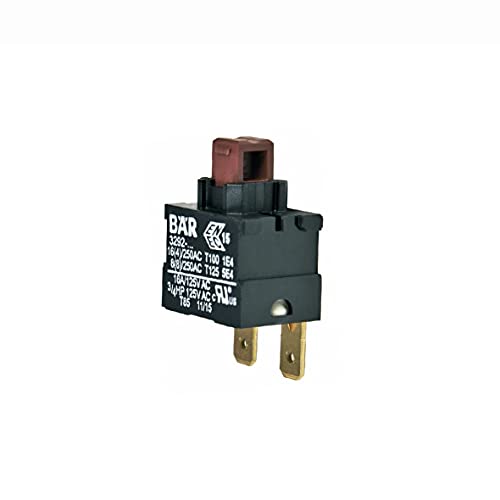
Official Dyson replacement ensures perfect compatibility and durability
Bissell OEM part with overload protection for DC25/DC24 vacuums
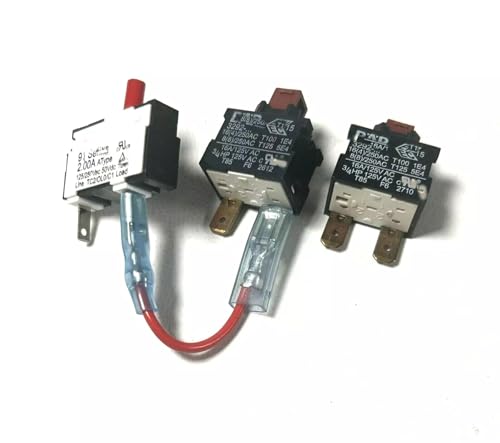
Official Dyson power switch and reset button set for DC25 models
High-quality generic replacement for multiple Dyson models
Access the switch assembly:
- Place the vacuum on its side
- Remove the three Torx T15 screws from the housing
- Carefully disengage the side clips to open the housing
Remove the old switch:
- Keep finger contact with switch covers to prevent internal parts from scattering
- Note the position of the short and long springs (the short spring fits in a designated slot, while the long spring sits behind the red button)
- Disconnect the wiring harness from the old switch
- Remove the switch from its mounting
Install the new switch:
- Position the new switch in the mounting
- Reconnect the wiring harness following the correct order: gray wire (neutral/common) first, followed by the red wire (beater bar)
- Carefully reposition the springs in their correct locations
- Reassemble the housing and secure with the screws
Test the vacuum after reassembly to ensure proper operation
Addressing Brush Roll Problems
If your vacuum powers on but the brush roll doesn’t spin, follow these steps:
Reset the Brush Roll Circuit Breaker
The brush roll has a separate 2-amp breaker that may trip independently:
- Turn off and unplug the vacuum
- Locate the small reset button near the brush roll assembly
- Press it firmly until you hear a click
- Plug in and test the vacuum
Check the Brush Roll for Obstructions
- Unplug the vacuum for safety
- Turn the vacuum over to access the brush roll
- Remove the brush roll cover (usually secured with screws or clips)
- Inspect the brush roll for tangled hair, string, or debris
- Use scissors to carefully cut away any entangled material
- Check that the brush roll spins freely by hand
- Reattach the cover and test the vacuum
Inspect the Drive Belt
- With the brush roll cover removed, examine the drive belt
- Look for signs of wear, fraying, or breakage
- If damaged, replace with a compatible belt
- Ensure proper tension when reinstalling
A worn or broken drive belt will prevent the brush roll from spinning, impacting cleaning performance.
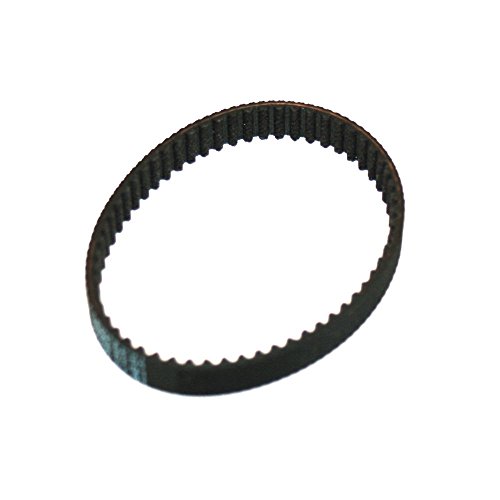
Official Dyson replacement belt for DC25 model
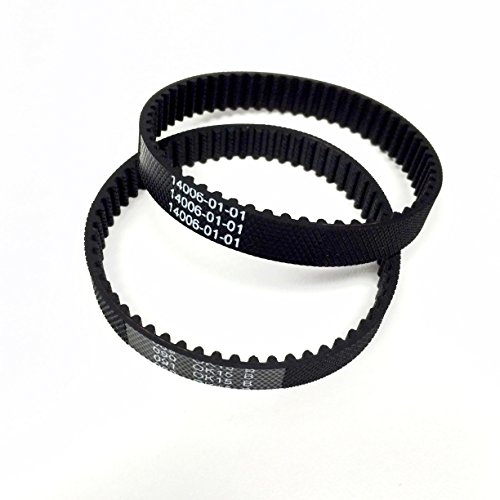
High-quality driven belt for DC25, 2-pack

Affordable OEM-spec replacement belt for DC25

Comprehensive replacement kit including DC25 belt
Fixing Electrical Connection Issues
Loose or damaged wiring can cause power failures in your Dyson DC25.
Check Internal Wiring Connections
- Unplug the vacuum for safety
- Open the housing using the appropriate screwdriver
- Pay special attention to the short wire connecting the beater bar and vacuum motor – this is prone to dislodging due to vibration
- Inspect all wire connections for looseness or damage
- Reconnect any loose wires and secure with electrical tape if needed
- Check for any burned or melted wires that may indicate a short circuit
Testing the Power Cord
If you suspect the power cord is faulty:
- Unplug the vacuum
- Set your multimeter to continuity mode
- Test continuity between each prong of the plug and the corresponding wire at the vacuum end
- A functional cord will show continuity on both prongs
- If no continuity is found, the cord needs replacement
Replacing the Power Cord
If the power cord is damaged or faulty, replacing it is essential for safety and proper operation.
Official replacement for Dyson DC25 with durable construction
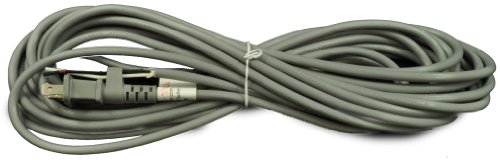
Affordable third-party replacement with standard features
- Open the vacuum housing to access the cord connection point
- Disconnect the old cord from the internal wiring
- Connect the new cord, matching wire colors (typically black/brown for live, white/blue for neutral)
- Secure any strain relief mechanisms
- Reassemble the housing and test
Addressing Motor and Circuit Board Problems
When simpler fixes don’t work, the issue might be with the motor or circuit board.
Bypassing the Reset Switch to Test the Main Motor
- Unplug the vacuum for safety
- Access the main circuit board
- Locate the reset switch connections
- Temporarily bypass the reset switch by connecting the wires directly (for testing only)
- Plug in and test the vacuum briefly
- If the motor works when bypassed, the reset switch is likely the problem
- If not, a yoke loom failure or motor issue might be the cause
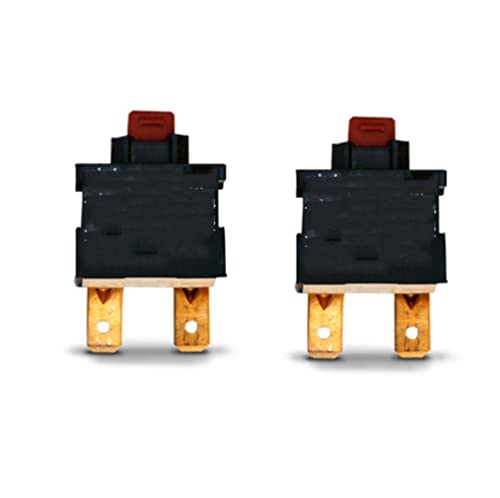
If the reset switch is faulty, replacing it can restore power to the motor.

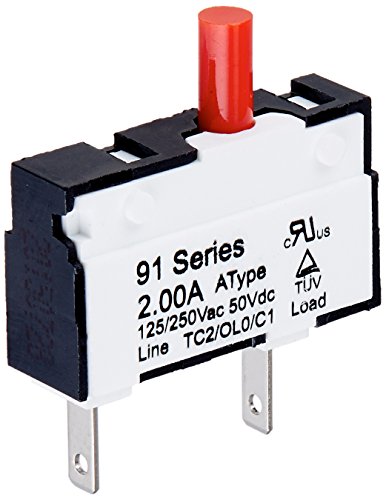
Official Dyson thermal reset switch for DC25 model
Authorized OEM replacement for Dyson DC25 thermal reset
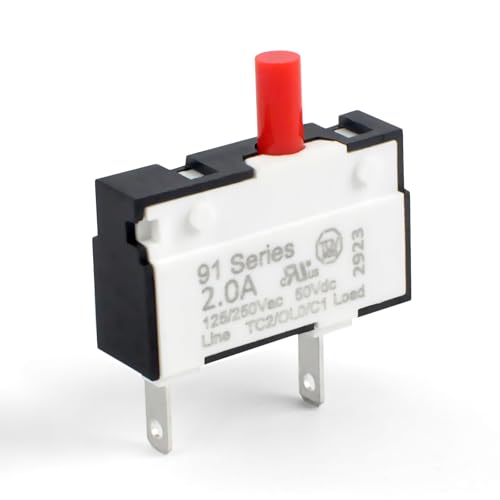
Push-to-reset thermal switch with 2A rated current
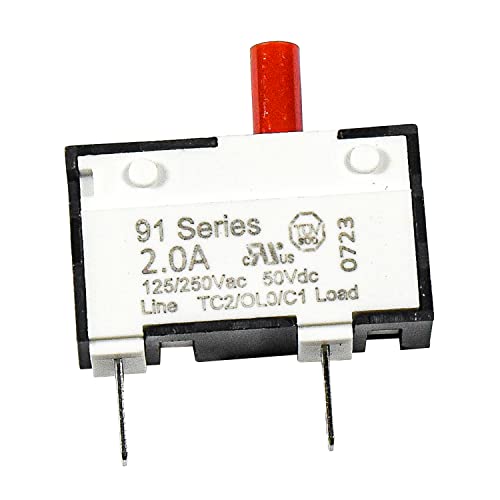
UL-listed thermal reset switch with extended warranty
Checking for Yoke Loom Failure
The yoke loom is a wiring harness that connects various components:
- Access the internal components
- Inspect the yoke loom for damage or disconnection
- Test continuity across suspicious connections
- Replace damaged sections or reconnect loose wires
Motor Replacement Considerations
If all other solutions fail, the motor may need replacement:
- Dyson DC25 motors have a limited lifespan (approximately 60+ hours of use)
- Compare the cost of a replacement motor against a new vacuum
- Consider professional repair for motor replacement if you’re not comfortable with complex disassembly
If the motor is the problem, replacing it can give your Dyson DC25 a new lease on life.

Official replacement motor for Dyson DC25 with part number
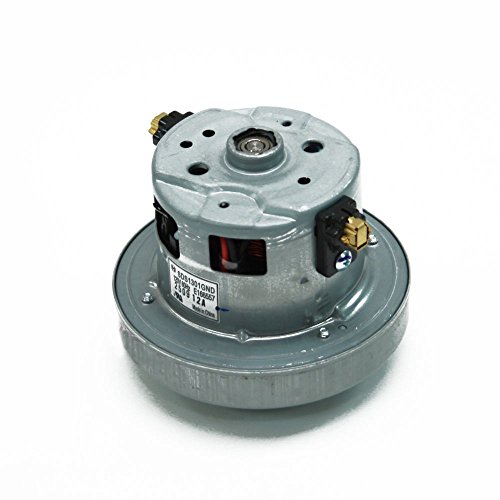
Factory-designed motor replacement for DC25 vacuums
Frequently Asked Questions (FAQ)
Why does my Dyson DC25 turn on but then shut off after a few seconds?
This typically indicates an overheating issue or a tripped thermal cutout switch. Check for blockages in the filters and airways, clean thoroughly, and allow the vacuum to cool completely before resetting the thermal switch and trying again.
How do I know if the problem is the power switch or the motor?
If you can hear a humming sound when you try to turn on the vacuum, the motor is likely receiving some power but may be stuck or failing. If there’s absolutely no response when pressing the power button, the issue is more likely with the power switch, cord, or circuit board.
Can I use any replacement power switch for my Dyson DC25?
It’s best to use a Dyson-compatible replacement switch. While generic switches may physically fit, they might not have the correct electrical specifications or mounting points. Replacement switches are relatively inexpensive (around $6-7) and widely available online.
How often should I clean the filters to prevent power issues?
Dyson recommends washing the filters at least every three months under normal use. However, if you have pets or vacuum frequently, monthly cleaning may be necessary to prevent airflow restrictions and overheating.
Is it worth repairing my Dyson DC25 or should I just buy a new vacuum?
If your DC25 is otherwise in good condition, repairs are typically much more cost-effective than replacement. Most power issues can be fixed for under $20 in parts and a few hours of work. A new comparable Dyson would cost hundreds of dollars.
Conclusion
A Dyson DC25 that won’t turn on can usually be repaired with some basic troubleshooting and DIY skills. By methodically checking the power source, switch, connections, and motor components, you can identify and fix the problem without expensive professional repairs or replacement.
Remember to always unplug your vacuum before attempting any repairs, document your disassembly process (taking photos can help), and keep track of all screws and small parts. Regular maintenance, including cleaning filters and checking for blockages, will help prevent future power issues and extend the life of your Dyson DC25.
With the right approach and a bit of patience, you can get your vacuum running again and save yourself the cost of a new appliance.


