
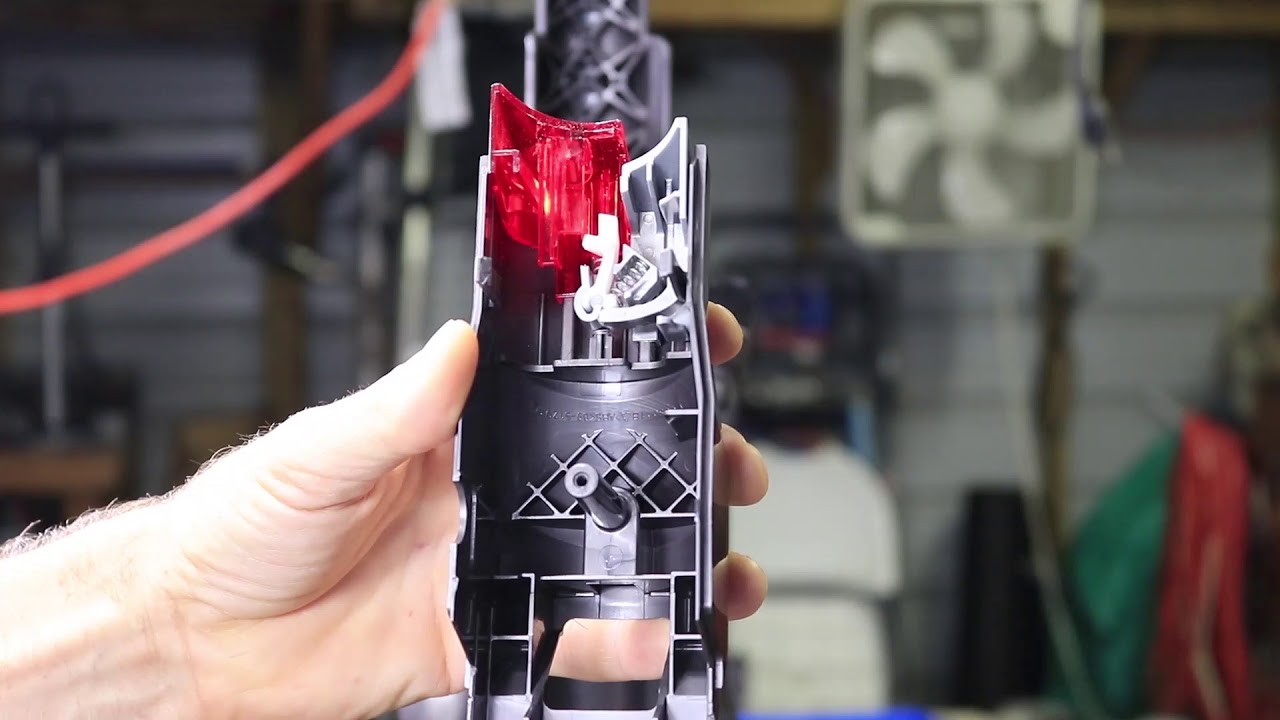
When your Dyson DC25 vacuum’s power button refuses to stay on without constant pressure, it can transform a simple cleaning task into a frustrating ordeal. This common issue typically points to a faulty microswitch—the small but crucial component responsible for completing the electrical circuit when you press the power button.
Affiliate disclosure: As an Amazon associate, We'll earn a commission for every successful order through our affiliate links in the article. However, you won’t be charged anything for this.
The microswitch failure doesn’t happen randomly. Several factors contribute to this malfunction, including accumulated dirt and debris that interfere with the button’s mechanism, natural wear and tear from frequent use, loose or damaged wiring connections, and potential issues with the reset switch near the brush roll. Understanding these underlying causes is the first step toward effectively diagnosing and resolving the problem, potentially saving you from unnecessary repair costs or premature replacement of your vacuum cleaner.
How the Dyson DC25 Power System Works
The Dyson DC25’s power system is more complex than it appears at first glance. At its core, the main switch controls two separate circuits: one for the vacuum motor (connected via a black wire) and another for the beater bar motor (connected via a red wire). These circuits work in tandem to provide the suction and brush action that make the vacuum effective on various surfaces.
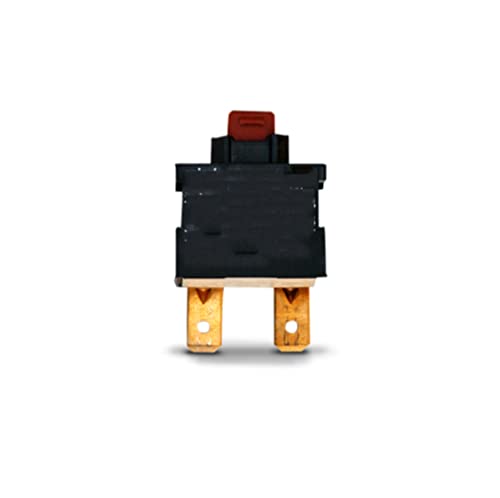
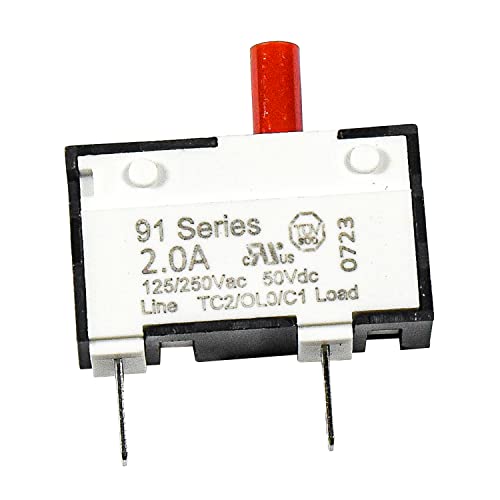
A critical component in this system is the 2-amp circuit breaker, often called a “popper,” which protects the beater bar motor from potential damage due to overloads. The white wire manages the neutral/common connection, completing the electrical circuit. Additional components like floor tool switches and the bin release spring also play important roles in the vacuum’s overall functionality.
The microswitch itself is designed to create a secure electrical connection when pressed, allowing current to flow continuously. When this switch begins to fail, it no longer maintains this connection without constant pressure, resulting in the frustrating on-off problem many Dyson owners experience.
Diagnosing Your DC25 Power Button Problem
Using a Multimeter for Accurate Diagnosis
Before disassembling your vacuum, a multimeter can help determine if the power button is indeed the culprit. Here’s how to use it effectively:
- Unplug the vacuum completely to avoid any risk of electrical shock
- Set your multimeter to measure resistance (ohms)
- Place the multimeter probes on the appropriate terminals of the switch
- Press the power button and observe the reading
- A functioning switch should show continuity (non-zero resistance) and produce an audible click
- No continuity indicates a defective switch requiring replacement
Common Diagnostic Findings
When investigating power button issues, you might discover:
– A loose wire connection between the beater bar and main motor circuits
– A defective power plug with one prong showing no continuity
– Faulty internal switches that fail to produce proper resistance readings
– Reset switch malfunction near the brush roll
Checking for Hidden Problems
Sometimes the power issue isn’t directly related to the button itself. Hidden clogs in the airway behind the cleaner head or in the lower duct hose can cause the vacuum to shut off unexpectedly. Similarly, a malfunctioning reset switch or a clogged brush roll might be the real culprit. Thoroughly inspect these components before concluding that the power button needs replacement.
Step-by-Step Power Switch Replacement Guide
Tools and Materials You’ll Need
- Torx T15 screwdriver
- Multimeter
- Replacement power switch
- Electrical tape
- Clean cloth for wiping components
- Small container to organize screws
If you’ve determined that the power switch is faulty, you’ll need a replacement to get your Dyson DC25 working again.
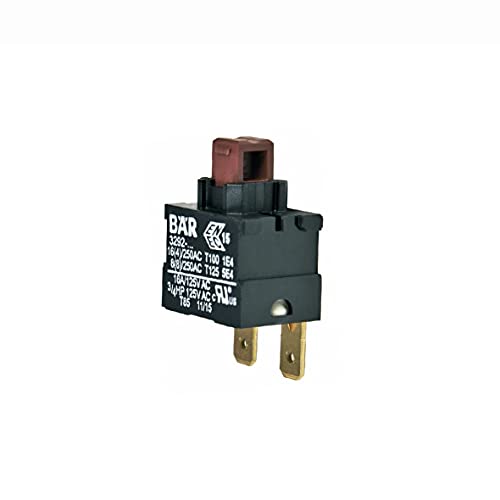
Official replacement ensures perfect compatibility and reliability
Wide compatibility with multiple Dyson models and long warranty
Safety-focused design with overload protection for DC25
Preparation Steps
- Unplug the vacuum completely from the electrical outlet
- Clear your workspace to organize parts and prevent losing small components
- Remove the dust collection bin to gain better access to internal components
Accessing the Power Switch
- Locate the motor housing at the bottom of the vacuum
- Remove the screws securing the motor housing cover using the Torx T15 screwdriver
- Carefully track each screw’s location for easier reassembly later
- Gently separate the housing to expose the internal components
Removing the Old Switch
- Identify the power switch location within the housing
- Document the wiring configuration before disconnecting anything (take photos if possible)
- Carefully detach the wires connected to the old power switch, noting which color wire connects to which terminal
- Extract the old switch from its mounting, which may be secured with clips or small screws
Installing the New Switch
- Assemble any additional parts that come with the new switch
- Connect the wires to the new switch following your documentation:
- Red wire for the beater bar circuit
- Black wire for the motor circuit
- White wire for the neutral connection
- Apply electrical tape for additional insulation if needed
- Insert the new switch into the mounting position
- Secure it properly with appropriate screws or clips
Reassembly Process
- Carefully place the motor housing cover back onto the vacuum
- Ensure no wires are pinched or caught between components
- Reinsert and tighten all screws in their original locations
- Reattach the dust collection bin until it clicks securely into place
Testing the Repair
- Plug in the vacuum to an electrical outlet
- Test the power button to confirm it stays on without continuous pressure
- Listen for unusual noises that might indicate improper installation
- Test all vacuum functions to ensure everything works correctly
Troubleshooting Other Power-Related Issues
Reset Switch Problems
The reset switch located near the brush roll can also cause power issues. To check and address this:
- Turn off and unplug the vacuum
- Locate the reset switch at the bottom of the vacuum near the brush roll
- Press the reset switch gently
- If it clicks back into place, the issue might be resolved
- If bypassing the reset switch results in a working brushroll, the reset switch needs replacement
If the reset switch is faulty, replacing it can restore power to the brush roll.

Official Dyson reset switch for guaranteed compatibility and quality
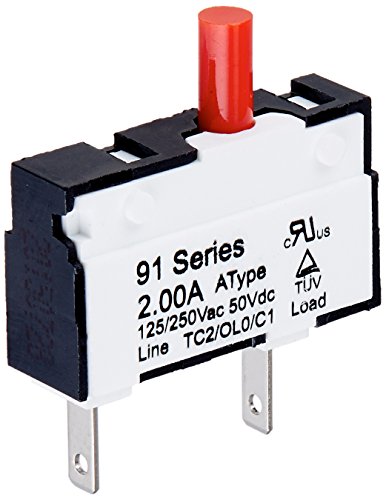
OEM-authorized part with broad model compatibility
UL-certified with extended warranty and electrical safety

Cost-effective 2-pack with manual reset functionality
Brush Roll Faults
A malfunctioning brush roll can trigger the reset switch or cause power interruptions:
- Remove the brush roll and inspect for debris
- Clear any tangled hair, string, or other obstructions
- Check the brush roll condition and belt tension
- Listen for unusual sounds or vibrations from the motor
- Reassemble and test the vacuum
If the brush roll is damaged or worn, replacing it can improve cleaning performance and prevent power issues.
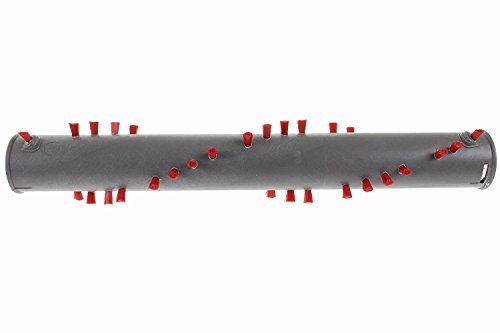
Restores cleaning performance with durable replacement
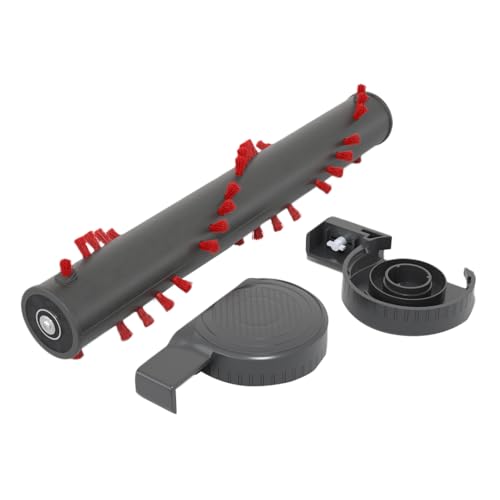
Complete replacement with dual end caps included
Addressing Loose Wiring
Loose connections are common culprits for power issues:
- Inspect all visible wiring for signs of damage or loose connections
- Pay special attention to the connection between the beater bar and main motor circuits
- Secure any loose connections, replacing damaged wires if necessary
- Use electrical tape to insulate connections and prevent short circuits
Power Cord Replacement
If your multimeter identifies a defective power cord:
- Disconnect the faulty cord at the vacuum’s internal wiring
- Install the new power cord, ensuring proper connection of white, black, and red wires
- Secure all connections and test for continuity with your multimeter
- Reassemble the vacuum and test functionality
A damaged power cord needs to be replaced to ensure safe and reliable operation.
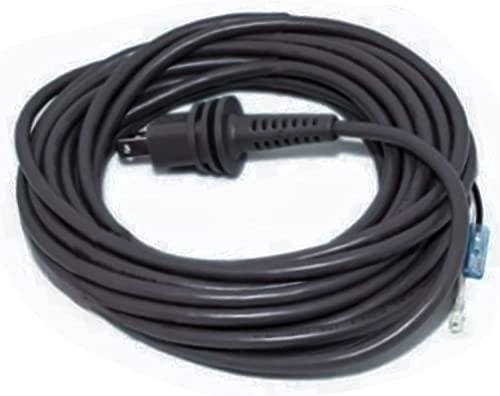
Original part number replacement for Dyson DC25 vacuum
Maintaining Your Dyson DC25 to Prevent Future Issues
Regular Cleaning Routine
Implement these maintenance practices to extend the life of your power button and other components:
- Empty the dust collection bin after each use or when it reaches the maximum fill line
- Clean the filters monthly according to Dyson’s recommendations
- Remove hair and debris from the brush roll weekly
- Wipe down the exterior and check for loose parts regularly
- Inspect the power cord for damage before each use
Proper Storage Practices
How you store your vacuum affects its longevity:
- Wind the cord loosely to prevent strain on internal connections
- Store in a cool, dry place away from extreme temperatures
- Keep the vacuum upright to prevent pressure on internal components
- Avoid hanging the vacuum by its handle for extended periods
When to Seek Professional Help
While many power button issues can be resolved with DIY repairs, consider professional service if:
- You notice burning smells or smoke during operation
- The vacuum repeatedly trips circuit breakers in your home
- There’s visible damage to the motor or electrical components
- Your repair attempts don’t resolve the issue
- The vacuum makes unusual noises even after repairs
Frequently Asked Questions (FAQ)
Why does my Dyson DC25 power button need constant pressure to stay on?
This typically indicates a faulty microswitch inside the power button assembly. The microswitch is designed to maintain electrical contact when pressed, but when it wears out or becomes damaged, it fails to hold this contact without continuous pressure. Replacing the microswitch or the entire power button assembly usually resolves this issue.
Can I repair the power button without replacing it?
In some cases, cleaning around the power button mechanism can resolve minor issues caused by dirt or debris. However, if the microswitch itself is damaged, replacement is generally necessary for a permanent fix. Attempting to repair the internal components of the microswitch is not recommended as it requires specialized tools and expertise.
How difficult is it to replace the power button on a Dyson DC25?
With the right tools (primarily a Torx T15 screwdriver) and careful attention to the wiring connections, most moderately handy individuals can replace the power button in about 30-45 minutes. The most critical aspect is ensuring the red, black, and white wires are reconnected to their exact terminals on the new switch to avoid motor or circuit failure.
Why does my vacuum shut off unexpectedly even after replacing the power button?
If your vacuum continues to shut off after power button replacement, check for hidden clogs in the airway behind the cleaner head or in the lower duct hose. Also inspect the reset switch near the brush roll, as it may be triggering due to an obstructed brush roll. Thermal protection mechanisms might also shut down the vacuum if it’s overheating due to clogged filters or airways.
How much does a replacement power switch cost for a Dyson DC25?
Replacement power switches for the Dyson DC25 typically cost between $15-30 depending on whether you purchase an OEM (Original Equipment Manufacturer) part or an aftermarket alternative. While aftermarket parts are usually less expensive, OEM parts often provide better reliability and exact fit. The cost of professional repair service would be additional if you don’t perform the replacement yourself.
Conclusion
Addressing the power button issue on your Dyson DC25 vacuum is a manageable repair that can significantly extend the life of your appliance. By understanding the underlying causes—whether it’s a faulty microswitch, loose wiring, or related components like the reset switch—you can approach the repair methodically and effectively.
The step-by-step guide provided offers a comprehensive approach to diagnosing and replacing the power switch, ensuring you can restore your vacuum’s functionality without the expense of professional repair or premature replacement. Remember that proper maintenance, including regular cleaning and careful storage, can prevent many power-related issues from developing in the first place.
With the right tools, careful attention to wiring connections, and patience during disassembly and reassembly, you can overcome this common Dyson DC25 challenge and get back to enjoying the powerful cleaning performance these vacuums are known for.


