
When your Dyson DC15 stops picking up debris effectively, it can be frustrating, especially considering the premium price tag these vacuums carry. Suction problems are among the most common issues Dyson owners face, but fortunately, many can be resolved without professional help. The good news is that Dyson vacuums are designed with user serviceability in mind, making troubleshooting accessible to most owners.
Affiliate disclosure: As an Amazon associate, We'll earn a commission for every successful order through our affiliate links in the article. However, you won’t be charged anything for this.
In this comprehensive guide, we’ll explore the various reasons your Dyson DC15 might be losing suction power and provide detailed, step-by-step solutions to restore your vacuum’s performance. From simple blockages to more complex mechanical issues, we’ll cover everything you need to know to get your Dyson working like new again.
Common Causes of Suction Loss in Dyson DC15

Blockages in the Hose
Hose blockages are perhaps the most frequent culprit behind suction problems. Over time, debris can accumulate and create a partial or complete obstruction that prevents proper airflow.
To check for and clear hose blockages:
- Detach the hose from both ends of the vacuum
- Hold the hose up to a light source to visually inspect for blockages
- Use a flashlight to look through the entire length
- If you spot a blockage, use a straightened wire hanger or pipe cleaner to gently dislodge it
- For stubborn blockages, try running water through the hose (ensure it’s completely dry before reattaching)
- Reattach the hose and test the suction
Remember to be gentle when probing for blockages to avoid puncturing or damaging the hose material.
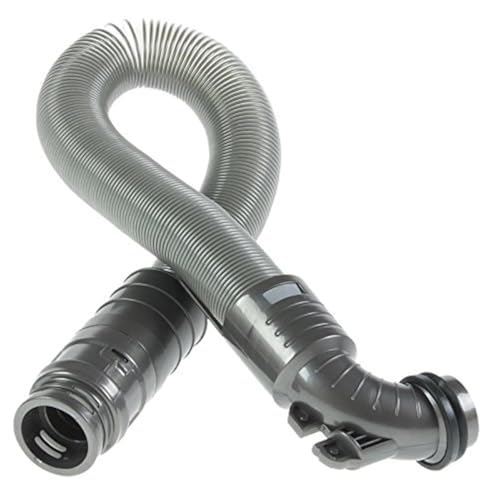
If the hose is damaged beyond repair or too clogged to clear, consider replacing it. A new hose will ensure optimal airflow and suction.
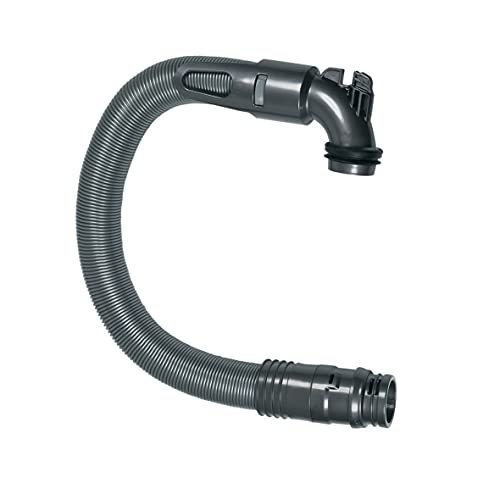
Original Dyson part for DC15 with guaranteed compatibility
Flexible hose with extended reach and warranty protection

Durable replacement with part number compatibility assurance

Complete hose assembly for DC15 Ball models
Full Dust Bin Restricting Airflow
A simple but often overlooked cause of poor suction is a full dust bin. When the bin reaches capacity, air cannot flow properly through the vacuum system.
To address this issue:
- Press the dust bin release button
- Hold the bin over a trash can
- Empty all contents completely
- Wipe the inside of the bin with a damp cloth to remove residual dust
- Ensure the bin is completely dry before reattaching
- Secure the bin back onto the vacuum until you hear a click
For optimal performance, consider emptying the dust bin after each use rather than waiting until it’s completely full.
Clogged Filters Impacting Performance
Dyson DC15 vacuums have multiple filters that require regular maintenance. When these become clogged with fine dust particles, they restrict airflow and reduce suction power.
To clean your Dyson DC15 filters:
- Locate the primary filter (typically found near the dust bin)
- Remove the filter according to the user manual instructions
- Rinse under cold water until the water runs clear
- Gently squeeze out excess water (do not wring or twist)
- Allow to air dry completely for at least 24 hours
- Check the exhaust filter (usually located on the ball) and clean similarly
- Reinstall the completely dry filters
Important: Never use detergents or washing machines to clean Dyson filters, and always ensure filters are 100% dry before reinstalling to prevent motor damage.
If your filters are old, damaged, or excessively clogged, replacing them is a good idea. Clean filters are essential for maintaining optimal suction.

Official replacement for DC05/DC08/DC14/DC15

Cost-effective washable filter for DC15 series
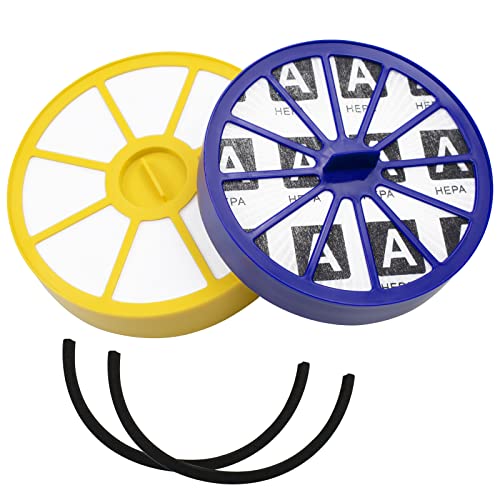
Dual-filter set with improved microfiber filtration

Budget-friendly washable filter with 2-pack option
Blockages in the Cleaner Head
Even with clear hoses and clean filters, blockages in the cleaner head can prevent effective suction at the point of contact with your floors.
To check for cleaner head blockages:
- Disconnect the cleaner head from the vacuum
- Test suction directly from the opening where the head attaches
- If suction is strong without the head, your issue is in the head itself
- Turn the cleaner head upside down and inspect for wrapped hair or debris
- Use scissors to cut away tangled hair from the brush bar
- Check the small air channels in the head for blockages
- Reattach the head and test again
Diagnosing and Fixing Changeover Valve Problems
The changeover valve is a critical component that directs suction between the cleaner head and the wand attachment. When it malfunctions, you may experience strong suction from one attachment but none from the other.
How to Identify a Changeover Valve Issue
You likely have a changeover valve problem if:
- The wand has strong suction but the floor head doesn’t
- Suction doesn’t switch properly when you lower or raise the vacuum handle
- You hear airflow but feel minimal suction at the cleaner head
Step-by-Step Changeover Valve Repair
- Locate the secondary filter on the left side of the vacuum
- Unscrew and remove this filter
- Look for the hose connection to the canister
- The changeover valve is at the junction where this hose meets the canister
- Remove the ball cover (may require a screwdriver)
- Inspect the valve mechanism for:
- Foreign objects (toys, candy wrappers, pen caps, etc.)
- Hair and debris buildup
- Small pieces of tubing that may be obstructing movement
- Use needle-nose pliers to carefully remove any obstructions
- Manually test that the valve moves freely
- Reassemble the vacuum
- Test by switching between floor cleaning and using the wand
Many users report finding unexpected items blocking their changeover valve, from golf tees to pen caps, which completely resolved their suction issues once removed.
Addressing Damaged Suction Hoses
Small cracks or tears in the internal suction hoses can cause significant suction loss that’s difficult to diagnose without deeper inspection.
Inspecting Internal Hoses
- Remove the ball cover (refer to your user manual for specific instructions)
- Remove and set aside the filter
- Locate the small suction hose that connects to the changeover valve
- Carefully inspect this hose for any cracks, tears, or damage
- Check all connection points for secure fit
- Pay special attention to the small tube with the red cap, which can become dislodged
Replacing Damaged Hoses
If you find damaged hoses:
- Take clear photos of the current configuration before disassembly
- Purchase replacement hoses from Dyson or authorized parts dealers
- Carefully remove the damaged hose
- Install the new hose, ensuring all connections are secure
- Reassemble the vacuum
- Test suction performance
Brush Motor and Beater Bar Issues
If your Dyson DC15 has good suction but the brush isn’t rotating, you may have an issue with the brush motor or electrical connections.
Diagnosing Brush Motor Problems
- Ensure the vacuum is unplugged before inspection
- Check if the brush roll is free from obstructions that might prevent rotation
- Inspect for visible damage to the brush bar or belt
- Look for a brush reset button that may have been triggered by an obstruction
Electrical Issues with the Brush System
The DC15 brush system is known to have electrical issues where:
- Internal wires can break and create shorts
- These shorts can damage the circuit board
- Repairs typically involve replacing both wires and potentially the circuit board
Note: If you’re experiencing repeated brush motor failures, consider that the repair costs ($110+ for circuit board replacement) may eventually exceed the value of the vacuum. In such cases, investing in a newer model might be more economical long-term.
If the circuit board is damaged, it will need to be replaced to restore power to the brush motor.
Search term for Amazon: Dyson DC15 circuit board
Comprehensive Maintenance Tips for Dyson DC15
Regular Maintenance Schedule
Implement this maintenance routine to prevent suction problems:
- After Each Use: Empty the dust bin
- Weekly: Check for visible blockages in the hose and cleaner head
- Monthly: Clean the brush bar and check for hair buildup
- Every 3-6 Months: Wash the filters
- Annually: Deep clean the entire vacuum, including all removable parts
Proper Vacuum Settings
Using incorrect settings can reduce effective suction:
- Ensure the vacuum is set to the appropriate height for your floor type
- Use the correct power mode for the surface (higher for carpets, lower for hard floors)
- Check that all attachments are properly secured before use
Avoiding Common Usage Mistakes
- Don’t vacuum wet surfaces or liquids with your DC15
- Avoid vacuuming fine dust (like drywall dust) without a proper filter
- Pick up large objects by hand rather than trying to vacuum them
- Never vacuum hot ash or burning materials
Frequently Asked Questions (FAQ)
Why does my Dyson DC15 have strong suction at the hose but not at the cleaner head?
This typically indicates a changeover valve issue. The valve directs suction between the wand and cleaner head. When obstructed, suction may remain at the wand instead of switching to the cleaner head when the vacuum handle is lowered. Follow the changeover valve repair steps outlined earlier to resolve this.
How often should I clean the filters on my Dyson DC15?
Dyson recommends washing the filters every 3-6 months under normal household use. However, if you have pets, allergies, or vacuum frequently, you may need to clean them more often. A good indicator is when you notice reduced suction even after checking for blockages.
Can I repair a cracked hose myself or do I need to replace it?
Small cracks in external hoses can sometimes be temporarily repaired with strong tape specifically designed for hose repair. However, this is generally a short-term solution. For internal hoses or significant damage, replacement is recommended for optimal performance. Replacement hoses can be purchased directly from Dyson or authorized parts retailers.
Why does my brush bar stop spinning intermittently?
Intermittent brush bar operation could indicate several issues:
– Thermal cutout has been triggered (let the vacuum cool down)
– Loose electrical connections inside the vacuum
– Hair or string wrapped around the brush bar ends
– Failing motor or circuit board
If basic cleaning doesn’t resolve the issue, the motor or circuit board may need professional attention.
Is it worth repairing my Dyson DC15 or should I replace it?
This depends on the specific issue and repair costs. If you’re facing repeated electrical problems with the brush motor circuit board ($110+ per repair), it may be more economical to invest in a newer model. However, for simple blockages or filter issues, repairs are usually straightforward and cost-effective.
Conclusion
The Dyson DC15 is a powerful vacuum that can provide years of reliable service when properly maintained. Most suction problems can be resolved through systematic troubleshooting of the common issues outlined in this guide. By regularly checking for blockages, cleaning filters, and ensuring all components are functioning correctly, you can maintain optimal performance.
If you’ve tried all the solutions in this guide without success, or if you’re dealing with repeated electrical failures, it may be time to consult a professional repair service or consider upgrading to a newer model. Remember that Dyson continues to improve their technology with each new release, offering better performance and reliability.
With proper care and timely intervention when issues arise, your Dyson DC15 can continue to deliver the powerful suction it was designed for, keeping your home clean and dust-free for years to come.


