
When your Dyson DC07 vacuum cleaner refuses to turn on, it can disrupt your cleaning routine and cause frustration. Power switch issues are among the most common problems with these otherwise reliable machines. Fortunately, with the right approach and some basic tools, you can diagnose and fix many power switch problems yourself, saving time and money on professional repairs.
Affiliate disclosure: As an Amazon associate, We'll earn a commission for every successful order through our affiliate links in the article. However, you won’t be charged anything for this.
This guide will walk you through the process of identifying why your Dyson DC07 isn’t switching on and provide detailed steps to resolve the issue. From simple troubleshooting to complete switch replacement, you’ll find the information you need to get your vacuum working again.
Common Causes of Power Failure in Dyson DC07
The Dyson DC07 may fail to power on for several reasons, with the most frequent culprits being:
- Faulty power switch – The most common cause, where the internal mechanism fails to complete the electrical circuit
- Damaged power cord – Fraying, internal breaks, or connection issues
- Electrical outlet problems – The power source itself may be faulty
- Motor or circuit board issues – Less common but more serious problems
A malfunctioning power switch typically manifests through specific symptoms: the vacuum won’t turn on when the button is pressed, the switch feels loose or unresponsive, or it may appear visibly damaged. In some cases, the vacuum might turn on briefly before shutting off, indicating intermittent switch contact.
Diagnosing Your Dyson’s Power Problem
Before attempting any repairs, it’s essential to accurately diagnose the issue. Follow these systematic steps:
Check the Power Source
- Test the outlet – Plug another device into the same outlet to verify it’s working
- Inspect the plug – Look for signs of damage, burning, or loose prongs
If you find the plug is damaged, it will need to be replaced.
- Examine the power cord – Check the entire length for cuts, fraying, or damage, particularly at stress points near the plug and where the cord enters the vacuum
If you find the cord is damaged, it will need to be replaced.
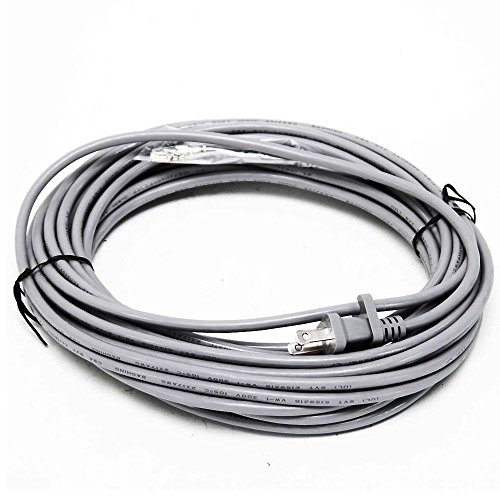
Official Dyson replacement for DC07 vacuum
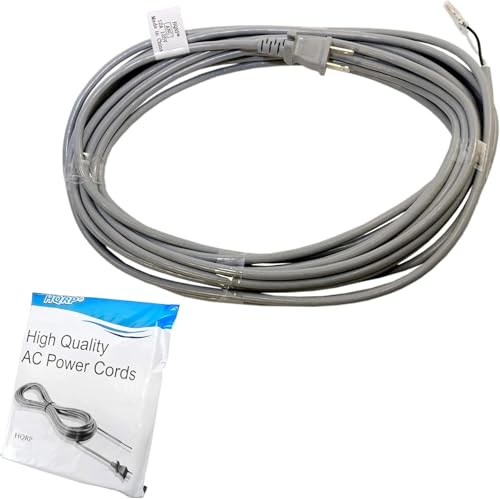
Affordable 36ft replacement with 200-day warranty
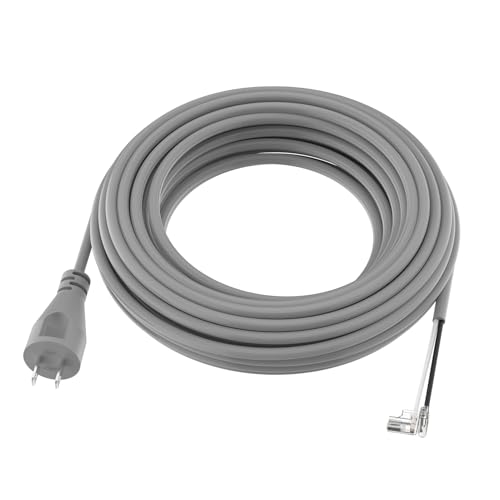
Premium 36ft cord with durable construction
Assess the Power Switch
- Visual inspection – Look for cracks, breaks, or signs of damage on the switch
- Functional test – Press the power button multiple times, noting any resistance, clicking, or partial response
- Listen for sounds – When pressing the switch, you should hear a definite click if the mechanism is working
Test with a Multimeter
For a more definitive diagnosis, use a multimeter to test electrical continuity:
- Unplug the vacuum for safety
- Set your multimeter to the continuity or resistance setting
- Touch the probes to the switch terminals
- Press the switch – you should see a reading indicating continuity when the switch is pressed and no continuity when released
- If you get a low voltage reading (2-3V) when the wall socket delivers 120V, this suggests a problem with the plug or internal circuitry
Step-by-Step Power Switch Replacement
If your diagnosis confirms a faulty power switch, replacement is relatively straightforward. This procedure works for Dyson DC07, DC14, DC33, and DC7 models, though the disassembly steps may vary slightly.
Tools and Materials Required
- Screwdriver set (including precision screwdrivers)
- T15 Torx screwdriver (sometimes incorrectly labeled as T20)
- Phillips head screwdriver
- Flathead screwdriver
- Small pliers
- Wire strippers (if needed)
- Electrical tape
- Replacement power switch compatible with Dyson DC07 (approximately $6 including shipping)
If you need to purchase a replacement power switch, here is the search term.
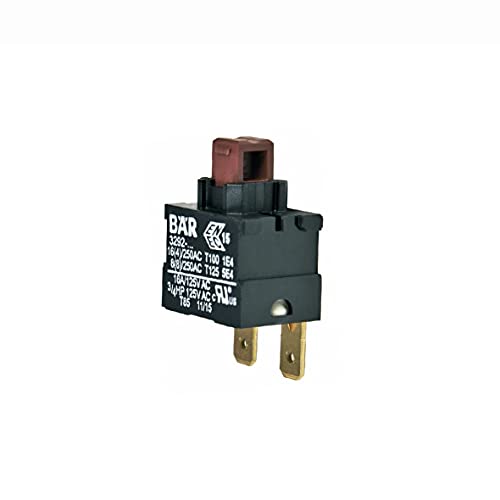
Official OEM replacement for DC07 vacuum
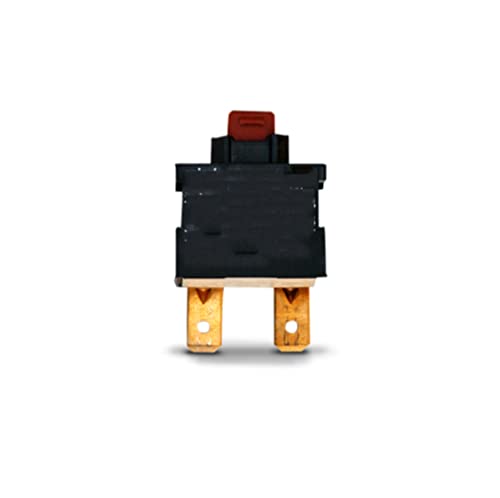
High-quality replacement with 18-month warranty
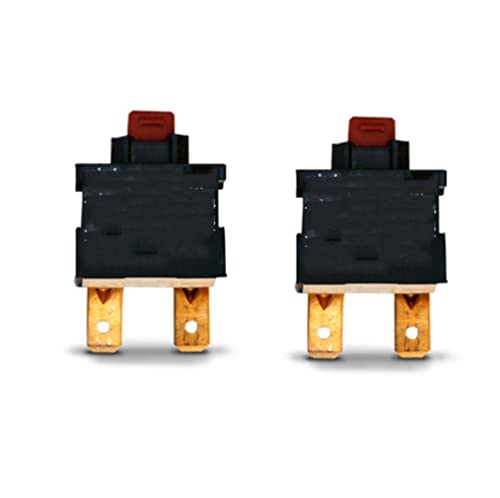
Cost-effective 2-pack option with warranty

Affordable generic replacement for DC07
Safety First
- Unplug the vacuum completely from the power source
- Work in a well-lit area with ample space
- Keep track of all screws and components as you disassemble
- Take photos at each step if you’re uncertain about reassembly
Disassembly Process
Remove the dust container by pressing the release button and lifting it away
Access the internal components:
- For DC07 models, locate and remove the screws securing the outer casing
- Use the T15 Torx screwdriver to remove screws around the canister area
- Carefully release any clips holding the casing together
- Gently separate the casing to expose the internal components
Locate the power switch assembly:
- The switch is typically positioned near the handle or on the upper portion of the vacuum
- You’ll see wires connected to the switch terminals
Document the wiring configuration:
- Take photos or make notes of how the wires connect to the switch
- Note the color and position of each wire for correct reassembly
Removing the Old Switch
Disconnect the wires from the switch terminals:
- Use small pliers to gently pull the wire connectors from the terminals
- Be careful not to damage the wires or connectors
Release the switch from its housing:
- Note how the switch is secured (usually with clips or small screws)
- For DC07/DC14 models, you may need to carefully pry retaining clips
- Extract the switch, paying attention to its orientation and any additional components like springs
Installing the New Switch
Prepare the replacement switch:
- Verify it matches the specifications of the original
- Check that any actuators or buttons align properly
Position the new switch in the housing:
- Align it correctly, ensuring the button mechanism interfaces properly with the external button
- Secure it using the same method as the original (clips or screws)
Reconnect the wires:
- Attach each wire to the corresponding terminal on the new switch
- Ensure connections are secure but don’t overtighten
- If any wire insulation is damaged, wrap with electrical tape to prevent shorts
Reassembly and Testing
Carefully reassemble the vacuum:
- Ensure all components align properly
- Replace all screws and secure all clips
- Verify no wires are pinched or strained
Test the repair:
- Plug in the vacuum
- Press the power switch to verify it turns on
- Test multiple times to ensure reliable operation
- Listen for any unusual sounds that might indicate other issues
- Reattach the dust container and perform a final function check
Troubleshooting Switch Replacement Issues
If your vacuum still doesn’t work after replacing the switch, consider these potential problems:
Switch Still Not Working
- Check wire connections – Ensure all wires are securely attached to the correct terminals
- Verify switch installation – Make sure the switch is properly seated and aligned
- Test for power at the outlet – Use a multimeter to confirm you’re getting full voltage
- Inspect the circuit board – Look for burnt components or loose connections that might prevent power from reaching the switch
Loose or Unresponsive Switch
- Verify proper mounting – Ensure the switch is securely fastened in its housing
- Check actuator alignment – The button mechanism must properly engage with the switch
- Clear any debris – Foreign objects may interfere with switch movement
- Inspect for damaged components – The switch housing or actuator may be broken
Addressing Motor and Power Supply Problems
If the switch replacement doesn’t resolve the issue, you may have a more serious problem:
Motor Diagnosis
- Listen for unusual sounds – A change in pitch or grinding noise suggests motor problems
- Check for burning smell – This indicates potential motor overheating or burnout
- Inspect motor brushes – Worn carbon brushes can prevent the motor from running
If the motor brushes are worn, they will need to be replaced.
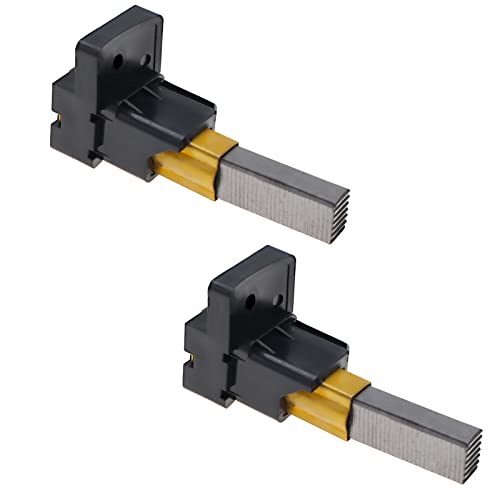
2-piece set with holders for DC07 motor compatibility
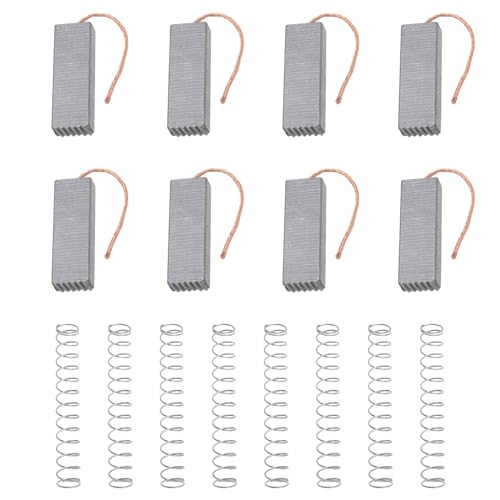
4-pair set (8 brushes) with springs for DC07 motors

2-piece set with durable materials for DC07 motor
- Test motor continuity – Use a multimeter to check if the motor windings have continuity
Circuit Board Issues
- Look for visible damage – Burnt components, bulging capacitors, or scorched areas
- Check for corrosion – Especially in vacuums used in humid environments
- Test voltage at key points – Use a multimeter to trace the power path from the plug to the motor
Frequently Asked Questions (FAQ)
Why does my Dyson DC07 turn on briefly then shut off?
This typically indicates an intermittent connection in the power switch or a thermal protection issue. The switch may be making momentary contact before failing, or the motor might be overheating and triggering a safety cutoff. Try replacing the switch first, as it’s the most common and easiest fix.
Can I repair the power switch instead of replacing it?
While technically possible, repairing the internal mechanism of a power switch is rarely practical or reliable. Switches are relatively inexpensive components designed to be replaced rather than repaired. A new switch will provide more dependable performance than attempting to fix the old one.
How long should a Dyson DC07 power switch last?
With normal use, a power switch should last 5-7 years or more. Factors affecting longevity include frequency of use, how forcefully the button is pressed, and environmental conditions like dust and humidity. Premature failure often occurs due to internal corrosion or mechanical wear of the switch contacts.
Is it worth fixing an older Dyson DC07?
In most cases, yes. The DC07 is a well-built vacuum with excellent suction power and durability. The cost of replacing a power switch (around $6 plus your time) is significantly less than purchasing a new vacuum. However, if multiple components are failing, you might consider the total repair costs versus replacement.
Conclusion
A non-functioning power switch on your Dyson DC07 is a common issue that can usually be resolved with basic tools and a methodical approach. By following the diagnostic steps and replacement procedure outlined in this guide, you can restore your vacuum to working condition without professional assistance in most cases.
Remember to always prioritize safety by unplugging the vacuum before attempting any repairs. If you encounter difficulties or suspect more complex problems beyond the power switch, contacting Dyson customer support or a qualified repair service may be your best option.
With proper maintenance and occasional repairs like these, your Dyson DC07 can continue to provide excellent cleaning performance for many years to come.


