
The Dyson DC39 is renowned for its powerful suction and innovative design, but like any appliance, it can encounter issues that prevent it from turning on. When your trusted vacuum cleaner fails to power up, it can disrupt your cleaning routine and leave you wondering about the cause. Power problems in the DC39 can stem from various sources, ranging from simple connection issues to more complex internal component failures.
Affiliate disclosure: As an Amazon associate, We'll earn a commission for every successful order through our affiliate links in the article. However, you won’t be charged anything for this.
This comprehensive guide will walk you through the most common reasons why your Dyson DC39 might not be turning on and provide step-by-step troubleshooting methods to diagnose and fix these issues. We’ll cover everything from basic power supply checks to more advanced component testing and replacement procedures. Whether you’re dealing with a completely dead vacuum or one that powers on intermittently, this article will help you identify the problem and implement the appropriate solution to get your Dyson DC39 back in working order.
Identifying Common Power Issues in Your Dyson DC39
When your Dyson DC39 refuses to turn on, several potential culprits could be responsible. Before disassembling your vacuum or calling for professional help, it’s worth checking some of the most common causes of power failure.
Power Supply Connections
The first and most obvious place to start troubleshooting is with the power supply:
-
Outlet Testing: Ensure your wall outlet is functioning correctly by plugging in another device. Sometimes what appears to be a vacuum problem is simply a tripped circuit breaker or faulty outlet.
-
Power Cord Inspection: Carefully examine the entire length of the power cord for any visible damage such as cuts, frays, or exposed wires. Pay particular attention to the areas near the plug and where the cord enters the vacuum body, as these are common stress points.
-
Plug Connection: Check that the plug is securely inserted into the outlet. Also inspect the plug itself—a broken white cable inside the plug is a frequent cause of power failure in the DC39.
If you find the power cord is damaged, you’ll need to replace it to ensure safe and reliable operation.
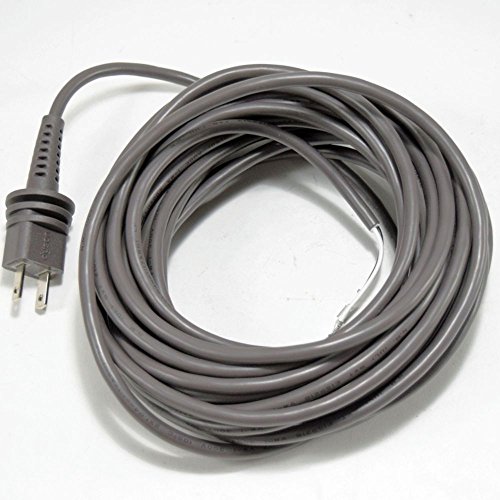
Official Dyson replacement power cord for DC33 models

Third-party replacement compatible with multiple Dyson uprights
Internal Electrical Components
If the power supply appears to be in good condition, the issue may lie with the vacuum’s internal electrical components:
On/Off Switch: The power switch can wear out over time. Try pressing and releasing it several times to see if it responds. A loose or unresponsive switch might need replacement.
Control Panel: Observe any LED indicators on the control panel. These can provide valuable diagnostic information about the vacuum’s status and any potential issues.
Motor Brushes: The DC39’s motor uses carbon brushes that wear down over time. When these brushes wear out completely, the motor won’t run.
Troubleshooting Your Dyson DC39: A Step-by-Step Guide
Basic Power Reset Procedure
Sometimes, electronic devices just need a simple reset to resolve temporary glitches:
- Unplug your Dyson DC39 from the power outlet.
- Leave it disconnected for at least 10 minutes to allow any residual charge to dissipate.
- Plug it back in and attempt to turn it on.
This basic reset can often resolve minor electronic issues that prevent the vacuum from powering up.
Checking for Overheating
Overheating is a common cause of automatic shutdown in vacuum cleaners:
- If your vacuum was running before it stopped working, it might have overheated.
- Allow the machine to cool down for at least 30 minutes.
- Once cooled, try turning it on again.
To prevent future overheating:
– Regularly empty the dustbin
– Clean or replace filters as recommended
– Check for and remove any blockages in the airflow path
Inspecting for Blockages
Blockages can cause the vacuum to overheat and shut down as a protective measure:
- Dustbin and Filters: Empty the dustbin and check that the filters are clean. A clogged filter restricts airflow, forcing the motor to work harder.
Hose Inspection: Detach the hose and check for any obstructions. Look through the hose to see if light passes through, or use a long object (like a broom handle) to gently push out any blockages.
Fan Assembly: The fan assembly can become jammed with debris. To check:
- Disconnect the vacuum from power
- Remove the dustbin
- Inspect the fan for obstructions or damage
- Clear any debris you find
Testing the On/Off Switch
A faulty power switch is often the culprit when a vacuum won’t turn on:
- If you have access to an ohmmeter or multimeter:
- Set the meter to measure resistance (ohms)
- Disconnect the vacuum from power
- Access the switch connections
- Test the switch by measuring resistance in both on and off positions
- In the “on” position, a working switch should show continuity (low resistance)
In the “off” position, it should show no continuity (infinite resistance)
If the switch fails this test, it will need replacement.
Advanced Repair: Disassembling Your Dyson DC39
If basic troubleshooting doesn’t resolve the issue, you may need to disassemble your vacuum to access and repair internal components. Here’s how to do it safely and effectively:
Required Tools
Before beginning disassembly, gather these tools:
– Phillips screwdriver
– Flathead screwdriver
– Needle-nose pliers
– T15 Torx screwdriver (solid torque type is recommended for deep mounting holes)
Step-by-Step Disassembly Process
1. Preparation and Initial Disassembly
- Unplug the vacuum and place it on a clean, flat work surface.
- Remove the filter assembly and dust collector by pressing the gray release button.
- Detach the side ears (decorative plastic pieces) by removing one screw from each.
2. Accessing the Base Components
- Turn the vacuum upside down to access the wheelbase.
- Remove the four wheelbase screws.
- Locate and remove the deep-bottom Torx screws.
- Carefully lift off the bottom housing.
3. Opening the Top Housing
- Use a flathead screwdriver to carefully release the hidden clips securing the top housing.
- Remove the two screws holding the top housing in place.
- Gently lift off the top housing to expose the internal components.
4. Accessing the Motor
- Carefully disconnect all wire connections, noting their positions for reassembly.
- Remove the on/off switch if necessary.
- When handling the motor, pay attention to the rubber vibration dampeners that isolate motor vibrations during operation.
Inspecting and Replacing Motor Brushes
The motor brushes in your Dyson DC39 are a common wear item that may need replacement:
- Locate the motor brushes (small carbon components that contact the motor’s commutator).
- Remove the old brushes by disconnecting their wiring and releasing any retention clips.
- Install new brushes (approximately $17 for a pair) in the same orientation as the originals.
- A properly functioning motor should show about 18 ohms of resistance when tested with a multimeter.
Worn motor brushes can prevent the motor from running. Replacing them can restore the vacuum’s functionality.

Original Dyson main roller brush for DC39 vacuum, durable and efficient cleaning
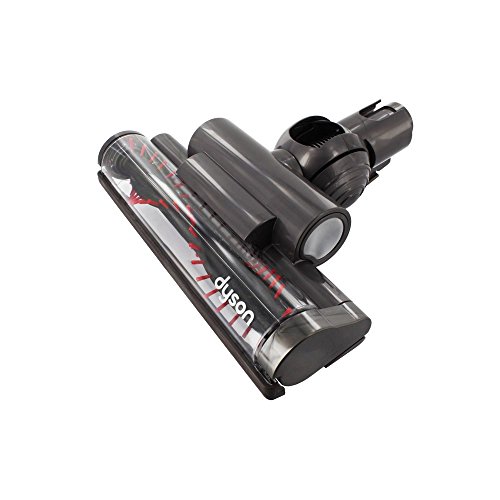
Official Dyson triggerhead for DC39 vacuum with V-Ball technology
Addressing Specific DC39 Components
Power Cord Repair or Replacement
If you’ve identified damage to the power cord:
- For minor damage near the plug end, you may be able to cut the damaged section and install a new plug.
- For damage elsewhere on the cord or for a complete replacement:
- Trace the cord to where it enters the vacuum body
- Disconnect it from the internal wiring
- Install a new compatible power cord
- The DC39 features a detachable spring spool for cord rewinding that can be serviced separately
Filter Maintenance
The DC39 has a non-replaceable internal filter that requires periodic cleaning:
- Locate the internal filter (separate from the main dust filter).
- Remove it carefully according to the user manual instructions.
- Wash it with cold water only (no detergents).
- Allow it to dry completely (at least 24 hours) before reinstalling.
- Never operate the vacuum without this filter in place, as it protects the motor.
Frequently Asked Questions (FAQ)
Why does my Dyson DC39 turn on but then shut off immediately?
This typically indicates an overheating issue or a blockage. Check all filters and airways for obstructions. The vacuum may also have a thermal cutout switch that activates when the motor gets too hot. Let the vacuum cool down completely before attempting to use it again. If the problem persists, the thermal switch itself might be faulty and need replacement.
How often should I replace the motor brushes in my Dyson DC39?
Motor brushes typically last 4-7 years depending on usage. Signs that brushes need replacement include intermittent operation, unusual noises, or visible sparking from the motor area. As a preventative measure, consider replacing the brushes if you’re already performing other internal repairs on an older vacuum.
Can I repair a damaged power cord myself?
For minor damage near the plug, replacing just the plug can be a safe DIY repair. However, if the damage is extensive or located where the cord enters the vacuum body, professional repair is recommended. Improper cord repairs can create electrical hazards. A complete replacement cord is often the safest solution.
Why is my Dyson making a humming noise but not starting?
A humming noise without motor operation often indicates that the motor is receiving power but cannot turn. This could be due to completely worn motor brushes, a jammed fan, or a seized motor bearing. Disassembly and inspection of the motor components will be necessary to diagnose the specific issue.
How do I know if the problem is the switch or the motor?
To differentiate between a switch and motor problem, you can bypass the switch temporarily (if you have electrical knowledge) or use a multimeter to test for continuity across the switch when it’s in the “on” position. If the switch tests good but the vacuum still won’t run when properly connected to power, the issue is likely with the motor or its brushes.
Conclusion
The Dyson DC39 is designed with repairability in mind, making it possible for many common issues to be resolved at home with the right tools and guidance. When your vacuum won’t turn on, systematically working through the potential causes—from simple power supply issues to more complex internal component failures—can often identify and fix the problem without professional assistance.
Remember to always prioritize safety by disconnecting the vacuum from power before attempting any repairs. If you’re uncomfortable performing any of these procedures, or if your troubleshooting efforts don’t resolve the issue, don’t hesitate to contact Dyson’s customer support or a qualified appliance repair technician.
With proper maintenance and occasional repairs when needed, your Dyson DC39 can provide many more years of reliable service, maintaining its powerful suction and cleaning effectiveness throughout its extended lifespan.


