
The Dyson DC18 is a reliable vacuum cleaner known for its powerful suction and innovative design. However, like any electrical appliance, it can sometimes encounter problems that prevent it from turning on. These issues can range from simple power supply problems to more complex internal malfunctions.
Affiliate disclosure: As an Amazon associate, We'll earn a commission for every successful order through our affiliate links in the article. However, you won’t be charged anything for this.
When your Dyson DC18 refuses to power up, it can be frustrating, especially when you’re in the middle of cleaning. Before rushing to replace your vacuum or scheduling a costly repair service, there are several troubleshooting steps you can take yourself. This comprehensive guide will walk you through the most common reasons why your Dyson DC18 won’t turn on and provide practical solutions to get it working again.
Common Causes for Dyson DC18 Power Failure
When your Dyson DC18 vacuum cleaner fails to turn on, several factors could be responsible. The most frequent causes include power supply issues, blockages in the airway system, faulty power switches, and problems with the brush roll mechanism. Understanding these potential culprits is the first step toward resolving the issue.
Power supply problems are often the simplest to fix. Before diving into more complex troubleshooting, always check if your vacuum is properly plugged in and if the wall outlet is functioning correctly. A blown fuse in the plug is another common issue that’s relatively easy to address.
Airway blockages can trigger safety mechanisms that prevent the vacuum from operating. The Dyson DC18 is designed to shut off when it detects significant obstructions to protect the motor from overheating. Regular maintenance, including filter cleaning and checking for blockages, can prevent this problem.
Internal electrical issues, such as a faulty power switch or damaged wiring, require more technical intervention but are still manageable with the right guidance. In the following sections, we’ll explore detailed solutions for each of these potential problems.
Essential Preliminary Checks
Inspecting for Physical Damage
Before attempting any repairs, thoroughly examine your Dyson DC18 for visible damage. Pay special attention to the power cord, looking for cuts, frays, or exposed wiring. If you notice any damage to the power cord, do not use the vacuum as it poses a safety hazard. Contact the Dyson Helpline for assistance or consider replacing the power cord if you have the necessary skills.
Also check the vacuum body for cracks or other damage that might affect its functionality. Sometimes, a hard fall or impact can damage internal components even if the exterior appears intact.
Verifying Power Supply
A non-functioning vacuum often comes down to power supply issues:
- Ensure the vacuum is properly plugged into a wall socket
- Verify the wall socket is working by testing it with another appliance
- Check if the wall socket switch is turned on (if applicable)
- Examine the vacuum’s plug for a blown fuse
For UK models, the plug contains a fuse that may need replacement. Refer to your Dyson DC18 user manual for the correct fuse type and replacement instructions. For other regions, check if your model has a reset button or circuit breaker that may have tripped.
If the fuse is blown, it needs to be replaced with a new one of the correct rating to ensure the vacuum functions safely.
Clearing Airway Obstructions
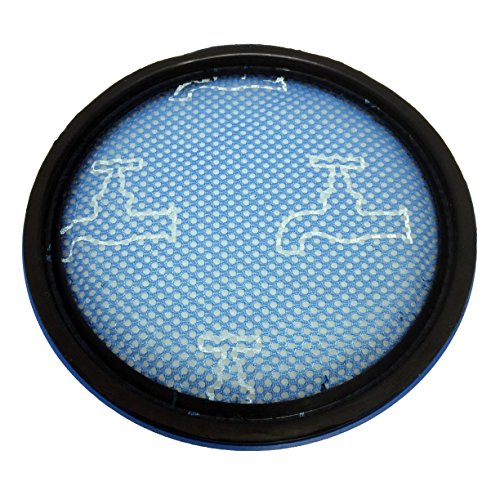
Filter Maintenance
A clogged filter is one of the most common reasons for a Dyson DC18 to shut down. The vacuum has safety features that prevent operation when airflow is severely restricted:
- Locate and remove the filter (usually found at the top of the cyclone assembly)
- Rinse it under cold water until the water runs clear
- Gently squeeze out excess water
- Allow the filter to dry completely for at least 24 hours before reinstalling
- Never use detergents or put the filter in a washing machine or dishwasher
Using a damp filter can damage your vacuum and potentially cause electrical hazards, so ensure it’s completely dry before reinstalling.
If your Dyson DC18 filter is damaged or worn, replacing it with a new one can improve your vacuum’s performance and prevent overheating issues.

Enhanced filtration with genuine part compatibility
Affordable pre-motor replacement for DC18
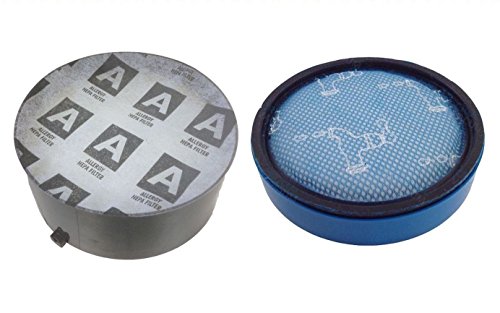
Complete filter set for DC18 vacuum

HEPA filter with genuine part comparison
Removing Blockages
If your filter is clean but the vacuum still won’t turn on, check for blockages in the airway:
- Disconnect the vacuum from power
- Check the main suction opening and hose for obstructions
- Use a metal clothes hanger with a bent hook to carefully probe and remove any debris
- Inspect the brush roll area for tangled hair or string
- Check the connection points between the hose and the vacuum body
Pay particular attention to the hose connection port and main motor port, as debris can accumulate in these areas and prevent proper operation.
If the hose is damaged or severely clogged, it may be necessary to replace it to restore proper suction.
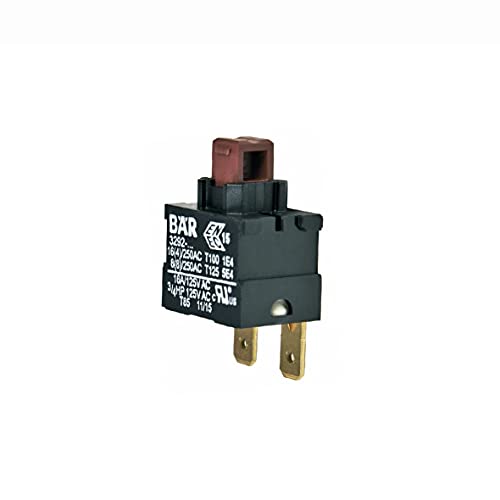
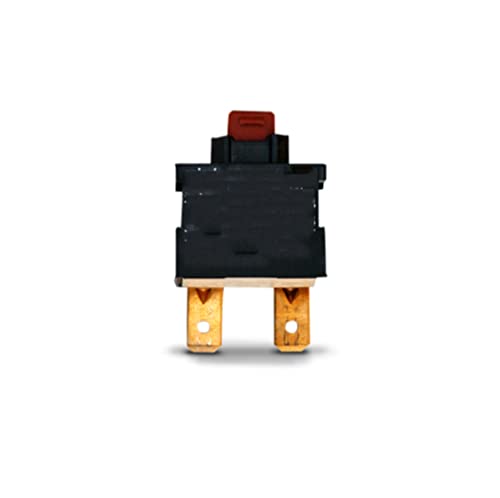
Addressing Power Switch Malfunctions
If your Dyson DC18’s main motor doesn’t remain on after pressing and releasing the red push button, the power switch may be faulty. This is a relatively common issue that can be resolved with the following steps:
Power Switch Replacement Procedure
- Obtain a new compatible power switch (DC15 part works with DC18)
- Unplug the vacuum completely
- Remove the switch cover:
- Locate and remove the four Torx screws securing the upper part of the cover
- Loosely replace the two bottom screws
- Use a screwdriver to push firmly on each screw to release the lower part of the cover
- Disconnect the old switch by carefully removing the wire connections
- Install the new switch, ensuring all wire connections match the original configuration
- Reassemble the vacuum by reversing the disassembly steps
- Test the vacuum to confirm the switch is working properly
This repair requires basic technical skills and the appropriate tools. If you’re uncomfortable performing this task, consider seeking professional assistance.
Replacing the power switch can restore the vacuum’s ability to turn on and off properly.
Official replacement for Dyson DC18 power switch
Compatible DC18 power switch with extended warranty
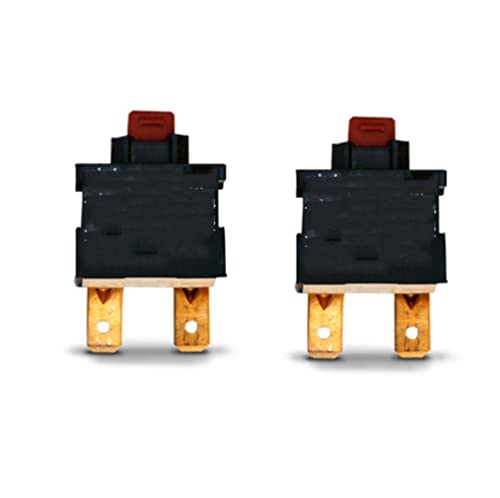
Bulk replacement option for DC18 power switches
Resolving Brush Roll Issues
The brush roll is crucial for effective carpet cleaning. If it’s not spinning properly, it can affect the vacuum’s overall performance and may even prevent it from turning on due to safety features.
Diagnosing Brush Roll Problems
Common brush roll issues include:
- Complete failure to spin
- Intermittent spinning
- Unusual noises during operation
- Reduced cleaning effectiveness on carpets
Brush Roll Maintenance and Repair
Follow these steps to address brush roll problems:
- Unplug the vacuum completely
- Access the brush roll:
- Turn the vacuum upside down
- Unscrew the bottom plate to expose the brush roll
- Use needle-nose pliers to disconnect any clips or fasteners
- Clean the brush roll:
- Remove tangled hair, strings, and debris using pliers
- Clean the surrounding area with a soft-bristled brush
- Inspect for wear and damage:
- Check for worn bristles
- Look for cracks or breaks in the brush roll
- Examine the bearings for smooth rotation
- Replace if necessary:
- Install a new brush roll if the existing one is damaged
- Ensure proper alignment and secure all fasteners
- Reassemble and test:
- Reattach the bottom plate
- Test the vacuum on different surfaces
Regular brush roll maintenance can prevent many issues and extend the life of your vacuum.
A worn or damaged brush roll can significantly reduce cleaning effectiveness, so replacing it ensures optimal performance.
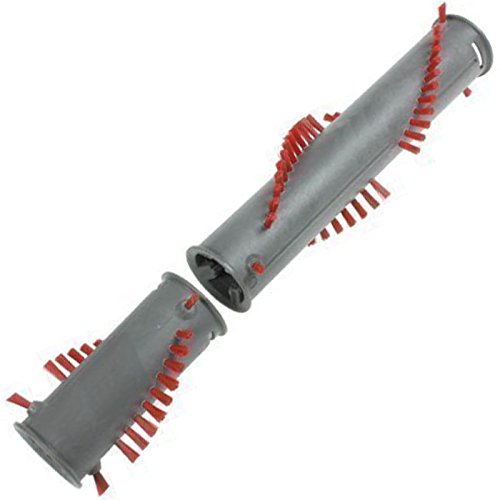
Direct replacement for Dyson DC18 vacuum cleaners with full compatibility
Fixing Electrical Connection Problems
If your Dyson DC18 still won’t turn on after addressing the previous issues, electrical connection problems might be the culprit.
Wiring Inspection and Repair
- Open the swivel cover to access internal wiring
- Carefully inspect all visible wires for breaks, frays, or loose connections
- For broken wires:
- Locate the exact break point
- Strip insulation from both ends of the broken wire
- Join the ends using a soldering iron
- Insulate the repaired section with electrical tape or heat-shrink tubing
- For loose connections:
- Ensure all wire terminals are securely attached to their connection points
- Tighten any loose screws or terminals
- Check for corrosion and clean if necessary
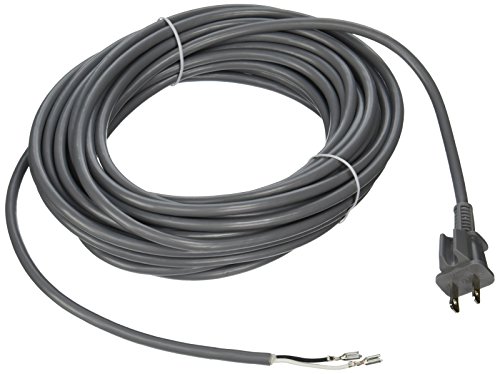
Power Cable Replacement
If the power cable is damaged beyond repair:
- Purchase a compatible replacement power cable for the Dyson DC18
- Disconnect the vacuum from power
- Open the necessary access panels to reach the internal power cable connection
- Carefully remove the old cable, noting how it’s routed and connected
- Install the new cable following the same routing path
- Secure all connections and reassemble the vacuum
- Test to ensure proper operation
Power cable replacement requires careful attention to safety. If you’re unsure about any step, consult a professional.
A damaged power cable is a safety hazard and needs to be replaced immediately to ensure safe operation of the vacuum.
Genuine Dyson DC18 power cord replacement

Compatible with DC14/15 models
Official DC14 model replacement
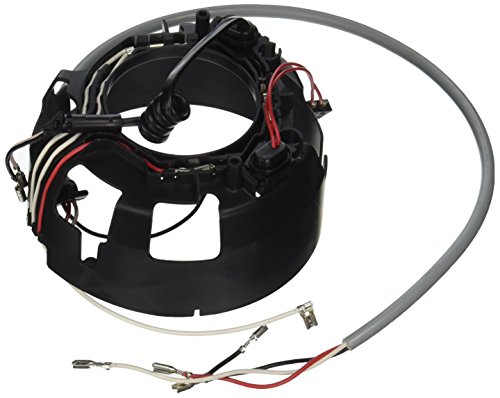
Undercarriage Component Issues
The undercarriage of the Dyson DC18 contains several critical components that can affect its operation.
Suction Diversion Problems
The undercarriage houses a diverter valve that directs suction between the floor head and the hose. Issues with this component can cause:
- Reduced suction through the hose
- Inability to switch between floor and hose modes
- Complete loss of suction
Unfortunately, undercarriage issues typically require replacement of the entire assembly. This is a complex repair best handled by authorized Dyson service centers.
Stability and Handle Issues
If your DC18 fails to remain upright or the handle doesn’t lock in position, there may be a broken component within the undercarriage assembly. This can indirectly affect power functionality as the vacuum may not engage properly in the upright position.
Frequently Asked Questions (FAQ)
Why does my Dyson DC18 turn on but then shut off immediately?
This typically indicates an airflow issue or overheating protection. Check for blockages in the filter, hose, and airways. Also ensure the dust bin isn’t overfilled. If the vacuum has been running for an extended period, allow it to cool down for 1-2 hours before trying again.
How often should I clean the filter on my Dyson DC18?
Dyson recommends washing the filter at least once every month under normal use conditions. However, if you vacuum frequently or clean dusty areas, you may need to wash it more often. Always allow the filter to dry completely (at least 24 hours) before reinstalling.
Can I replace the battery in my Dyson DC18?
The Dyson DC18 is a corded vacuum and doesn’t contain a battery for operation. If you’re experiencing power issues, they’re related to the electrical components or mechanical functions rather than battery failure.
Is it worth repairing my Dyson DC18 or should I replace it?
This depends on the specific issue and the overall condition of your vacuum. If the problem is simple (like a clogged filter or minor electrical issue), repairs are usually cost-effective. However, if multiple components are failing or replacement parts are difficult to find, it might be more economical to upgrade to a newer model. Consider that the DC18 is an older model, and newer Dyson vacuums offer improved features and efficiency.
Where can I find replacement parts for my Dyson DC18?
Genuine Dyson parts can be purchased directly from Dyson’s website, authorized service centers, or reputable online retailers. For older models like the DC18, third-party compatible parts may also be available. Always ensure parts are compatible with your specific model to avoid further issues.
Conclusion
When your Dyson DC18 refuses to turn on, the problem could range from simple power supply issues to more complex internal malfunctions. By following this comprehensive troubleshooting guide, you can identify and resolve many common problems without professional assistance.
Start with the basics: check the power supply, inspect for physical damage, and ensure the filter and airways are clean. If these steps don’t resolve the issue, proceed to more technical solutions like power switch replacement or brush roll maintenance. For complex undercarriage problems, seeking professional help may be the most efficient solution.
Regular maintenance is key to preventing future issues. Clean your filters regularly, keep the brush roll free of tangles, and promptly address any unusual noises or performance changes. With proper care and timely troubleshooting, your Dyson DC18 can continue to provide effective cleaning performance for years to come.


