

When your Dyson DC40 vacuum cleaner stops picking up debris effectively, it can be frustrating but is often fixable without professional help. Suction problems typically stem from blockages, worn components, or improper maintenance. This comprehensive guide will walk you through diagnosing and resolving the most common causes of poor suction in your Dyson DC40.
Affiliate disclosure: As an Amazon associate, We'll earn a commission for every successful order through our affiliate links in the article. However, you won’t be charged anything for this.
Most suction issues can be resolved through systematic troubleshooting and basic maintenance. With the right approach, you can restore your vacuum’s performance and extend its lifespan, saving both money and frustration in the process.
Common Causes of Reduced Suction
When your Dyson DC40 isn’t picking up properly, several culprits could be responsible:
Blocked Air Pathway
The most frequent cause of suction problems is a blockage somewhere in the vacuum’s air pathway. Dust, debris, and larger objects can become lodged in:
- The main hose
- Internal connecting pipes
- The wand attachment
- The cleaner head inlet
Even a small obstruction can significantly reduce airflow and compromise cleaning performance.
Clogged Filters
Your DC40 has two primary filters:
- Pre-motor filter: Catches fine dust before it reaches the motor
- Post-motor filter: Traps microscopic particles before air exits the vacuum
When these filters become clogged with dust and debris, they restrict airflow through the vacuum, reducing suction power.
Damaged or Worn Brush Bar
The brush bar (also called the beater bar) is critical for effective carpet cleaning. When bristles become worn, damaged, or tangled with hair and string, the vacuum’s ability to agitate and lift debris from carpets diminishes significantly.
Clogged Change Valve
The change valve directs airflow between the wand attachment and the roller brush. When clogged with pet hair or debris, it can’t properly switch between functions, resulting in poor suction at either the hose or the cleaner head.
Damaged Hose
Cracks, tears, or holes in the hose create air leaks that dramatically reduce suction power. Even small punctures can cause significant performance issues.
Diagnosing Suction Problems
Before attempting repairs, you need to identify the specific cause of your suction problems:
Testing Suction Points
Cleaner Head Test: With the vacuum running, place your hand over the cleaner head inlet with the brush bar turned off. You should feel strong suction.
Wand Test: Remove the wand from the hose and place your hand over the opening. Again, you should feel powerful suction.
Hose Test: Disconnect the hose from the vacuum body and feel for suction at the connection point.
These tests help pinpoint where suction is being lost in the system.
Visual Inspection
Perform a thorough visual check of:
- The transparent bin for obvious blockages
- The hose for visible obstructions or damage
- The filters for excessive dirt buildup
- The brush bar for tangled hair or debris
Listening for Changes
When operating normally, your Dyson DC40 should produce a consistent sound. Any unusual noises—particularly high-pitched whining or straining sounds—can indicate blockages or motor stress.
Clearing Blockages in the Hose System
Blockages in the hose system are among the most common causes of suction problems:
Main Hose Inspection and Cleaning
- Unplug the vacuum for safety.
- Disconnect the hose from both ends.
- Hold the hose up to a light source to identify blockages.
- For visible blockages:
- Use a broom handle or similar long object to gently push through the obstruction
- For stubborn clogs, carefully use a wire hanger with a hook formed at the end to extract the debris
- Never use sharp objects that could puncture the hose
If the main hose is damaged beyond repair or too difficult to clear, replacing it is a practical solution.

Official replacement for DC40 upright vacuum valve hose

Enhanced durability with multi-model compatibility
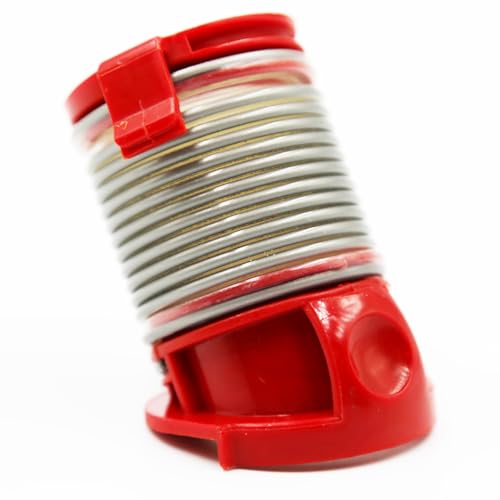
Cost-effective internal hose replacement
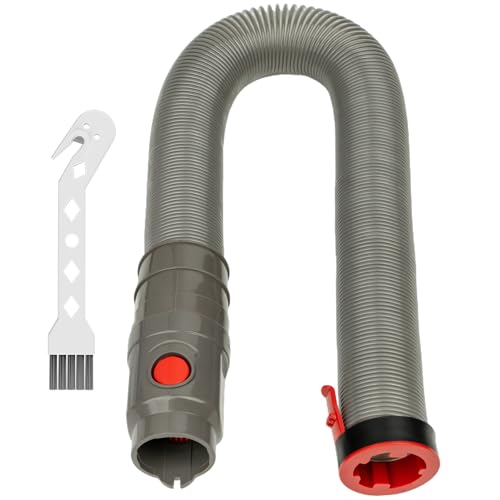
Flexible hose with hair-removal functionality
Cleaning the COV Hose
The COV (Changeover Valve) hose is located behind the lower cord hook:
- Remove the wand and main hose.
- Keep the machine in an upright position.
- Look down into the opening to check for blockages.
- Use needle-nose pliers to carefully remove any visible debris.
Clearing the Cleaner Head
- Unclip the cleaner head from the vacuum body.
- Examine the pipe and connection point behind it.
- Check for hair wrapped around the brush bar by:
- Flipping the side tabs to access the brush area
- Using scissors to cut away entangled hair (avoid cutting the bristles)
- Pulling the hair free from the brush
Checking Internal Hoses
- Locate the small hose inside the ball at the back of the vacuum.
- Inspect for blockages using a flashlight.
- Use long, thin pliers to remove any visible obstructions.
Cleaning and Replacing Filters
Dirty filters significantly impact suction performance:
Pre-Motor Filter Maintenance
- Locate the pre-motor filter (usually a washable foam filter).
- Remove it according to your model’s instructions.
- Rinse thoroughly under cold water until the water runs clear.
- Important: Allow the filter to dry completely (at least 24 hours) before reinstalling.
- Never use detergents or put filters in a dishwasher or washing machine.
Post-Motor Filter Care
- Locate the post-motor HEPA filter (typically on the side of the ball).
- Remove the filter according to your model’s instructions.
- Tap gently to remove loose dust.
- If excessively dirty, consider replacement as these filters are generally not washable.
Filter Replacement Schedule
For optimal performance:
– Wash the pre-motor filter every 1-3 months depending on usage
– Replace the post-motor filter every 6-12 months
Addressing Change Valve Issues
The change valve is a critical component that often gets overlooked:
Locating and Accessing the Change Valve
- Find the secondary filter on the left-hand side of the vacuum.
- Unscrew its cover to access the change valve.
Cleaning the Change Valve
- Inspect the valve for obstructions such as pet hair, debris, or small objects.
- Carefully remove any blockages by hand.
- Test the valve’s movement to ensure it operates smoothly.
- Clean the surrounding area to prevent future blockages.
Brush Bar Maintenance and Replacement
A functioning brush bar is essential for carpet cleaning:
Cleaning the Brush Bar
- Turn the vacuum upside down and locate the brush bar.
- Use scissors to cut away hair and string wrapped around the bar.
- Pull the debris free, being careful not to damage the bristles.
- Wipe the brush bar with a damp cloth to remove dust buildup.
Replacing a Worn Brush Bar
If the bristles are worn down or damaged:
- Remove the old brush bar according to your model’s instructions (usually involves removing a side plate).
- Install the new brush bar, ensuring it’s properly seated.
- Replace any covers or plates and secure them properly.
If the brush bar is worn, damaged, or not spinning correctly, replacing it will restore the vacuum’s carpet cleaning effectiveness.

Official Dyson replacement for DC40 models
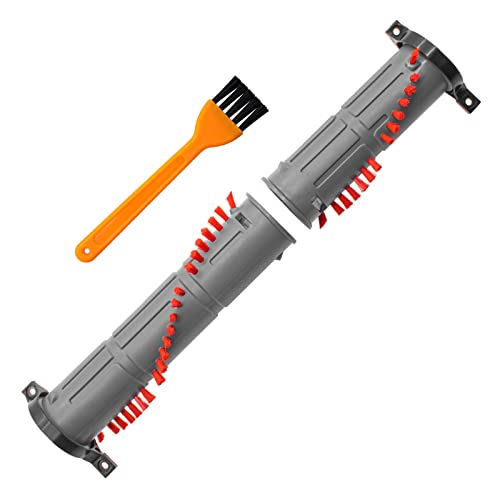
Affordable compatible replacement with nylon bristles

Includes screws for easy installation
Advanced Troubleshooting Techniques
If basic cleaning doesn’t resolve the issue:
Complete System Disassembly
- Remove all red clip parts for thorough access.
- Clean all pipes and the cleaner head connection points.
- Carefully reinstall all components, ensuring proper alignment.
Cyclone Cleaning
- Empty the dust container completely.
- Rinse the cyclone under a tap to remove fine dust buildup.
- Flush the center cyclone and metal mesh thoroughly.
- Allow all components to dry completely (at least 24 hours) before reassembly.
Testing for Air Leaks
- With the dust container attached, unclip the red part at the front.
- Run the vacuum and feel for suction at the front opening.
- If suction is strong here but weak at the cleaner head, you likely have a leak in the system.
Hose Replacement Procedure
If your hose is damaged beyond repair:
Removing the Old Hose
- Disassemble the canister to access the hose connection.
- Locate the red tab on the hose attachment point.
- Push the tab inward while pulling upward to detach the old hose.
Installing a New Hose
- Align the new hose with the connection point.
- Push firmly until it snaps into place.
- Test the connection by gently pulling on the hose.
DC40 Changeover Hose Replacement
This is a more complex procedure involving:
- Disassembling ball shells using needle-nose pliers.
- Removing the cyclone assembly and filter components.
- Aligning the new changeover assembly correctly during reassembly.
- Ensuring the short screw is on the correct side.
- Securing all screws and washers to maintain stability.
Preventative Maintenance Tips
Prevent future suction problems with these maintenance practices:
Regular Cleaning Schedule
- Empty the dust container after each use or when it reaches the MAX line.
- Wash the pre-motor filter monthly.
- Check the post-motor filter every three months.
- Inspect the hose and brush bar for blockages bi-weekly.
Proper Vacuuming Techniques
- Avoid vacuuming large objects that could cause blockages.
- Don’t vacuum wet surfaces or sticky substances.
- Use appropriate attachments for different surfaces.
- Move the vacuum slowly over carpets to allow the brush bar to effectively agitate dirt.
Storage Recommendations
- Store the vacuum in an upright position.
- Ensure the hose is not kinked or bent during storage.
- Keep the vacuum in a dry location to prevent moisture damage.
Frequently Asked Questions (FAQ)
Why does my Dyson DC40 have strong suction at the hose but not at the cleaner head?
This typically indicates a blockage in the pathway between the hose and the cleaner head, or an issue with the change valve that directs airflow. Check the connection points and the valve for obstructions. In some cases, small objects like plastic pieces can become lodged in the tube between the valve and floorhead.
How often should I clean the filters on my Dyson DC40?
The pre-motor filter should be washed every 1-3 months depending on usage. The post-motor HEPA filter should be checked every 3-6 months and replaced if visibly dirty. More frequent cleaning may be necessary for homes with pets or high dust levels.
Can I wash all parts of my Dyson DC40 with water?
No. While the pre-motor filter and dust bin can be washed with cold water, the post-motor HEPA filter should only be tapped clean or replaced. Never submerge electrical components, and always ensure parts are completely dry before reassembly (at least 24 hours drying time).
Why is my Dyson making a high-pitched noise when I turn it on?
A high-pitched noise often indicates a partial blockage somewhere in the system. The motor has to work harder to pull air through the restricted pathway, causing the pitch to increase. Systematically check all potential blockage points, including the hose, filters, and brush bar.
How do I know if I need to replace my Dyson’s hose rather than just clean it?
Inspect the hose for cracks, tears, or holes by running your hand along its length while looking for damage. Hold it up to a light source to spot small punctures. If you feel air escaping when the vacuum is running, or if the hose has visible damage that can’t be repaired, replacement is necessary.
Conclusion
Most Dyson DC40 suction problems can be resolved through systematic troubleshooting and regular maintenance. By following the steps outlined in this guide, you can identify and fix the most common causes of poor pickup performance.
Remember that prevention is key—regular cleaning of filters, emptying the dust bin promptly, and checking for blockages will help maintain optimal suction and extend the life of your vacuum. If problems persist after trying these solutions, consider contacting Dyson customer support or a professional repair service for additional assistance.
With proper care and maintenance, your Dyson DC40 should provide many years of effective cleaning performance, making your home maintenance routine more efficient and effective.


