
The Dyson DC50 is known for its powerful cleaning capabilities, but like any vacuum cleaner, it can experience suction problems over time. When your once-reliable Dyson starts leaving behind dust and debris, it’s a clear sign that something’s amiss. Suction loss doesn’t necessarily mean you need a replacement—often, the issue can be resolved with proper diagnosis and targeted repairs.
Affiliate disclosure: As an Amazon associate, We'll earn a commission for every successful order through our affiliate links in the article. However, you won’t be charged anything for this.
In this comprehensive guide, we’ll walk through the common causes of suction loss in the Dyson DC50 and provide detailed, step-by-step instructions for diagnosing and fixing these issues. Whether you’re dealing with clogged filters, blocked hoses, or more complex problems like impeller failures or changeover valve issues, you’ll find practical solutions to restore your vacuum’s performance. By following these expert tips, you can potentially save money on repairs and extend the life of your Dyson DC50.
Common Causes of Dyson DC50 Suction Loss
When your Dyson DC50 isn’t performing as expected, several culprits could be responsible. Identifying the root cause is the first step toward an effective repair. Here are the most frequent issues that lead to suction loss:
Clogged Filters
Dyson vacuums rely on a multi-filter system to trap dust and allergens. Over time, these filters accumulate debris, restricting airflow and reducing suction power. The DC50 has two main filters: a pre-motor filter and a post-motor HEPA filter. When either becomes clogged, your vacuum’s performance suffers significantly.
Blocked Hoses and Airways
The complex network of hoses and airways in your DC50 can become obstructed with larger debris, pet hair, or even small objects accidentally vacuumed up. These blockages prevent proper airflow, resulting in diminished suction power throughout the system.
Full Dust Bin
A simple but often overlooked cause of suction problems is an overfilled dust bin. When the bin reaches its capacity, airflow becomes restricted, and the cyclone technology can’t function properly. This results in decreased suction and inefficient cleaning.
Worn Brush Roll
The brush roll (or beater bar) is crucial for agitating carpet fibers and loosening embedded dirt. When the bristles wear down or become tangled with hair and fibers, the vacuum’s ability to pick up debris is compromised, giving the impression of suction loss.
Damaged Seals
Your Dyson DC50 relies on airtight seals throughout its system. If any of these seals are damaged or deteriorated, air leaks occur, reducing the vacuum’s suction power. These leaks can happen around the dust bin, filter housings, or hose connections.
Faulty Impeller
The impeller is a critical component that creates the airflow necessary for suction. When damaged or worn, it can significantly impact your vacuum’s performance. This is typically a more serious issue that requires component replacement.
Changeover Valve Problems
The DC50’s changeover valve switches airflow between floor cleaning and hose attachments. If this valve becomes stuck or obstructed, it can cause suction to be diverted incorrectly, resulting in poor cleaning performance.
Cracked Suction Hoses
Small cracks or tears in the suction hoses, particularly the small hose connecting to the cleaning head, can cause air leaks that dramatically reduce cleaning effectiveness.
Step-by-Step Diagnosis and Repair Procedures
Checking and Cleaning the Filters
Dirty filters are the most common cause of suction loss in Dyson vacuums. Follow these steps to properly clean your DC50 filters:
- Turn off and unplug your vacuum for safety.
- Locate both the pre-motor and post-motor filters.
- Remove the filters by pressing the release buttons or twisting them out of position.
- Gently tap them against a trash can to remove loose dust and debris.
- Rinse the filters under cold running water until the water runs clear.
- Do not use detergents or wash the filters in a dishwasher or washing machine.
- Allow the filters to dry completely for at least 24 hours before reinstalling.
- Reinsert the dry filters securely in their proper positions.
- Test your vacuum to see if suction has improved.
Pro tip: Mark your calendar to clean your filters every 3-6 months, depending on usage frequency. More frequent cleaning may be necessary for homes with pets or high dust levels.
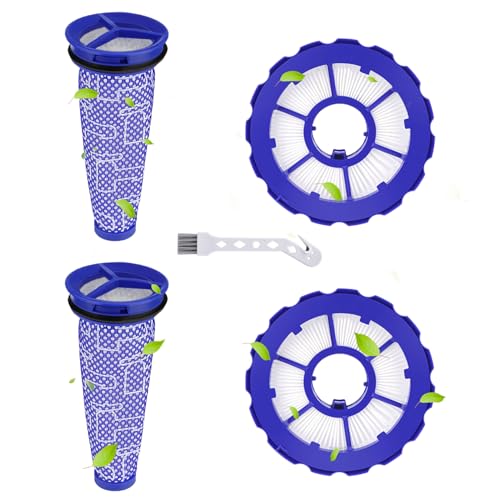
If your filters are damaged or worn out, replacing them can significantly improve your vacuum’s suction power.

Budget-friendly filter set with washable pre-filters for DC50 models
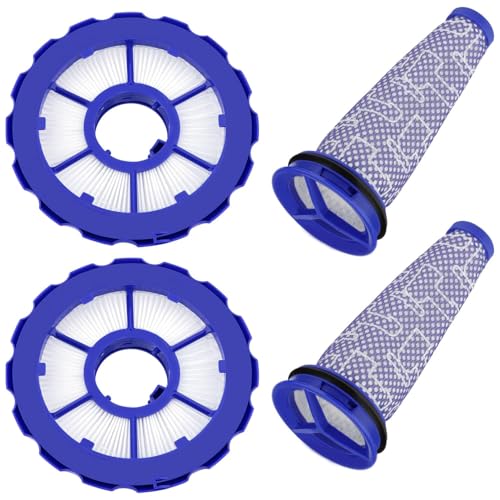
Premium filter set with enhanced durability for DC50 vacuums
High-efficiency filters with pet hair removal capability
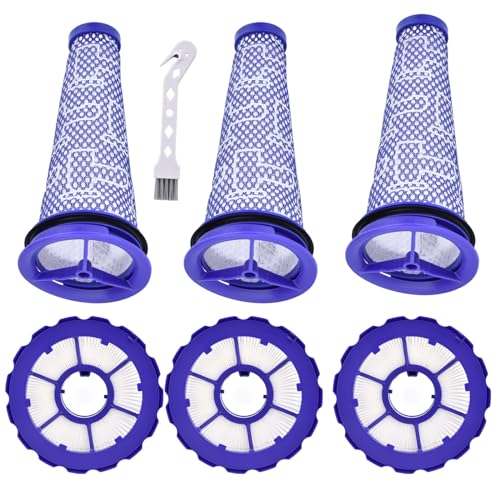
Extended maintenance kit with 3 months of filter coverage
Inspecting and Clearing Hose Blockages
Blocked hoses can significantly impact your vacuum’s performance. Here’s how to check and clear them:
- Disconnect the vacuum from power.
- Detach the main hose from the vacuum body.
- Visually inspect the hose for visible blockages, using a flashlight if needed.
- For stubborn blockages, use a long, thin object like a broom handle or straightened coat hanger to carefully dislodge the obstruction.
- Check all connection points and smaller hoses for blockages as well.
- Run water through the hose to flush out any remaining debris, then allow it to dry completely.
- Reconnect the hose and test the vacuum.
Pro tip: Never use sharp objects to clear blockages as they can puncture or damage the hose.
If your hose is cracked or damaged beyond repair, replacing it is necessary to restore proper suction.

Official Dyson replacement for DC50 vacuum

Affordable compatible DC50 hose replacement

High-quality internal service hose

Budget-friendly internal hose replacement
Emptying and Cleaning the Dust Bin
A full or dirty dust bin can restrict airflow. Here’s how to properly empty and clean it:
- Press the dust bin release button to detach it from the vacuum.
- Hold the bin over a trash container and press the bin emptying button to release the contents.
- Remove the cyclone assembly from the clear bin by pressing the appropriate release button.
- Wash the clear bin with cold water only (no detergents).
- Use a dry cloth to wipe down the cyclone assembly—do not submerge it in water.
- Allow all components to dry completely before reassembling.
- Ensure the bin clicks securely back into place when reattaching.
Pro tip: Empty the dust bin after each use, before debris reaches the MAX line, to maintain optimal performance.
If your dust bin is cracked or damaged, replacing it will ensure proper sealing and optimal suction.
Examining and Maintaining the Brush Roll
A worn or tangled brush roll can significantly impact cleaning effectiveness:
- Turn the vacuum upside down and locate the brush roll access plate.
- Use a coin or flathead screwdriver to rotate the locking mechanism and remove the plate.
- Lift out the brush roll assembly.
- Cut away any tangled hair, string, or fibers using scissors.
- Check the bristles for wear—if they appear significantly flattened or damaged, the brush roll should be replaced.
- Inspect the belt for signs of wear or damage and replace if necessary.
- Reinstall the brush roll, ensuring it rotates freely.
- Secure the access plate back in place.
Pro tip: Clean the brush roll monthly to prevent buildup and extend its lifespan.
Checking and Replacing Damaged Seals
Compromised seals can cause air leaks that reduce suction:
- Inspect all rubber seals and gaskets around the dust bin, filter housings, and hose connections.
- Look for cracks, tears, deformation, or missing sections.
- Clean any dirty seals with a damp cloth to ensure they can form a proper seal.
- For damaged seals, order replacements from Dyson or an authorized dealer.
- When installing new seals, ensure they sit properly in their grooves without twisting or pinching.
- Test the vacuum after replacing any seals to confirm the issue is resolved.
Pro tip: Apply a small amount of silicone lubricant to rubber seals occasionally to prevent them from drying out and cracking.
Replacing a Faulty Impeller
If you’ve ruled out other issues, a damaged impeller might be the culprit:
- Gather necessary tools: Flathead screwdriver, Phillips head screwdriver, and a replacement impeller compatible with the DC50.
- Unplug the vacuum and remove the dust bin and filters.
- Remove the screws securing the motor housing and carefully separate the two halves.
- Locate the impeller attached to the motor shaft.
- Carefully disconnect the old impeller, noting its orientation.
- Install the new impeller onto the motor shaft, ensuring proper alignment.
- Reassemble the motor housing and tighten all screws securely.
- Reinstall the filters and dust bin.
- Test the vacuum to verify improved suction.
Fixing Changeover Valve Issues
The changeover valve directs suction between the floor head and hose attachments:
- Remove the ball cover and filter to access the valve.
- Locate the changeover valve (resembles a large plastic golf tee).
- Using needle-nose pliers, carefully pull back the valve for inspection.
- Remove any debris or small pieces of material that might be causing it to stick.
- Check that the valve moves freely in both directions.
- If the valve is damaged, it will need replacement.
- Reassemble the vacuum and test its performance in both floor and hose modes.
Pro tip: Listen for a clicking sound when switching between floor and hose modes—this indicates the valve is functioning correctly.
If the changeover valve is damaged, replacing it will ensure proper suction switching between the floor head and hose attachments.

Premium quality replacement valve hose for Dyson DC50 vacuum
Repairing the Small Suction Hose
The small hose connecting to the cleaning head is crucial for proper suction:
- Locate the small suction hose at the back of the machine (often has a red cap).
- Check that it’s securely connected at both ends.
- Remove the hose and inspect for cracks, tears, or blockages.
- Clear any obstructions using compressed air or a thin, flexible tool.
- If the hose is damaged, it needs replacement.
- When reinstalling, ensure both connections are tight and secure.
- Test the vacuum to confirm improved suction.
Replacing the Changeover Hose
A faulty changeover hose can cause poor floor suction despite adequate hose suction:
- Gather tools: Torx T-15 and T-8 screwdrivers.
- Disassemble the vacuum:
- Remove the filter cover by unscrewing four screws.
- Detach the nozzle using the red latch.
- Remove the cyclone assembly.
- Locate and remove two T-8 screws on the upright side.
- Remove the old hose:
- Disengage the spring by pushing outward and lifting it out.
- Remove the third T-8 screw securing the hose.
- Extract the hose, noting its orientation (short end at top, longer end at bottom).
- Install the new hose:
- Position the new hose with the short end at the top and longer end at the bottom.
- Ensure the gasket is properly seated without bends.
- Slide the hose into place, aligning the lip with the notch.
- Reattach the spring to the black area with a hook.
- Secure all T-8 screws and reassemble the filter cover.
- Test the vacuum to ensure proper suction in both upright and floor positions.
Replacement part needed: Dyson DC50 changeover hose
Replacing the changeover hose is essential for restoring proper suction to the floor head if the original hose is damaged.

Direct replacement with OEM compatibility
Universal fit with genuine part equivalent
Specialized internal hose for small ball series
Frequently Asked Questions (FAQ)
Why does my Dyson DC50 have good suction at the hose but not at the floor head?
This typically indicates an issue with the changeover valve or the small suction hose connecting to the floor head. The changeover valve may be stuck in the wrong position, or the small hose might have a blockage or crack. Check both components following the procedures outlined above. Another possibility is a worn brush roll that isn’t agitating carpet fibers effectively, giving the impression of reduced suction.
How often should I clean the filters on my Dyson DC50?
Dyson recommends washing both filters every three months under normal household use. However, if you have pets or live in a particularly dusty environment, you may need to clean them more frequently—perhaps every 4-6 weeks. Regular filter maintenance is crucial for maintaining optimal suction performance.
My Dyson DC50 makes a high-pitched noise when operating. Is this related to suction loss?
A high-pitched noise often indicates that air is being forced through a restricted pathway, which can indeed cause suction loss. Common causes include partially blocked filters, a clogged hose, or debris caught in the brush roll. Follow the diagnostic steps outlined in this guide to identify and clear any blockages. If the noise persists after addressing these issues, there might be a problem with the motor that requires professional attention.
Can I use my Dyson DC50 without filters while they’re drying?
No, you should never operate your Dyson vacuum without properly installed filters. Doing so can allow dust and debris to enter the motor, causing damage and potentially voiding your warranty. Always allow filters to dry completely (at least 24 hours) before reinstalling them. If possible, keep a spare set of filters on hand so you can use your vacuum while one set is drying.
Is it worth repairing my Dyson DC50, or should I replace it?
Most suction issues can be resolved with the maintenance and repair procedures outlined in this guide, often at minimal cost. If your DC50 is less than 5-7 years old and the motor still runs smoothly, repairs are typically worthwhile. However, if you’re experiencing multiple component failures or motor issues, and the vacuum is older, replacement might be more cost-effective. Consider that a new comparable Dyson model costs $300-$500, while most DIY repairs cost under $50 in parts.
Conclusion
Suction loss in your Dyson DC50 vacuum is rarely a reason to replace the entire unit. By following the systematic diagnosis and repair procedures outlined in this guide, you can identify and fix most common issues that affect your vacuum’s performance. Regular maintenance—including emptying the dust bin after each use, cleaning filters every three months, and checking for blockages periodically—can prevent many problems before they start.
Remember that proper care extends the life of your investment and ensures consistent cleaning performance. If you’ve attempted all the troubleshooting steps and still experience suction problems, consider contacting Dyson customer support or a certified repair technician for additional assistance. With proper maintenance and timely repairs, your Dyson DC50 can continue to provide powerful cleaning performance for many years.


