
A malfunctioning Dyson DC50 brush bar can disrupt cleaning efficiency, leaving debris untouched and causing frustration. Common symptoms include the brush stopping abruptly, emitting noise before halting, or failing to rotate despite intact suction. These issues often stem from blockages, electrical faults, or wear and tear. This guide provides actionable steps to diagnose and resolve the problem, from basic maintenance to advanced repairs, ensuring your vacuum regains optimal performance.
Affiliate disclosure: As an Amazon associate, We'll earn a commission for every successful order through our affiliate links in the article. However, you won’t be charged anything for this.
The article covers troubleshooting techniques, electrical diagnostics, and preventive strategies to extend your Dyson DC50’s lifespan. Whether the issue is a tangled brush roll or a faulty printed circuit board (PCB), this guide empowers users to address problems confidently. For persistent challenges, we’ll also outline when to seek professional assistance or consider part replacements.
Diagnosing Common Causes of Brush Bar Failure
The Dyson DC50’s brush bar may malfunction due to hair and debris buildup, belt damage, motor issues, or electrical faults. Pet hair and threads frequently around the brush roll, restricting its movement. Over time, the drive belt can stretch or snap, disconnecting the motor from the brush mechanism. Electrical problems, such as a blown PCB or damaged wiring, may also prevent the brush from spinning. Identifying the root cause ensures targeted repairs.
Step-by-Step Troubleshooting Guide
Basic Cleaning and Inspection
- Turn off and unplug the vacuum for safety.
- Flip the vacuum to access the brush roll compartment. Release the access door by pressing the tabs.
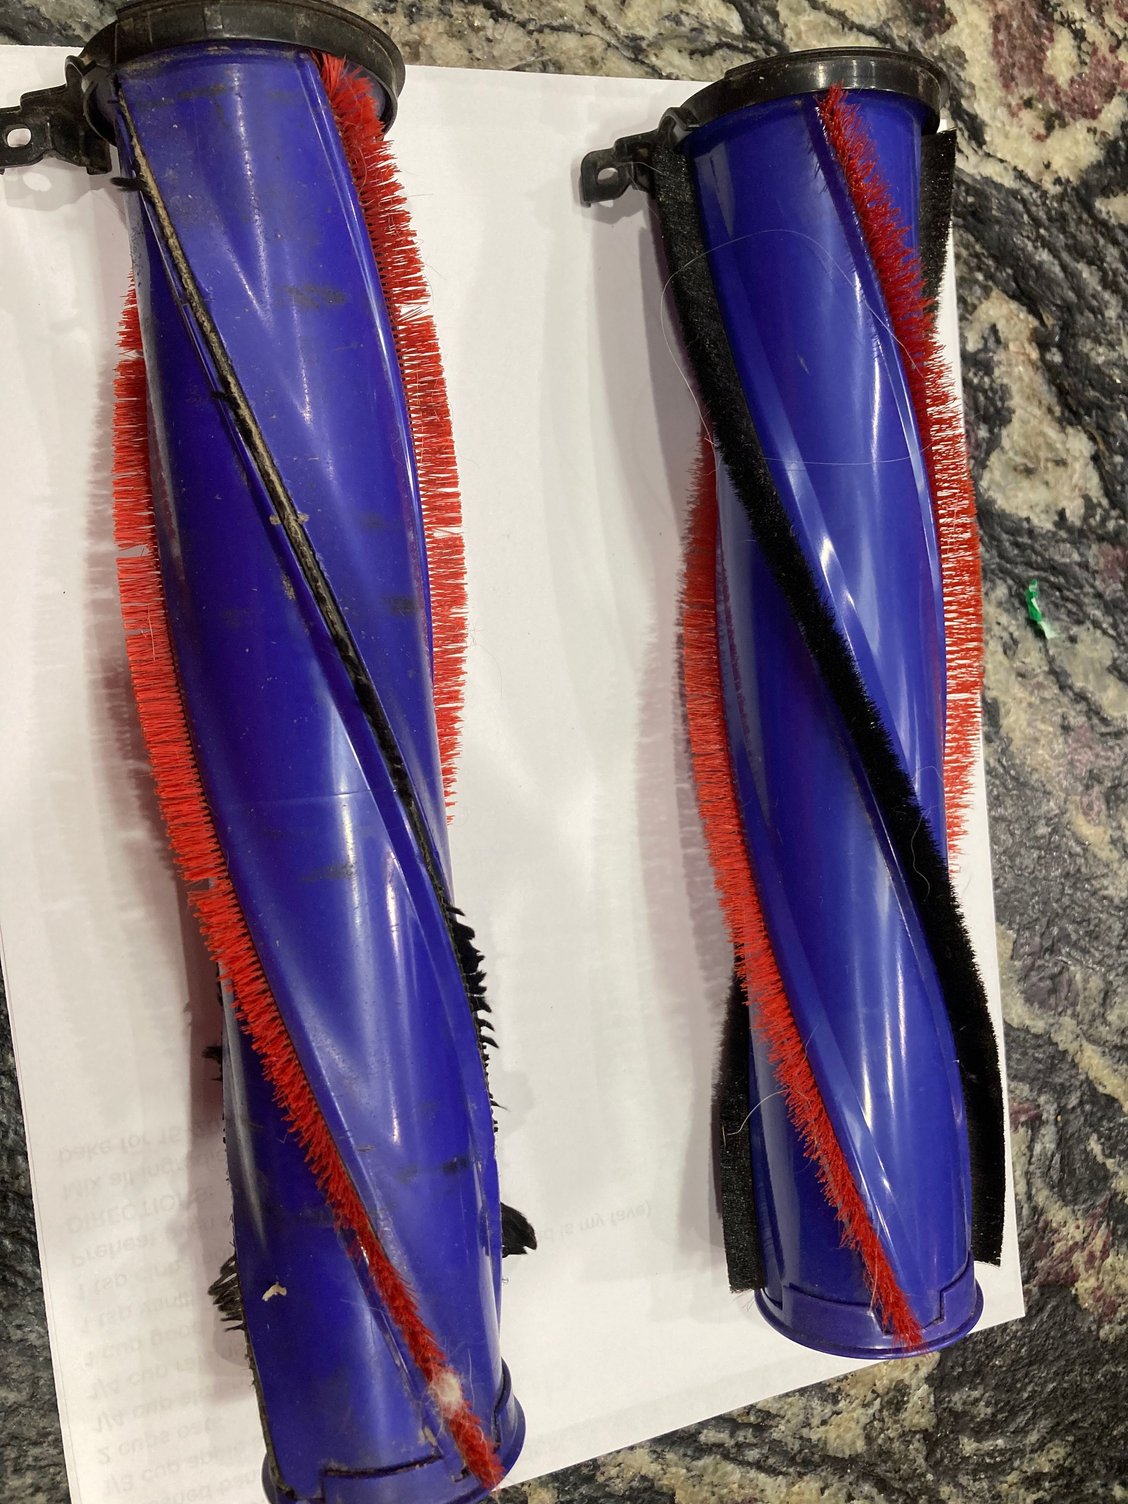
- Remove the brush roll and inspect for hair, string, or debris. Use scissors or a seam ripper to clear obstructions.
- Reinstall the brush roll with the flat end first, ensuring it clicks securely into place.
- Close the access door—if it doesn’t click smoothly, recheck the brush roll alignment.
Advanced Cleaning Techniques
- Inspect the black spiral connector: Detach the brush head and check if the connector spins freely. Clean hair or debris if it’s stuck.
- Disassemble the brush head: Remove internal components to access hidden obstructions behind the spiral connector. Clean thoroughly with a dry brush or cloth.
Addressing Electrical and Mechanical Failures
Motor and Wiring Checks
- Test the motor: Use a multimeter to verify continuity in electrical connections. If the motor shows signs of damage, consult Dyson or a technician for replacement.
- Examine wiring: Look for loose or frayed wires. Test other attachments to confirm if the issue is isolated to the brush head.
PCB Diagnostics and Replacement
- Measure voltage: With the brush bar disconnected, check for a 310VDC supply. Reconnect the brush bar—if voltage drops to zero, the PCB is likely faulty.
- Verify AC supply: Ensure 240V AC reaches the PCB. If voltage remains stable but the PCB fails, replace it (e.g., part number 965086-01 for DC50 ERP PCB).
Real-world cases highlight PCB failures: For instance, user beko1919 resolved the issue by replacing a blown PCB caused by a failed motor, while Brookleigh confirmed the fault via voltage testing.
Preventive Maintenance for Long-Term Reliability
Regular upkeep prevents recurring issues:
– Empty the dust bin after each use to avoid strain on the motor.
– Clean the brush head every few weeks to remove hair buildup.
– Wash filters as recommended to maintain suction power.
– Store the vacuum upright to prevent belt stretching and keep it in a dry environment.
When to Replace Parts or Seek Professional Help
If DIY fixes fail, consider:
– Replacing the brush head from retailers like eBay, which resolved issues for some users.
– Contacting Dyson support for warranty claims or complex repairs.
Dyson Support Contacts:
- US: 866-693-9766
- UK: 0800-298-0298
- CA: 1-877-397-6622
- AU: 1800 397 666
- NZ: 0800 397 667
Frequently Asked Questions (FAQ)
How do I clean the Dyson DC50 brush roll?
Turn off the vacuum, remove the brush roll, and cut away tangled hair or debris. Reinstall it with the flat end first, ensuring it clicks into place.
What are signs of a faulty PCB?
Voltage drops to zero when the brush bar is connected, or the vacuum shows no response despite a stable AC supply.
Can a broken belt cause the brush to stop?
Yes. A stretched or snapped belt disconnects the motor from the brush bar. Replace the belt if damaged.
A worn or broken drive belt will prevent the brush roll from spinning, so replacing it is crucial.
Search term for Amazon: Dyson DC50 drive belt replacement
Is it worth replacing the brush head?
If cleaning and electrical checks fail, a new brush head (e.g., from eBay) may be a cost-effective solution.
How do I reset the Dyson DC50?
While the DC50 lacks a specific reset button, extending the beater bar fully and toggling the power button five times may resolve minor glitches.
Conclusion
A Dyson DC50 brush bar that won’t spin freely often stems from blockages, electrical faults, or mechanical wear. By following systematic troubleshooting steps—cleaning debris, testing voltage, and replacing damaged components—users can restore functionality. Regular maintenance prolongs the vacuum’s lifespan, while persistent issues may require professional assistance or part replacements.
For complex problems like PCB failures, contacting Dyson support ensures safe and reliable repairs. Prioritize safety and precision to keep your DC50 operating at peak performance.


