
The Dyson DC07 vacuum’s brush roll (cyclone) not spinning is a frustrating issue that can hinder cleaning performance. Common culprits include a faulty clutch, tangled debris, worn belts, or seized bearings. This guide walks you through diagnosing and resolving the problem, from simple fixes like clearing blockages to replacing critical components. Whether you’re a DIY enthusiast or need help deciding when to call a professional, this article covers everything to restore your vacuum’s functionality.
Affiliate disclosure: As an Amazon associate, We'll earn a commission for every successful order through our affiliate links in the article. However, you won’t be charged anything for this.
Understanding the root causes is key to effective repair. The DC07’s brush roll relies on a delicate interplay of parts, including the clutch, drive belt, and motor. A malfunction in any of these components can lead to reduced suction, unusual noises, or complete stoppage. We’ll break down step-by-step troubleshooting methods, maintenance tips to prevent future issues, and cost-effective solutions tailored to your vacuum’s needs.
Identifying Common Causes of Brush Roll Failure
The Dyson DC07’s brush roll stopping is often linked to five primary issues:
- Faulty Clutch: The clutch transfers motor power to the brush roll. A damaged clutch causes the brush to stop spinning, especially in “auto” mode.
- Blocked Brush Roll: Hair, lint, or debris缠绕 around the brush roll creates friction, preventing rotation.
- Worn Drive Belt: A snapped or loose belt disconnects the motor from the brush roll.
- Seized Bearings: Bearings inside the brush roll degrade over time, leading to resistance or complete lockup.
- Misalignment: Friction from the brush rubbing against the housing or improper base alignment can halt movement.
Symptoms like a clicking noise, reduced suction, or a non-spinning brush roll point to these underlying problems. Early identification can prevent further damage.
Step-by-Step Troubleshooting and Repair Process
Step 1: Clear Blockages
- Unplug the Vacuum: Safety first—disconnect the power source.
- Inspect the Brush Roll: Remove visible debris using scissors or a cleaning brush.
- Test Rotation: Manually spin the brush to ensure it moves freely.
Step 2: Inspect the Drive Belt
- Check for Wear: Look for cracks or stretching. Replace the belt if damaged.
- Realign the Belt: Ensure it’s securely seated on both the motor pulley and brush roll.
Step 3: Diagnose the Clutch
- Access the Clutch Assembly: Remove the protective plate with a flathead screwdriver.
- Test Clutch Movement: Rotate the clutch manually. If stiff, clean or lubricate it with fairy liquid.
- Replace the Clutch: If damaged, install a new clutch ($28–$40) by aligning it with mounting holes and reconnecting the belt.
If the clutch is damaged, you’ll need a replacement to restore the brush roll’s spinning functionality.
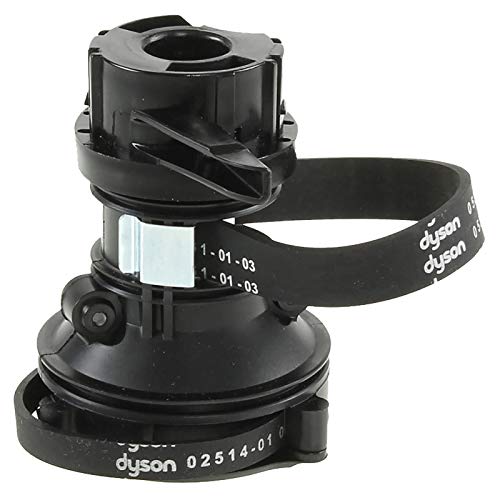
Official replacement for brush roll clutch issues

OEM-approved clutch assembly with belt
Step 4: Address Motor or Bearing Issues
- Frozen Bearings: If the brush spins manually but not when powered, seized bearings may require professional replacement.
- Motor Problems: Check for error messages or unusual sounds. Refer to the user manual or contact Dyson support.
Replacing the Clutch: A Detailed Breakdown
Tools Needed
- Phillips and Torx T15 screwdrivers
- Snap ring pliers (for clutch mechanism)
- New clutch assembly
Steps
- Disassemble the Base: Remove the sole plate and internal hose. Disconnect the belt from the motor.
- Extract the Old Clutch: Unscrew and lift out the clutch assembly.
- Install the New Clutch: Align the new clutch, reattach screws, and reconnect the belt. Replace the protective plate.
Motor Replacement for Advanced Repairs
For models like the DC07 or DC14:
1. Remove the Motor: Detach the sole plate, drive belt, and brush roll. Extract five securing screws.
2. Lubricate and Reinstall: Apply fairy liquid to the motor housing for smoother installation. Transfer the belt guard to the new motor.
Maintenance Tips to Prevent Future Issues
- Clean After Each Use: Remove hair and debris from the brush roll.
- Rinse Filters: Every few months, clean filters and let them dry fully.
- Inspect the Hose: Clear blockages periodically to maintain airflow.
- Store Properly: Keep the vacuum upright in a dry area to avoid moisture damage.
Frequently Asked Questions (FAQ)
How do I check for brush roll blockages?
Turn off and unplug the vacuum. Visually inspect the brush roll, then cut away tangled hair or debris with scissors.
How much does a replacement clutch cost?
Clutch assemblies range from $28 (individual) to $40 (pre-assembled with belts).
Why is my drive belt slipping off?
A misaligned or loose belt is the most common cause. Ensure it’s properly seated on both the motor and brush roll pulleys.
Conclusion
The Dyson DC07’s brush roll not spinning is a solvable issue with the right approach. Start with simple fixes like clearing blockages or realigning the belt. For persistent problems, replacing the clutch or motor may be necessary. Regular maintenance, such as cleaning filters and inspecting components, can prolong your vacuum’s lifespan. If repairs become too complex or the vacuum is under warranty, contact Dyson directly for assistance. By following this guide, you’ll keep your DC07 performing at its best, ensuring a cleaner home with minimal hassle.


