
A non-spinning brush roll in your Dyson DC07 can turn a simple cleaning task into a frustrating challenge. This issue often stems from problems with the belt, clutch mechanism, or other mechanical components, reducing suction and efficiency. In this article, you’ll learn how to diagnose and resolve these common issues, from identifying worn belts to replacing faulty clutches. Whether you’re troubleshooting a slipping belt or preparing for a DIY repair, this guide covers everything you need to restore your vacuum’s performance.
Affiliate disclosure: As an Amazon associate, We'll earn a commission for every successful order through our affiliate links in the article. However, you won’t be charged anything for this.
By the end of this guide, you’ll understand the root causes behind a malfunctioning brush roll, how to test for clutch failure, and the steps to replace critical parts. We’ll also share maintenance tips to prevent future issues and highlight model-specific considerations for Dyson DC04, DC07, and DC14 units. With clear, step-by-step instructions, you’ll save time and money by tackling repairs confidently at home.
Common Causes of Brush Roll Failure
Clutch Mechanism Issues
The clutch transfers power from the motor to the brush roll. Over time, wear and tear or debris buildup—such as hair and string—can cause the clutch to jam or malfunction. If your model has a clutch knob, ensure it’s set to the “auto” position. Misalignment during reassembly after cleaning can also prevent the clutch from engaging properly. To test for a faulty clutch, switch to carpet mode and try stopping the brush roll manually. If it stops easily without a ratcheting sound, or if you notice melted residue or blackened areas, the clutch likely needs replacement.
If the clutch is indeed faulty, replacing it with a compatible new one is essential for restoring the brush roll function.
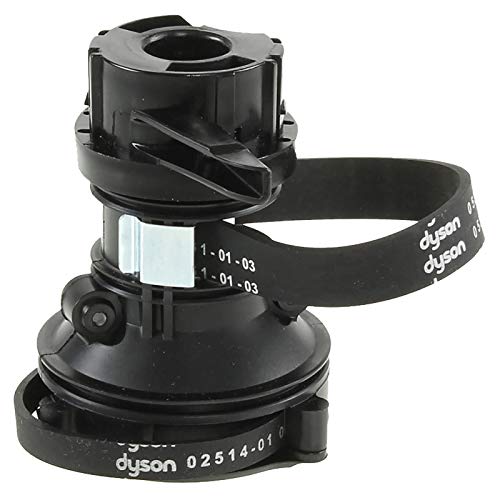
Official replacement clutch with drive belts for DC07 models

Authorized OEM clutch replacement at reduced price
Belt Problems
A broken, loose, or worn belt is another frequent culprit. A snapped belt will prevent the brush roll from spinning entirely, while a slipping belt may cause inconsistent rotation. Overuse or repeated tangling can degrade the belt’s elasticity, leading to poor contact with the motor pulley. Inspect the belt for cracks, fraying, or misalignment, and replace it if damaged. For optimal performance, replace both belts—even if only one appears worn—as the smaller belt often contributes to the issue.
If you notice any of these signs, it’s time to replace the belt to ensure the brush roll spins correctly.
Official replacement for clutch system with belts
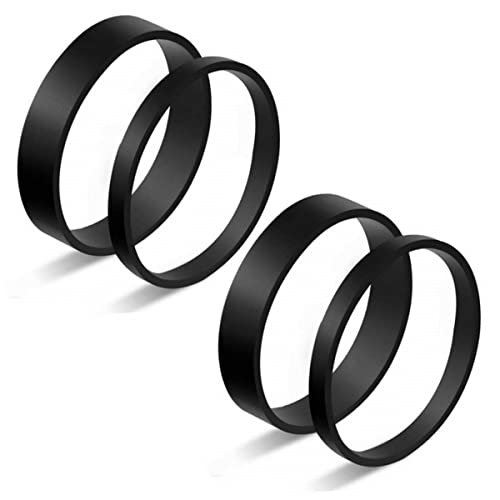
Affordable durable replacement set

Budget-friendly 6-month replacement option

Complete set with belt-changing tool
Other Mechanical Failures
Blockages in the brush roll housing from debris, worn bearings, or loose electrical connections may also halt rotation. Check for obstructions, ensure the brush roll spins freely, and test the motor’s electrical connections with a multimeter if the problem persists.
Diagnosing the Problem
Initial Checks
Start by unplugging the vacuum and emptying the dust container. Remove the brush roll housing end caps to clear hair and debris, then verify the clutch knob is in the “auto” position.
Detailed Inspection Steps
- Remove the brush roll housing using a screwdriver.
- Test the clutch by manually spinning the brush roll—it should rotate freely and stop when released.
- Inspect the belt for damage or slippage. Replace it if cracks or fraying are visible.
- Check bearings and movement by removing the brush roll and ensuring smooth rotation.
Advanced Diagnostics
Listen for unusual noises like grinding, which may indicate clutch failure. Use a multimeter to test motor connections and confirm power delivery.
Repair Solutions
Replacing the Clutch Assembly
- Gather tools: a screwdriver set, pliers, and a new clutch assembly.
- Remove the dust container and rear panel, then disconnect electrical connections.
- Unscrew the old clutch and install the new one, aligning it with mounting points and securing it with T15 Torx screws.
- Reconnect electrical wires, reassemble the vacuum, and test on carpet.
Replacing the Belt
- Use a T15 screwdriver to disassemble the brush roll housing.
- Remove the old belt from the motor pulley and brush roll.
- Install the new belt, ensuring proper tension, then reattach the brush roll.
- Test the vacuum to confirm smooth brush roll rotation.
Addressing Mechanical Failures
Replace worn bearings by tapping the drive shaft to dislodge them, then install size 6-to-5 bearings. Remove hose spring obstructions and apply lubricant to reduce friction.
Maintenance Tips for Longevity
Regular Cleaning
Empty the dust container after each use, clean filters with mild detergent, and inspect the hose for blockages. A brush removal tool helps clear debris from the brush roll ends.
Lubrication
Apply lubricant to clutch components, brush roll bearings, and the shaft to prevent wear. Avoid non-genuine brush rolls, as they may not align properly.
Model-Specific Considerations
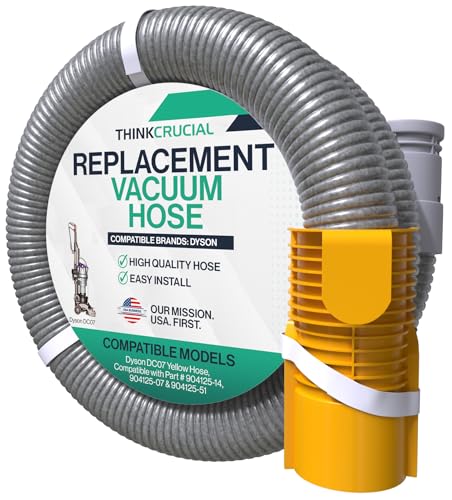
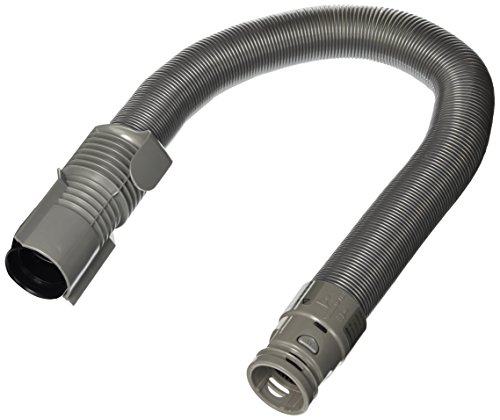
For Dyson DC04, DC07, and DC14 models, ensure the clutch knob is in the correct position and the vacuum is reclined during use. Replace internal hoses if damaged, as they affect suction in upright mode.
A damaged internal hose can significantly reduce suction power. Replacing it can restore your vacuum’s cleaning efficiency.

Official replacement with original quality and durability
Healthier cleaning with easy installation and extended reach

Cost-effective replacement for standard model maintenance
OEM-certified alternative with compatible performance
Troubleshooting Common User Complaints
Clutch Not Engaging Automatically
Double-check alignment during reassembly. Misalignment can prevent the clutch from engaging when the handle lowers.
Belt Slipping or Burning Through
Clean debris from the brush roll ends and apply lubricant to bearings. Replace both belts to avoid recurring issues.
Brush Roll Sticking to the Floor
Adjust the soleplate to prevent tilting. Manual intervention may be needed to keep it engaged on hard floors.
User Experiences and Additional Tips
Many users resolved issues by thoroughly cleaning years of debris buildup. For cost savings, refurbish the clutch instead of purchasing a new one. If problems persist, consult Dyson’s customer support or seek professional repairs for complex electronic faults.
Essential Tools and Replacement Parts
Keep a T15 Torx screwdriver, quarter or plastic screwdriver for clutch cover installation, and a brush removal tool handy. Replace the hose spring if worn, and use genuine Dyson parts for compatibility.
Frequently Asked Questions (FAQ)
How do I test if my Dyson DC07 clutch is faulty?
Switch to carpet mode and attempt to stop the brush roll manually. If it stops easily without a ratcheting sound, the clutch likely needs replacement.
What tools are needed to replace the belt?
A T15 Torx screwdriver and a replacement belt are essential. A brush removal tool helps dislodge the belt from the bridge.
Why does my belt keep slipping?
A worn or misaligned belt, debris buildup, or lack of lubrication can cause slippage. Clean the brush roll ends and replace both belts.
Can I use non-genuine brush rolls?
Avoid unverified sources, as non-genuine parts may not align properly with the clutch mechanism, leading to further issues.
How often should I replace the clutch?
Replace the clutch if it shows signs of wear, such as melted residue or stiffness, or after repeated belt replacements.
Conclusion
Resolving a Dyson DC07 belt issue requires diagnosing the root cause—whether a faulty clutch, worn belt, or mechanical blockage—and addressing it with targeted repairs. Regular maintenance, including cleaning and lubrication, extends the lifespan of your vacuum. By following this guide, you’ll restore optimal performance and tackle future issues with confidence. If repairs feel overwhelming, consult Dyson’s customer support or a professional technician for assistance.


