
The Dyson DC25 vacuum cleaner is a reliable cleaning tool, but users often encounter a frustrating problem: the roller bar refuses to spin. This issue typically stems from three categories: debris blockages, electrical faults, or mechanical failures. Addressing these problems requires a systematic approach, from simple fixes like clearing obstructions to more complex repairs involving wiring or motor replacements.
Affiliate disclosure: As an Amazon associate, We'll earn a commission for every successful order through our affiliate links in the article. However, you won’t be charged anything for this.
Understanding the root cause is critical. A jammed brush bar might be resolved with a quick reset, while electrical issues could demand soldering or part replacements. Mechanical wear, such as a damaged belt or motor failure, may require deeper troubleshooting. This guide provides actionable solutions, step-by-step repair instructions, and insights into maintaining or replacing components, ensuring your Dyson DC25 returns to peak performance.
Common Causes of Roller Bar Failure
Blockages and Debris Accumulation
Hair, threads, or dirt often around the brush bar, halting its rotation. Begin by inspecting the roller bar for visible obstructions. Use scissors to cut away tangled debris and clean the surrounding area. A red reset button on the vacuum head’s side can resolve temporary faults—press it firmly to restore function.
Electrical Malfunctions
Faulty wiring is a frequent culprit. The white power cable within the side assembly may break, disrupting power to the brush bar. Soldering the severed wire may suffice, but recurring issues suggest replacing the entire wiring loom (part no: 916190-01). This requires disassembling the vacuum head to access screws securing the loom.
Mechanical Wear and Tear
Over time, the gear belt connecting the brush bar to the motor can twist or snap. Additionally, older models may suffer motor failure, identifiable by reduced suction when the head is detached. Check the reset switch—a small recessed button—for jams caused by dust buildup. Age-related wear on this component often leads to startup failures.
Troubleshooting and Repair Steps

Clearing Debris and Using the Reset Button
- Turn off and unplug the vacuum.
- Remove the brush bar by unscrewing the end cap.
- Cut away tangled hair or debris with scissors.
- Press the red reset button on the head’s side.
- Reassemble and test the roller bar.
If the issue persists, proceed to electrical or mechanical diagnostics.
Electrical Problem Diagnosis and Repair
- Access the Wiring Loom:
- Remove the yolk from the ball mechanism.
- Locate and unscrew the back panel of the wiring loom.
- Inspect Wires: Check for frayed or broken white power cables.
- Repair Options:
- Solder minor breaks.
- Replace the loom (part no: 916190-01) for extensive damage.
Mechanical Repairs and Motor Replacement
Diagnosing Motor Failure
- Detach the cleaner head and check suction strength. Weak suction suggests motor issues.
- Test the motor terminals with a multimeter:
- Expected Reading: 320–330 V DC.
- No Voltage? Replace the motor.
If the motor is not receiving the correct voltage or shows signs of internal failure, replacement is necessary to restore the brush bar’s function.
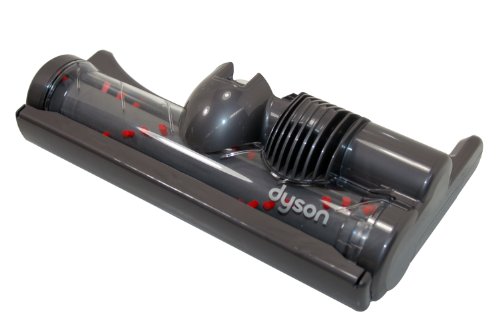
Official Dyson replacement with motor functionality for DC25 models
Motor Replacement Steps
- Disassemble the Head:
- Remove the end cap and brush roll.
- Unscrew 8 T15 and 1 Philips screw to access the sole plate.
- Extract the Motor:
- Remove the belt with long-nose pliers.
- Lift the plastic arm to release the motor.
- Install the New Motor:
- Ensure spades (electrical connectors) align correctly.
- Reinstall the belt and tension spring.
- Reassembly:
- Secure the PCB (printed circuit board) and reconnect wires.
- Replace covers and screws without overtightening.
Replacing the Cleaner Head
For users avoiding complex repairs, replacing the entire cleaner head is an option. Dyson no longer supports the DC25, retired in 2022, but third-party retailers offer compatible replacements. Verify model compatibility before purchase.
If the motor, wiring, and brush bar itself are all suspect, replacing the entire cleaner head assembly can be a more straightforward solution.
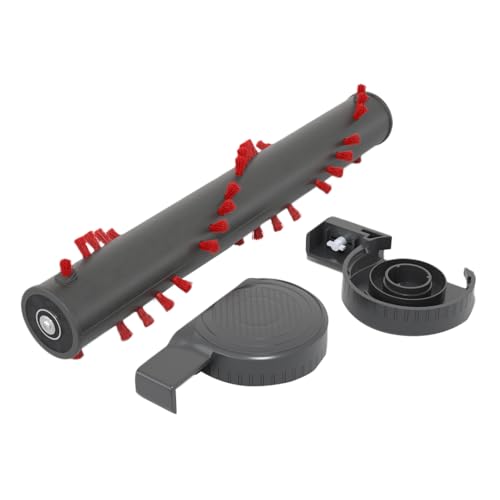
Premium replacement roller and caps for enhanced cleaning performance
Frequently Asked Questions (FAQ)
Why won’t my Dyson DC25 roller bar spin?
Common causes include debris blockages, broken wiring, a damaged belt, or motor failure. Start by cleaning the brush bar and pressing the reset button.
How do I reset the brush bar?
Locate the red reset button on the vacuum head’s side. Press it firmly after clearing debris or resolving minor faults.
What tools are needed to fix the motor?
A T15 screwdriver, long-nose pliers, and a multimeter to test voltage (320–330 V DC).
Can I replace the cleaner head myself?
Yes. Purchase a compatible third-party head and attach it following standard installation steps.
Is Dyson still supporting the DC25 model?
No. Dyson retired the DC25 in 2022. Contact local technicians or use third-party parts for repairs.
Conclusion
A non-spinning roller bar on your Dyson DC25 can often be resolved with basic troubleshooting, from clearing debris to replacing worn parts. Electrical and mechanical repairs demand careful attention to detail, including soldering or motor replacement. If DIY fixes seem daunting, opt for a new cleaner head from third-party suppliers.
By following these steps, you can extend the life of your vacuum and maintain efficient cleaning performance. Always prioritize safety by unplugging the unit before repairs and consulting technical specifications (e.g., 320–330 V DC motor voltage) to ensure correct part replacements.


