
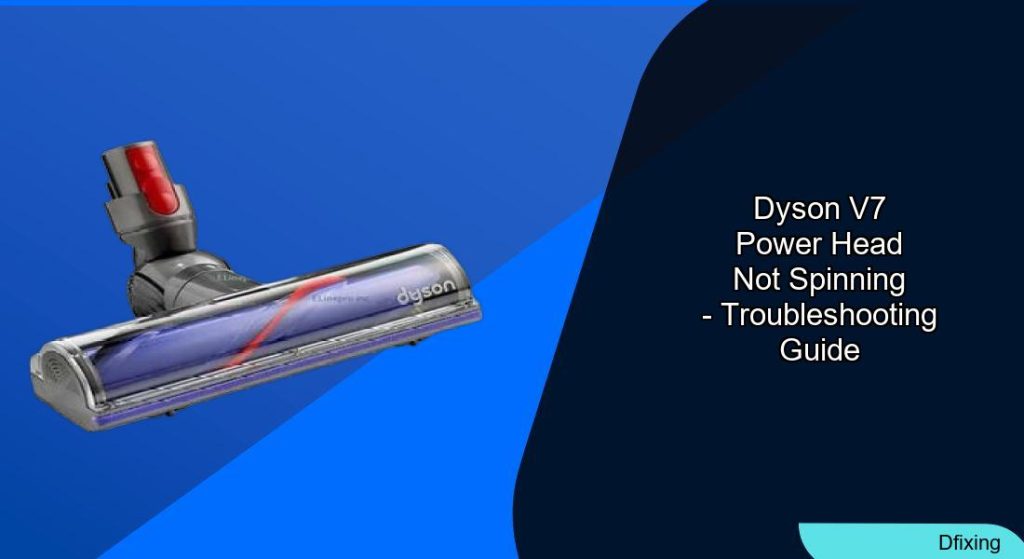
A non-spinning power head on your Dyson V7 can be a frustrating experience, significantly reducing its cleaning effectiveness. This issue often stems from common problems like blockages, worn components, or electrical connection faults, but with a systematic approach, many of these can be resolved at home.
Affiliate disclosure: As an Amazon associate, We'll earn a commission for every successful order through our affiliate links in the article. However, you won’t be charged anything for this.
This guide will walk you through the typical reasons your Dyson V7 power head might have stopped spinning and provide a detailed, step-by-step process to diagnose and fix the problem. We’ll cover everything from simple debris removal to more advanced troubleshooting, helping you get your vacuum back to optimal performance.
Exploring Why Your Dyson V7 Power Head Isn’t Spinning
Several factors can cause your Dyson V7’s power head to cease its crucial spinning action. One of the most frequent culprits is a blocked brush bar, where hair, string, and other debris become tightly wound, physically preventing rotation. Similarly, the belt that drives the brush bar can wear out over time, become stretched, or even snap, leading to a loss of power transfer.
Beyond physical obstructions, motor issues within the power head itself can be the source of the problem. Incorrect assembly of the brush bar components can also hinder its function. Furthermore, faulty or dirty electrical connections between the vacuum body, wand, and power head are common offenders; oxidation or debris on these contact points can interrupt the power flow. Internal wiring, especially at bend points, can suffer from wear and tear, and in some cases, a malfunctioning protection circuit on the logic board, designed to prevent motor burnout from blockages, might erroneously stop the head. Lastly, accidental water damage to the motor is often an irreversible cause of failure.
Fixing Your Dyson V7 Power Head: A Step-by-Step Guide
Before you begin, gather the necessary tools and materials. You’ll likely need a small flat-head screwdriver, a T8 Torx screwdriver, pliers, scissors, and gloves. If a replacement part is needed, have a new belt or even a replacement cable on hand. For cleaning electrical contacts, rubbing alcohol, WD-40, or carburetor cleaner and a cleaning cloth will be useful. A multimeter can help check electrical continuity and voltage.
- Prioritize Safety: Always unplug your Dyson V7 from the charger or ensure the battery is fully discharged before starting any disassembly or repair.
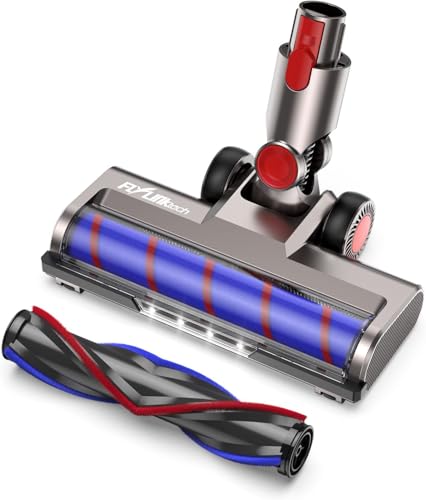
- Access the Brush Bar: Turn the power head over. Use a small flat-head screwdriver or a coin to unlock and remove the brush roll cover, typically located on the side or bottom of the head.
- Initial Brush Bar Inspection:
- Check for Debris: Look for tangled hair, string, fibers, or other debris wrapped around the brush bar.
- Examine the Belt: Inspect the drive belt for any signs of wear, such as fraying, stretching, or if it’s broken or has come off the pulleys.
- Ensure Secure Components: Verify that all parts within the brush head assembly are correctly seated and secure.
- Thoroughly Clean the Brush Bar: Carefully use scissors to cut away stubborn hair and fibers. Pliers can help pull out deeply embedded debris. Wear gloves for protection. For extensive hair accumulation, you might need to use a T8 Torx screwdriver to disassemble the brush bar further, clearing hair from between segments and the bearing area. An additional T8 screw may need removal to access the internal housing for residual hair.
- Address Belt Issues (If Necessary):
- Removing an Old Belt: If the belt is damaged or worn, carefully slide it off the brush bar and the motor shaft pulley.
- Installing a New Belt: Loop the new belt around the motor shaft first, then stretch it over the designated section of the brush bar. Ensure it’s snug, properly aligned on both pulleys, but not overly tight.
- Inspect and Clean Electrical Connections:
- Clean Contact Points: Use a cleaning cloth lightly dampened with rubbing alcohol, WD-40, or carburetor cleaner to wipe the electrical contacts on the main vacuum unit, the wand, the power head, and the dust bin contacts. To access the dust bin contacts, you may need to remove the dust filter with a screwdriver.
- Verify Power Flow: If you have a multimeter, check for electrical continuity through the wand and at the connection points to the head. The voltage at the contacts leading to the power head should typically be around 22 volts.
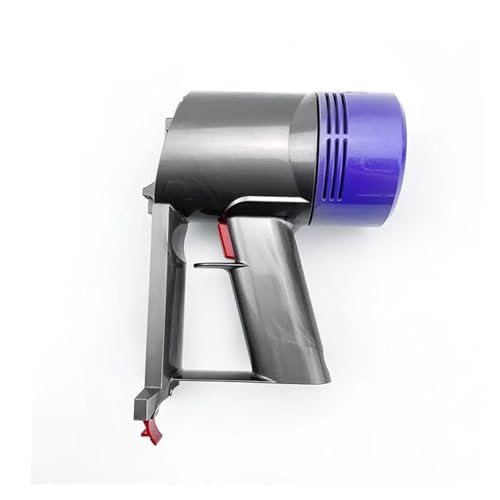
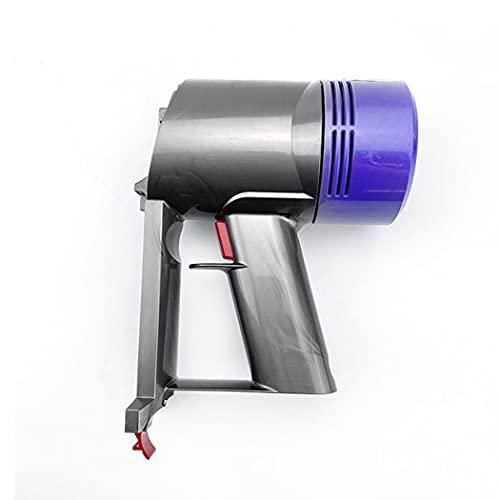
- Examine the Motor Area: Visually inspect the motor within the power head for any obvious signs of damage, burning, or malfunction. If the motor seems to be the issue, replacement might be necessary.
If the motor is damaged or malfunctioning, a replacement motor will be needed to restore the power head’s function.

Direct motor replacement with low noise and compatibility
Affordable motor assembly for V6/V7/V8 with ergonomic benefits
Premium main body with HEPA filter for V7, durable build
- Check Internal Wiring: Carefully inspect the internal wiring within the power head, especially where wires bend or flex during vacuum movement, looking for breaks, frays, or loose connections. A snapped cable, often due to aggressive maneuvering, can also be a culprit.
If you find damaged or broken wires, you’ll need a replacement cable to repair the power head.
Search term for Amazon: Dyson V7 cable replacement
- Deal with Jammed Roller Bearings: If the bearings seem stuck, you may need to disassemble the head further to clean out any debris from the bearing housing.
- Test Your Work: Reassemble any parts you’ve removed, ensuring everything is correctly aligned and secured. Plug in the vacuum or reattach the battery and test the power head. Listen for unusual noises and check if the brush bar is spinning effectively and if suction is normal.
Advanced Fixes for Persistent Power Head Issues
If the basic troubleshooting steps don’t resolve the problem, more advanced solutions might be required.
Bypassing the Protection Circuit
Some users have found success by bypassing the V7’s protection circuit, which can sometimes malfunction and prevent the motor from running.
1. Access Internal Wires: Open the back cover of the vacuum.
2. Identify Wires: Locate the red and white wires, usually found to the side.
3. Connect Wires: Carefully connect these red and white wires directly to the red and black wires that supply main power for the switch.
Important Note: This procedure bypasses a safety feature designed to prevent motor burnout. Undertake this modification only if you are experienced with electronics, as it can lead to faster wear on the power brush motor.
Motor or Head Replacement
If the motor itself is damaged (e.g., by water or wear), replacement is often the best course.
* Motor Swap: Disassemble the head by removing screws (typically 1 to 7 depending on the exact model configuration within the V7 series) and substitute the motor with a compatible spare. Some users have successfully used motors from a V8 head.
* V8 Head Upgrade: Consider replacing the entire V7 Direct Drive head with a V8 unit. This is often recommended to mitigate issues like cable breakage, as the V8 head design can be more durable. If a cable has snapped, replacing it with a thicker V8 cable and ensuring a little slack to reduce tension is a good preventative measure.
If the head is beyond repair, consider replacing it with a new Dyson V7 head.

Official replacement for V7 vacuum with quick installation

Affordable alternative with enhanced maneuverability

Budget-friendly option with hardwood floor optimization
Premium choice with lighting for hard-to-see areas
Keeping Your Dyson V7 Power Head Working Smoothly
Regular maintenance can prevent many power head problems and extend the life of your vacuum.
- Consistent Cleaning:
- Brush Bar: Make it a habit to clean the brush bar after every few uses, or immediately if you vacuum up a lot of hair or string.
- Belt Health: Periodically inspect the belt for signs of wear, stretching, or damage.
- Filters: Clean or replace your Dyson’s filters according to the manufacturer’s recommendations. Avoid washing paper filters; tap them clean to maintain airflow.
- Electrical Contacts: Regularly wipe down the electrical contacts with rubbing alcohol or a specialized cleaner to ensure a good connection.
- Smart Storage: Store your Dyson V7 in a cool, dry place, away from direct sunlight. Keeping it upright can also help.
- Proper Usage Habits:
- Dust Bin Management: Empty the dust bin before it becomes completely full to prevent reduced suction and strain on the motor.
- Appropriate Settings: Use the correct power settings for the surface you are cleaning. High power on delicate rugs can strain the brush bar motor unnecessarily.
- Cable Care: To prevent cable breakage within the power head, avoid sharp, aggressive turns while vacuuming and consider loosening the cable slightly if you’re comfortable disassembling the neck joint.
When Specific Attachments Fail
If your Dyson V7 operates normally with other tools, but a particular motorized attachment (like the main power head) fails to activate, it strongly suggests an issue localized to that attachment. This could be a compatibility problem (though less likely with genuine parts) or, more commonly, an internal electrical fault within the attachment itself, such as a broken wire or faulty motor.
Notes on Different Dyson Models
While this guide focuses on the V7, some principles apply across Dyson models, with specific considerations:
- Dyson V6 (e.g., DC59): For these models, pay close attention to the electrical connections between the canister and the head.
- Dyson V7/V8: These models often require T8 Torx screw access for thorough brush bar maintenance. V8 head upgrades are a common consideration for V7 users seeking enhanced durability.
- Dyson SV-04: Cleaning connection points with specialized solvents is key. Also, inspect turbine-driven rollers if applicable (these don’t rely on electrical connections to spin).
- Dyson Syntec and Older Stick Vacuums: General hair removal and electrical connection checks are relevant. Note that turbine-driven rollers, if present, spin via airflow and don’t require electrical troubleshooting for rotation issues.
Frequently Asked Questions (FAQ)
Q1: Why did my Dyson V7 power head suddenly stop spinning?
A1: The most common reasons for a sudden stop include a blockage from hair or debris around the brush bar, a snapped or slipped drive belt, or an interruption in the electrical connection to the power head. It could also be the vacuum’s internal protection circuit engaging due to a perceived jam.
Q2: What tools do I absolutely need to fix a non-spinning Dyson V7 power head?
A2: At a minimum, you’ll likely need a small flat-head screwdriver or a coin to open the brush bar access plate, and scissors or pliers to remove debris. For more involved repairs like belt replacement or deeper cleaning, a T8 Torx screwdriver is often necessary.
Q3: Can I use a V8 power head on my Dyson V7?
A3: Yes, many users report that Dyson V8 power heads are compatible with the V7 model and can be a good upgrade, potentially offering better durability, especially concerning internal wiring and cable strength.
Q4: How often should I clean the brush bar on my Dyson V7?
A4: It’s good practice to inspect and clean the brush bar every few uses, especially if you have pets or long-haired individuals in the household. Regular cleaning prevents build-up that can lead to spinning issues and motor strain.
Q5: Is it safe to clean the electrical contacts with WD-40?
A5: Yes, WD-40 can be used to clean electrical contacts as it displaces moisture and can help remove corrosion or grime. Apply sparingly to a cloth and wipe the contacts. Rubbing alcohol or a dedicated electrical contact cleaner are also good alternatives. Ensure contacts are dry before reassembling and powering on.
Conclusion
A Dyson V7 power head that refuses to spin can usually be brought back to life with some careful inspection and targeted troubleshooting. By systematically checking for blockages, examining the drive belt, ensuring clean electrical connections, and performing regular maintenance, you can often resolve the issue yourself. For more persistent problems, solutions like replacing worn components or even upgrading the head may be necessary.
Remember to always prioritize safety by disconnecting the power source before you begin. With the right approach, you can restore your Dyson V7’s cleaning power and keep it running efficiently for years to come.


