
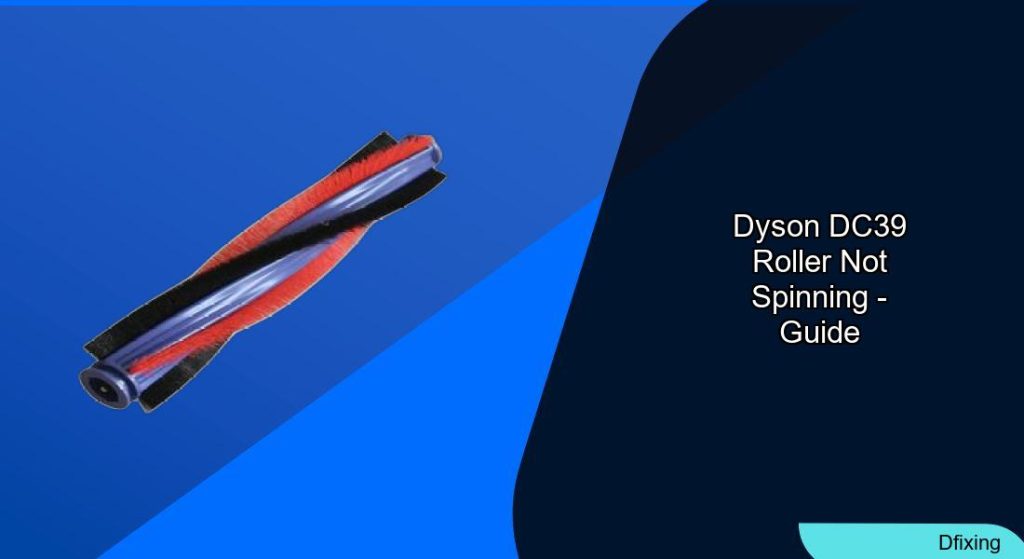
A Dyson DC39 vacuum is a powerful cleaning tool, but its effectiveness plummets when the roller brush stops spinning. This common issue can be frustrating, leaving carpets uncleaned and debris behind. A non-spinning roller often points to a few specific problems, from simple blockages to worn-out components.
Affiliate disclosure: As an Amazon associate, We'll earn a commission for every successful order through our affiliate links in the article. However, you won’t be charged anything for this.
Fortunately, many causes of a stuck roller brush on your Dyson DC39 can be addressed with some DIY troubleshooting and repair. This guide will walk you through identifying the problem, the necessary tools, step-by-step repair instructions, and maintenance tips to keep your vacuum performing optimally.
Pinpointing Why Your Dyson DC39 Roller Isn’t Working
Before diving into repairs, it’s helpful to know the common culprits behind a non-spinning roller. If your Dyson DC39 struggles to pick up dirt, makes unusual noises, or becomes difficult to push, a stationary roller is likely the cause. Key reasons for this include:
- Blocked Roller: This is the most frequent issue. Hair, string, carpet fibers, and other debris can wrap tightly around the brush bar or get lodged behind the connector. Accumulated dust and hair can also jam the gear mechanism, preventing rotation.
- Broken or Worn Belt: The DC39 roller is often belt-driven. This belt can stretch, fray, or snap over time, severing the connection between the motor and the brush bar.
- Worn-Out Bearings: Bearings allow the brush bar to rotate smoothly. If they become worn or damaged, the roller can seize up.
- Seized Internal Connector: The black spiral connector inside the head assembly can become stuck due to debris buildup or internal component failure.
- Loose Connections: Electrical wires providing power to the brush head motor or mechanical linkages can become dislodged.
- Motor Failure: In some cases, the small motor that drives the roller brush itself may have burned out or failed.
Gathering Your Repair Toolkit
To tackle this repair, you’ll need a few tools and potentially some replacement parts:
- Screwdrivers: A small Phillips head screwdriver, a flathead screwdriver, and a flexible star (Torx) screwdriver.
- Coin: Useful for removing the initial brush cover on some models.
- Cleaning Tools: Tweezers, scissors (for cutting hair and string), and a soft-bristled brush.
- Lubricant: A small amount for bearings.
- Replacement Parts (if needed): New belt, replacement bearings, or in some cases, a new brush head assembly. Screws and springs might also be needed if disassembling the trigger head.
A Step-by-Step Guide to Reviving Your DC39 Roller
Follow these detailed steps to get your Dyson DC39’s roller brush spinning again.
Preparing for the Repair
- Safety First: Always unplug your Dyson vacuum cleaner from the power outlet before starting any disassembly or repair work.
- Gather Tools: Have all your tools and any anticipated replacement parts ready.
Accessing and Inspecting the Roller Head
- Remove Front Cover: On the vacuum head, press the release buttons typically found on either side to open or remove the front cover.
- Inspect the Roller: Visually check the brush bar for obvious obstructions like tangled hair, strings, or large debris.
- Remove Brush Roll Access Door: Push up on the designated tabs and lift off the access door to get a better view of the internal components.
Cleaning the Roller Assembly
- Remove Debris: Carefully use tweezers or scissors to cut and pull away any hair, fibers, or debris wrapped around the brush bar. Pay close attention to the ends of the roller and any crevices. Check for hair buildup behind the connector, even if it seems to spin.
- Deep Clean: For a thorough cleaning, you may need to disassemble the brush head further. Clean all accessible parts, including the gear mechanism, motor, and pulley assembly, using a soft-bristled brush to remove dust and fine particles.
- Lubricate Bearings: If the bearings are accessible and seem stiff (but not damaged), apply a very small amount of appropriate lubricant. Avoid over-lubricating, as this can attract more dirt.
Addressing Belt Issues
- Inspect the Belt: Look for signs of wear, such as cracks, fraying, stretching, or if it’s broken.
- Remove the Old Belt: If the belt is damaged or broken, carefully detach it from the motor pulley and the brush bar gear.
- Install the New Belt: Loop the new belt around the motor pulley and then stretch it over the brush bar gear. Ensure it is correctly seated in the grooves.
- Check Belt Tension: The new belt should be snug but not overly tight. Proper tension is vital for effective power transfer.
Dealing with Worn Bearings
- Inspect Bearings: While the brush bar is accessible, check the bearings at each end for smoothness of rotation, damage, or excessive wear.
- Replace if Necessary: If bearings are worn out or seized, they will need to be replaced. This might involve further disassembly of the brush head.
Checking Connections
- Inspect Electrical Connections: If your model has an electric-powered brush head, ensure all wires are securely connected and show no signs of damage or fraying.
- Inspect Mechanical Connections: Verify that all gears and linkages are properly aligned and moving as intended.
- Reattach Loose Parts: Carefully reattach any loose wires or components, ensuring they are secure.
Reassembling the Vacuum Head
- Secure the Brush Bar: Place the cleaned or repaired brush bar back into its housing, ensuring it’s correctly aligned.
- Re-engage the Belt: If removed, ensure the belt is properly positioned on its pulleys/gears.
- Replace the Cover: Put the brush roll access door and the main front cover back on, ensuring they click securely into place.
- Double-Check Assembly: Give the vacuum head a once-over to make sure all parts are correctly assembled and tightly secured.
When the Roller Still Refuses to Spin: Advanced Fixes
After reassembly, it’s time to test your work.
- Plug In and Test: Plug the vacuum back into the power outlet. Turn it on and test the roller on a clean surface.
- Observe Operation: Check if the roller spins freely and consistently. Listen for any unusual noises that might indicate a lingering problem.
If the roller still isn’t spinning:
- Verify Power: Ensure the vacuum is receiving adequate power.
- Re-Inspect: Double-check the brush bar for any missed blockages or damage.
- Review Connections: Go over all electrical and mechanical connections again to ensure they are secure.
- Motor Reset: Some Dyson models feature a motor reset button. Consult your user manual to see if your DC39 has one and how to use it.
- Consult Support: If all else fails, refer to your Dyson user manual for further troubleshooting specific to your model or contact Dyson customer support.
Special Notes for Dyson DC39 Animal Owners
The Dyson DC39 Animal has a few specific characteristics to be aware of:
- Air-Driven Mechanism: The DC39 series often uses an air-driven turbine to power the brush head. Sufficient airflow is critical. Ensure filters are clean and there are no blockages in the hoses or airways, as this can impact turbine performance and thus brush rotation.
- Belt-and-Gear System: The brush head is driven by a belt connected to a gear. The DATA suggests this gear can sometimes be problematic. If the gear is damaged or clogged with debris, it will prevent the brush from spinning.
- Replacement Parts: Dyson typically sells complete replacement brush heads rather than individual internal components. If a major part like the gear or internal motor fails, you might need a new head. Third-party retailers online (like eBay or Amazon) often offer compatible replacement heads or individual parts at a more cost-effective price.
Proactive Care for a Long-Lasting DC39 Roller
Regular maintenance can prevent many roller issues and extend the life of your vacuum:
- Frequent Cleaning: Make it a habit to inspect and clean the brush bar and belt area after every few uses, especially if you have pets or long-haired individuals in the household. Regularly clean the gear mechanism to prevent dust and hair buildup.
- Avoid Blockages: Try to pick up large items like paper clips, coins, or small toys by hand before vacuuming. Use the crevice tool for tight spaces and be mindful of vacuuming up cords or strings that can easily tangle.
- Inspect for Wear: Periodically check the brush strips on the roller for wear, as well as the belt and bearings. Replace any parts that show significant signs of deterioration promptly.
- Filter and Hose Health: Keep the vacuum’s filters clean as per manufacturer instructions. A clogged filter reduces suction, which can affect air-driven turbines. Also, check hoses for blockages or damage.
Real-World Fixes and User Discoveries
Dyson users have shared several insights that might help:
- Hidden Hair: Even if the main part of the roller connector appears to spin, hair can accumulate behind it, causing a blockage. Thorough cleaning in this area is crucial.
- Third-Party Heads: Many users have found that purchasing a compatible replacement brush head from third-party sellers is a quicker and often cheaper solution than going through official support, especially for older models. While they might not look identical, they are generally functional.
- Trigger Mechanism Issues: Some roller spinning problems are linked to the vacuum’s main trigger mechanism.
- A small rubber “stopper” inside the trigger can fail to retract properly, blocking suction and halting brush rotation when the trigger is released (as intended). If it’s stuck, it might prevent rotation.
- A “flange component,” designed to block suction from the brushes when the trigger is activated (this seems counterintuitive as described, but it’s what the data suggests impacts rotation), can detach. If this part becomes dislodged, it might interfere with the brush stopping/starting correctly.
- For technically inclined users, a 3D-printed replacement for the rubber stopper has been designed, which allows continuous brush rotation (disabling the trigger’s on/off function for the brush, requiring power-off via the main switch).
- Causes of Failure: Users note that some internal components, like rubber stoppers or plastic flanges, can be fragile and degrade or detach over time. Dust and hair accumulation are also significant factors in mechanical blockages of gear systems.
Frequently Asked Questions (FAQ)
What are the most common reasons my Dyson DC39 roller isn’t spinning?
The most frequent causes include a blocked roller due to tangled hair and debris, a broken or worn-out belt, or issues with the air-driven turbine mechanism not receiving enough airflow due to clogged filters or blockages in the vacuum’s airways.
Do I need special tools to fix my Dyson DC39 roller?
You’ll generally need basic tools like Phillips head and flathead screwdrivers, a flexible star (Torx) screwdriver, a coin for some covers, and cleaning implements like tweezers and scissors.
Can I buy individual parts for my DC39 Animal brush head from Dyson?
Dyson typically sells complete replacement brush heads rather than individual internal components like gears or belts for the head itself. However, third-party retailers may offer individual parts or compatible entire head assemblies.
How often should I clean the brush bar on my Dyson DC39?
It’s good practice to inspect and clean the brush bar after every few uses, especially if you have pets or long carpets. Regular cleaning of the brush bar, belt area, and gear mechanism prevents build-up and maintains performance.
Conclusion
A non-spinning roller on your Dyson DC39 can significantly hamper its cleaning power, but it’s often a solvable problem. By systematically checking for blockages, inspecting the belt, cleaning the assembly, and ensuring good airflow, you can often restore your vacuum to full working order. Regular maintenance is key to preventing future issues.
While some problems might require replacement parts or even a new brush head, the troubleshooting steps outlined here empower you to diagnose and, in many cases, fix the issue yourself, saving time and money. Don’t let a stuck roller retire your Dyson prematurely!


